Photos + Tutorial by Bonnie Kaye Whitfield
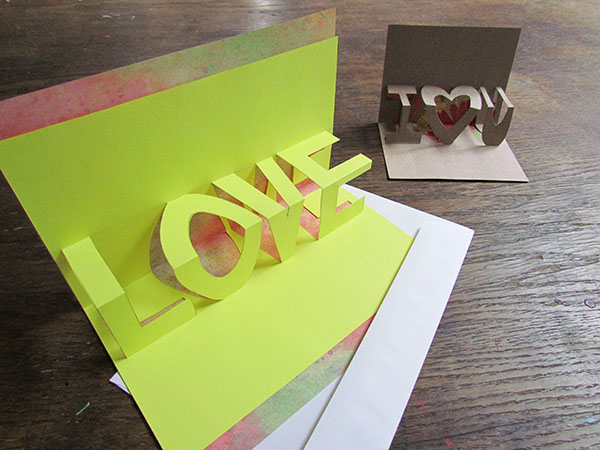
With Valentine’s Day just a couple weeks away, you might be itching to design some handmade cards for your special valentine(s). This tutorial will show you how to create a pop-up text card with your favorite little word or message.
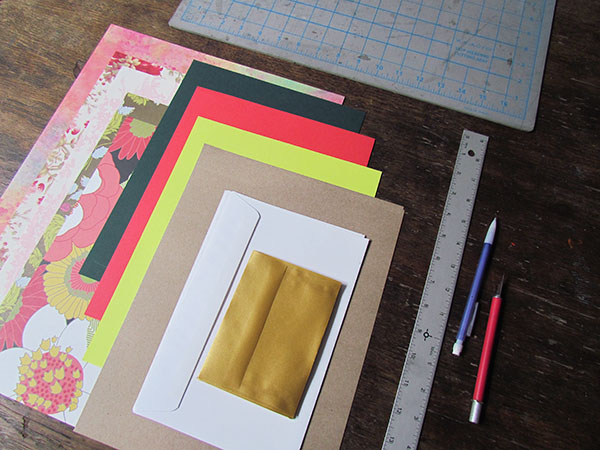
You will need:
- paper – both a variety of solid and patterned papers, cardstock is ideal
- envelopes – if you plan on mailing your cards
- self-healing mat or an old magazine
- ruler
- pencil
- eraser
- x-acto knife
- glue stick (not pictured)
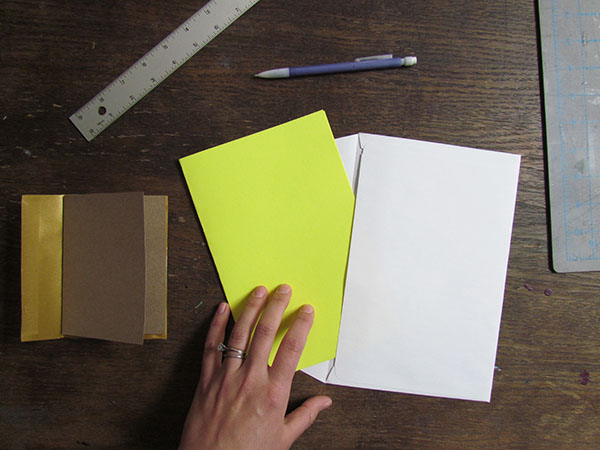
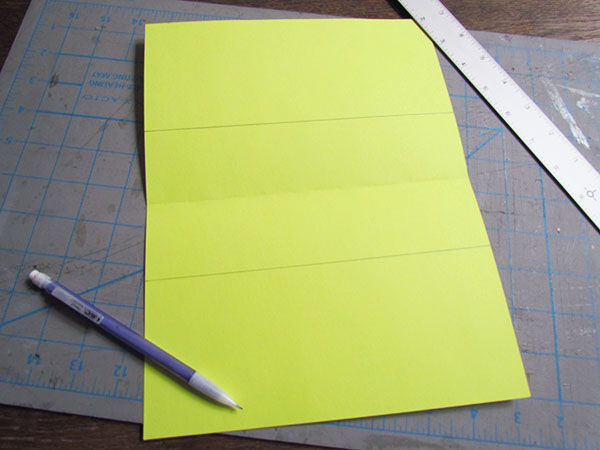
 First, take a solid-colored piece of paper and cut + fold to a card size so that it fits in your envelope. If you are not mailing it or don’t have an envelop, then simply fold your paper and you can cut the card down to size later.
With your card open, measure 2” from the fold on each side of the fold crease and on each end of the card, and mark with your pencil.
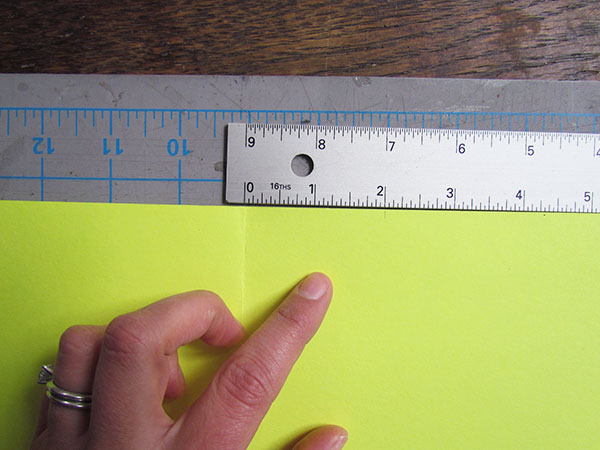
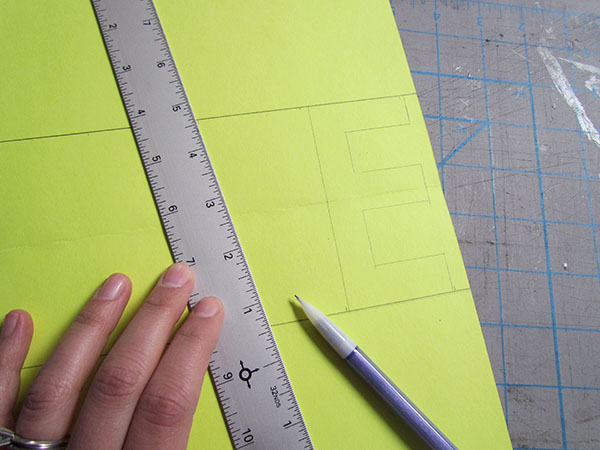
You will connect your two marks on each side of the fold crease. Feel free to make this line very light, as you will later erase it. This will serve as the guideline for the top and bottom of your text. You can also make the measurements closer or further away from the fold depending on how tall you want your letters, but make sure that the fold crease is always in the center of your two pencil guidelines.
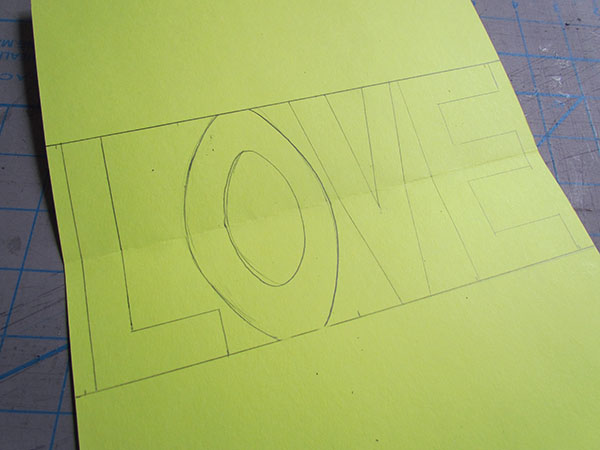
Next, begin to draw your text in block letter form, making sure that there is space between all letters and the edges of the card. Draw your letters so that they touch both the top and bottom pencil line, with the center of the letter falling on the fold crease. If you are using any rounded letters, make sure that they still have a solid connection to the top and bottom pencil guideline (see my “O”).
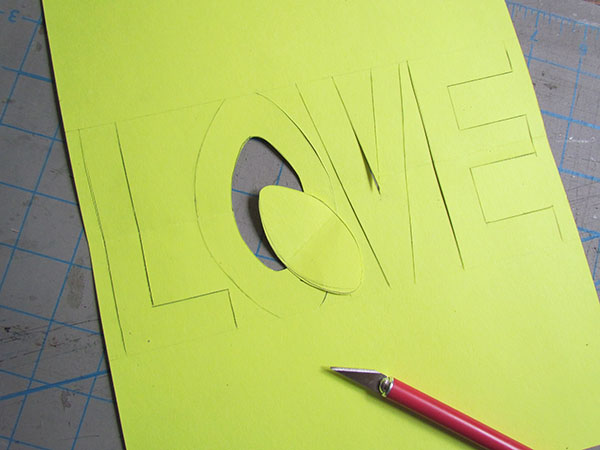
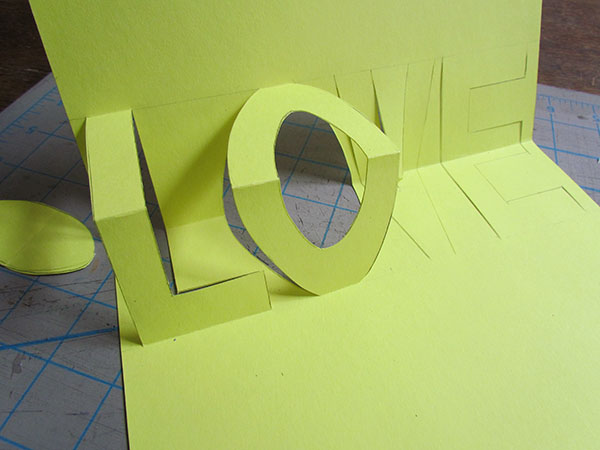
Once you have drawn out your text, grab your self-healing mat and x-acto blade and begin to carefully cut on all the text lines except the bottom and top lines. You are not cutting out the letters, just the edges. If you letter has an enclosed space (like my “O”) then the center will cut out entirely.
After cutting, you will refold your card. One letter at time, you will slowly “pop-out” the letters by reversing the center fold crease and gently folding along the top and bottom line of each letter.
Lastly, when you have finished adjusting all your letters, feel free to erase any pencil lines still showing. Take a patterned piece of paper or a contrasting solid paper and play around with folding it and adding it to the backside. At this point you can adjust the overall size of your card if you like, allowing more or less of the second paper to show. Feel free to glue the two pieces together – just make sure that you don’t glue down any of your letters.
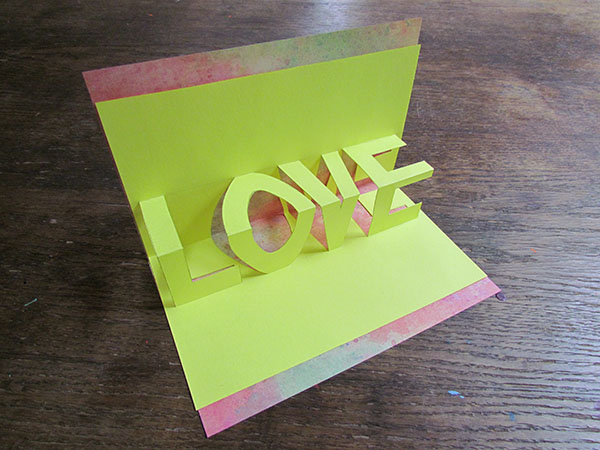
Now you can go wow your sweetheart with your new pop-up skills! Happy Valentine’s Day, everyone.
—————————————————————————————————————-
Bonnie Kaye Whitfield designs and screen prints home textiles + paper goods under the name, Bonnie Kaye Studio. www.BonnieKayeStudio.com
 You will need the following:
 Roll out a piece of your clay evenly and not too thin! Mine was probably around an 1/8″ thick.
 Now cut out your little hearts with your cookie cutter! No worries if they don’t come out perfect, you can sand them smooth after baking.
 After you’ve cut out your desired amount of hearts, gather them up on a baking tray or piece of foil and stick them in your preheated oven. Bake at 125 for 15 mins (or whatever it reads on your sculpey packaging). Remove from oven and let cool before handling. Sand the edges, front & back to remove imperfections.
 Grab your sharpie (make sure it is permanent b/c otherwise it will smear) and write in your favorite sayings! This is definitely the fun part. I kept it somewhat sweet and PG-13 for this post, but I did have fun writing in some really naughty ones! I practiced my handwriting on paper first, cuz I’m a dork. They didn’t all come out perfectly but that’s okay – it gives them character!
 Next you will glue on your pin backs. You need just the tiniest dot of glue on the back. Let them dry overnight before handling.
 All finished! They make cute and easy v-day gifts! I pinned this one to my hubby this morning after he tried to eat it. As tasty as they look, don’t eat them. You’ll die.
 I hope you enjoyed this post! Feel free to share but please credit me and link back to our site.
 Friends, groups, couples – come one, come all! Get crafty and celebrate Valentine’s Day with us. Deadline to sign up is February 7th and the event is limited to just 25 people, so sign up ASAP. We will only hold the event if we get enough people to sign up, so tell your friends. If we end up not filling up, we will let you know and refund you in full. If you would like to sign up, please click