Tag: crafts

  • MAKE THIS: Printed Pinwheels for Spring!

    Photos + Tutorial by Bonnie Kaye Whitfield

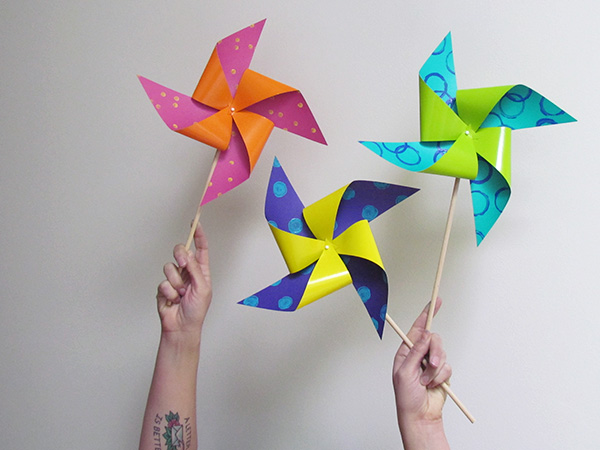
    Ever since I was a kid, I’ve loved pinwheels.  This printed version of pinwheels is a perfect way to lift your spirits after months and months of winter.  Make as festive decor for your next party or create with your kiddo on a rainy day.

    Blog_5_Pic_15

    You will need:

    • square cardstock, ideally different colors on each side
    • scissors or x-acto
    • ink for printing, either water-based block printing or stamp pads
    • ink tray + brayer if using block printing ink
    • circular tools for printing – pencil eraser, wine cork, empty cardboard tape ring
    • dowel rods
    • small tacks/pins
    • scrap piece of cardboard

    Blog_5_Pic_1

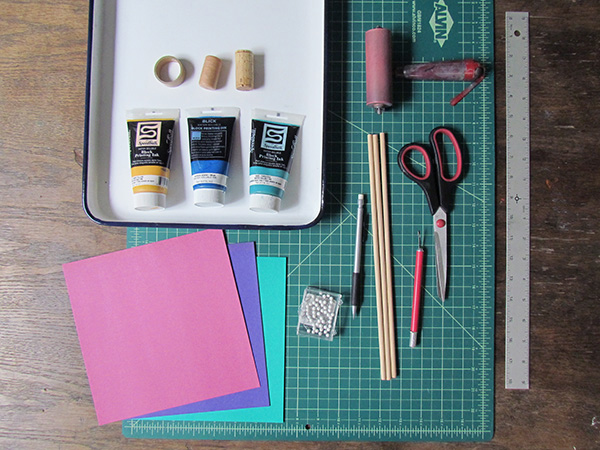
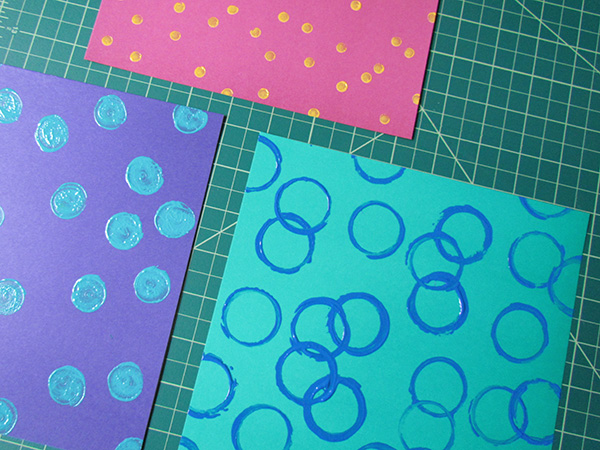
    Gather your materials.  Try to work with colored cardstock.  You can test out other papers to see if they hold up to lots of blowing and twirling.  If you have colored ink pads (I didn’t…) then I would use those before turning towards block printing ink, as the prints will take less time to dry.

    Blog_5_Pic_2

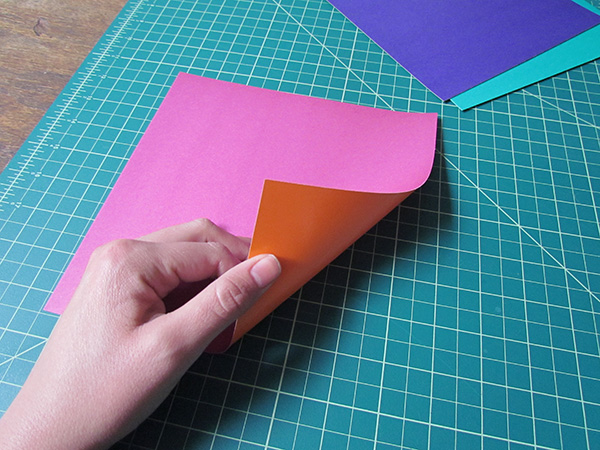
    If you can find paper that is different colors on each side, it will add to the colorful pop of the pinwheels.  If not, no biggie.  Just work with whatcha got.

    Blog_5_Pic_3

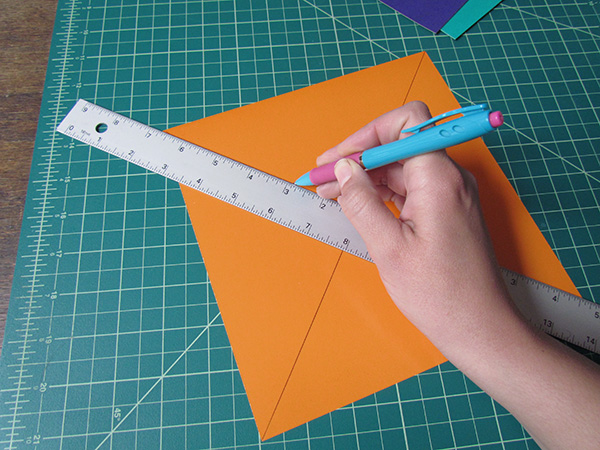
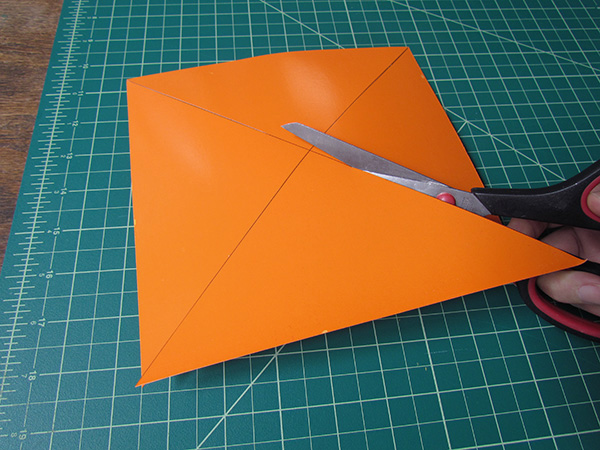
    Before you begin printing, go ahead and draw two lines of the backside of your printing side.  Use a ruler and a pen to line up opposite corners and draw a line, making a big X across the paper.

    Blog_5_Pic_4

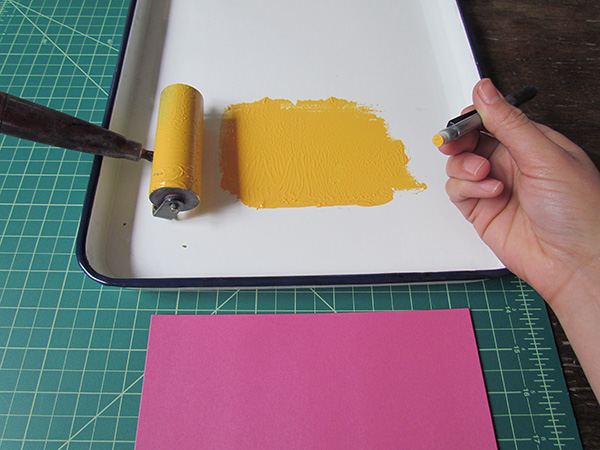
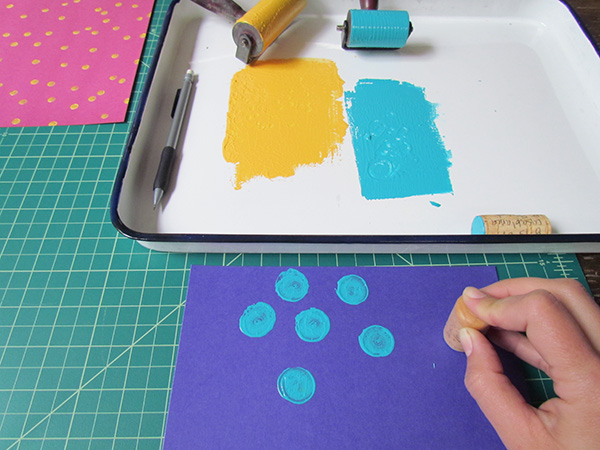
    Now for printing fun!  Roll out some ink in a tray.  Dip your pencil eraser in the ink and go to town.  Pencil erasers make the perfect tiny dot.

    Blog_5_Pic_5 Blog_5_Pic_6

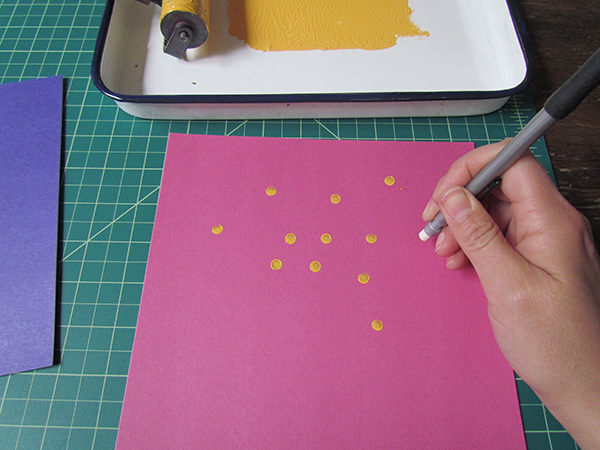
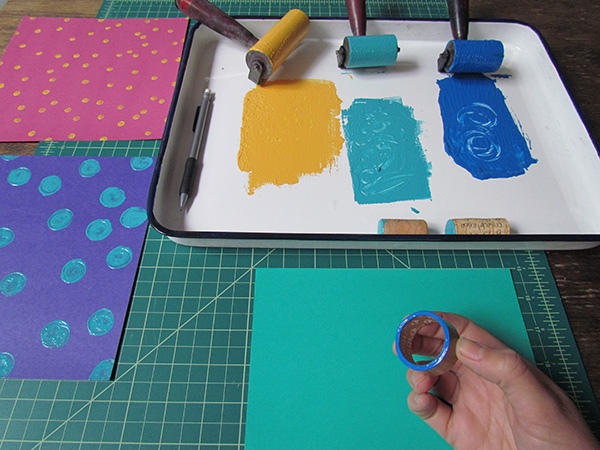
    Feel free to just use a pencil eraser for all your printing, or grab some other circular items to print with.  Here, I’m using a wine cork for a larger circle blob.

    Blog_5_Pic_7 Blog_5_Pic_8

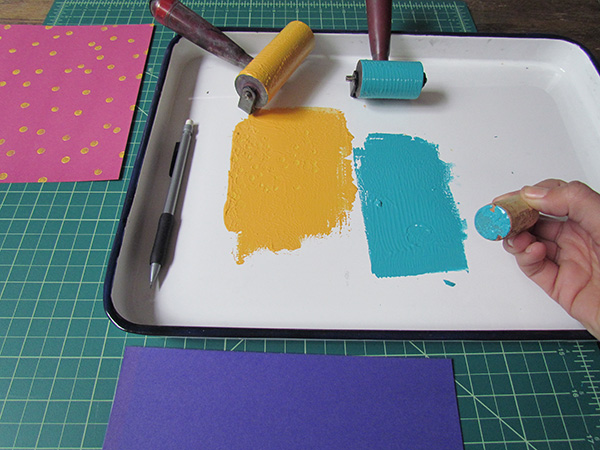
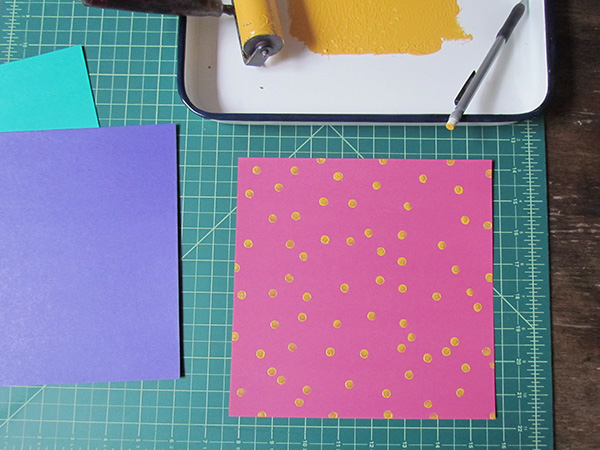
    I also had an empty tape roll on hand.  I recommended scouting out other circular items in your recycling bin, like a toilet paper roll or yogurt container.

    Blog_5_Pic_9 Blog_5_Pic_10

    After the prints have thoroughly dried, grab your scissors and begin to cut on the lines that you drew at the beginning.  Cut on each line until you get about an inch away from the center point – then stop!

    Blog_5_Pic_11

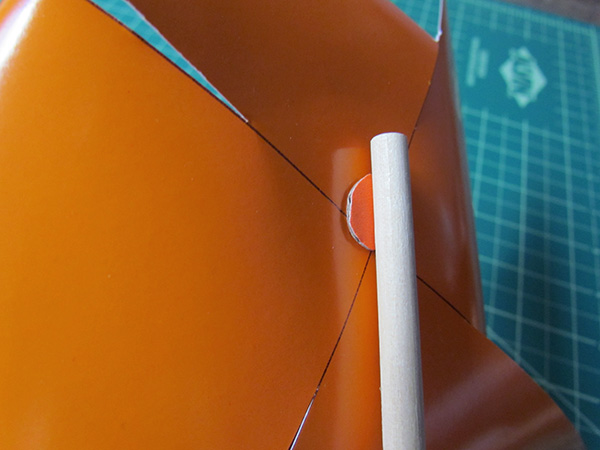
    Now for the only tricky part … pinning them all together.  First, unless these are going to be purely decorative and you don’t want them to spin, you’re going to want to cut out a few dime-sized circles out of cardboard.  This will help the pinwheels spin.  Set the cardboard circles aside.

    Blog_5_Pic_12

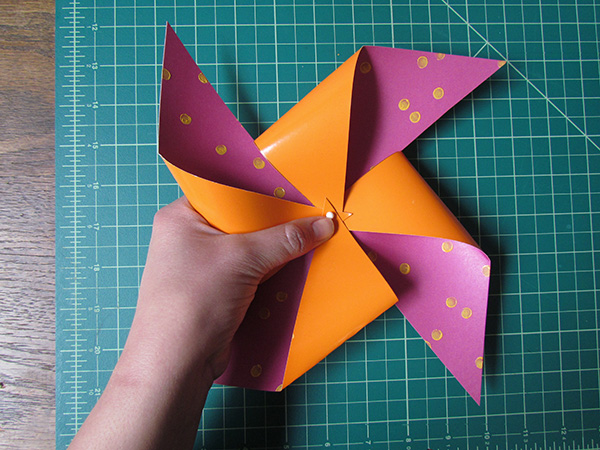
    Begin by folding down every other corner of the pinwheel and hold in one hand.  Grab the pin with your other hand and push through the center, making sure you are going through all 4 corners that you are holding down.  Grab one of your cardboard circles and press it in between the paper pinwheel and the wooden dowel rod.  I find that a couple long presses in the dowel does the trick for me, but then again, I don’t have a 4-year-old that’s going to run around with it.  So if you do, you might want to add a dab of glue before jamming into the dowel.

    Blog_5_Pic_13

    Lastly, if you really want some good spin action, you’ll need to play around with moving the paper around so that it it doesn’t hit the dowel rod when you try to spin it.

    Blog_5_Pic_14

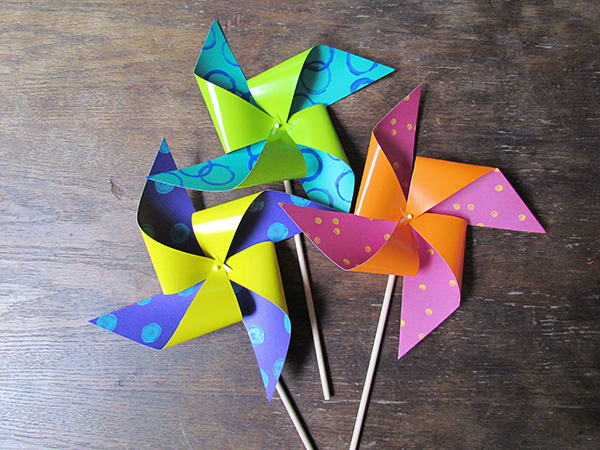
    So there you have it – springtime pinwheels + insta mood lifter!

    ———————————————————————————————————————————–

    Bonnie Kaye Whitfield designs and screen prints home textiles + paper goods under the name, Bonnie Kaye Studio.  Products are created to inspire memories at home and around the table.  A donation is made with every purchase to help feed hungry Americans.

    www.BonnieKayeStudio.com


  • Clover Market This Sunday!

     We will be set up at Clover Market here in Philly on Sunday! We will be bringing a mix of goods from the shop – clothing, jewelry, prints, Horrible Adorables, knitted items, bags, and more!  We put together a new display just for this show.  We will post pics of it soon.  See ya there!

  • Art Market at Tyler this Friday and Saturday!!

    Erin and I were honored to jury this year’s Art Market at our alma mater – Tyler School of Art.  We were so impressed with the pool of applicants and think we picked out a strong group of artists that include Tyler alumni & student groups.  The show takes place this Friday from 12-7pm and Saturday from 12-5 at Tyler School of Art. View Map / Directions here.  26 artists will be set up selling their handmade goods, which include fine art, jewelry, accessories, glass, prints, pottery and more!  Get started on your holiday shopping while supporting a talented group of artists & Tyler.   A portion of the proceeds from the Art Market at Tyler benefits scholarships to the Tyler School of Art. Here are some highlights of participating artists’ work to get you in the spirit.  A full list of participating artists can be found here.

    Steven Hagan Designs


    Dianne Koppisch Hricko


    Mira Ramchandani


    J.A. Christensen


    Michael Neville Design
  • Spotlight on Audrey Cooper

    I will be posting a spotlight on each of the participating Farmhaus & Friends artists now through October 20th.  This first spotlight features potter Audrey Cooper.  We weren’t familiar with Audrey’s work until Ben introduced it to us and we are so happy he did!

    AUDREY O. COOPER (b. 1971) has been working with clay since 2005. Born and raised in Philadelphia, Audrey graduated with a degree in literature from the University of Pennsylvania and studied sculpture at the Pennsylvania Academy of Fine Arts. She has studied with potters in Maine and Pennyslvania, and worked for two years at The Clay Studio in Philadelphia. She lives and works in Northern Liberties.


    Audrey is interested in using local materials, creating as little waste as possible, and in the life cycle of materials. She embraces the unpredictability, combined with the control of craftsmanship, inherent in the ceramic process. For this project, Audrey made functional tableware, hand-thrown on her electric wheel. She fired one group of porcelain pieces in a wood-fired kiln, fueled by scraps from Ben McBrien’s woodshop. These pieces are unglazed, fired in the salt-chamber of the kiln, colored by the intense atmosphere created by wood fire. The other group was fired in her electric kiln. They are stoneware glazed entirely or partially with ash glazes she made by burning woodshop scraps, applied in combination with commercial glazes.

    Check out all of Audrey’s pieces from Farmhaus & Friends online here but if you can, please come and see them in person.  The photos do not truly capture the richness and beauty of the glazes PLUS they all feel great in your hands.

The owner of this website has made a commitment to accessibility and inclusion, please report any problems that you encounter using the contact form on this website. This site uses the WP ADA Compliance Check plugin to enhance accessibility.