 Tutorial + Photos by Christie Sommers
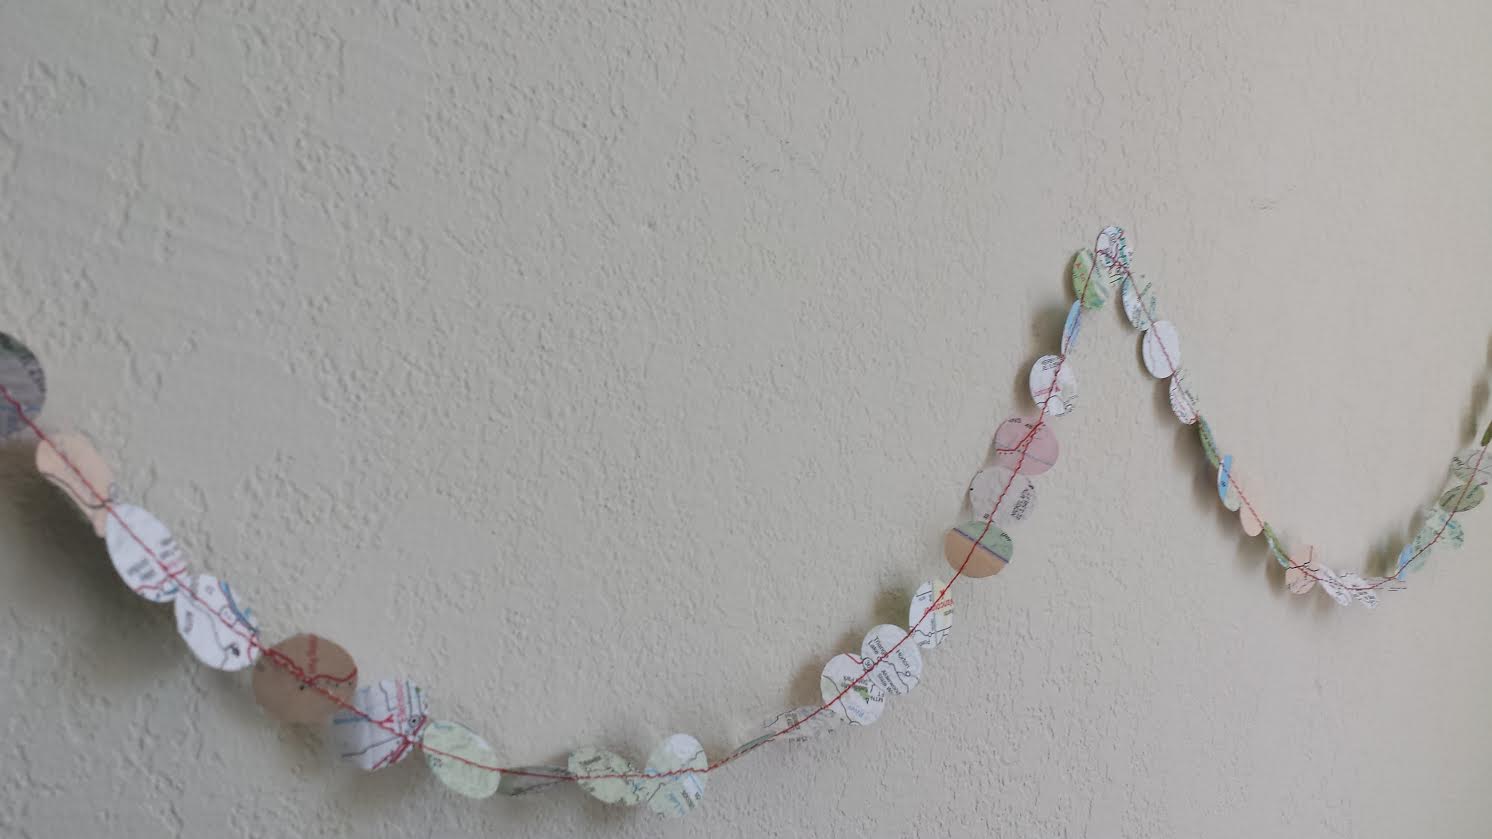
Try this inexpensive and easy tutorial to spruce up your place or decorate for a party. Paper garland is a great way to reuse old travel maps. You can also use colored or decorative paper purchased at your local craft shop.
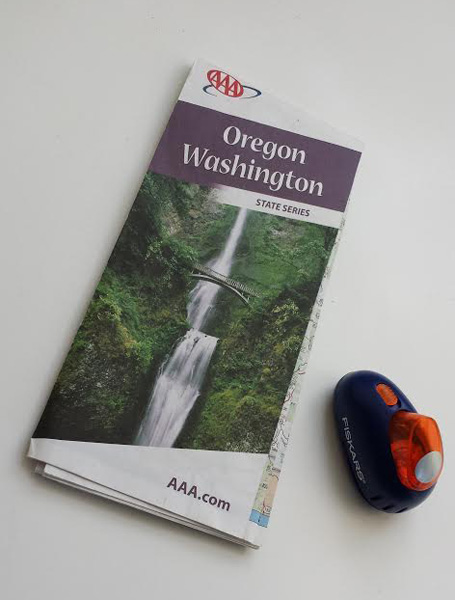
You will need:
*paper….at least the thickness of printer paper, newspaper may be too thin.
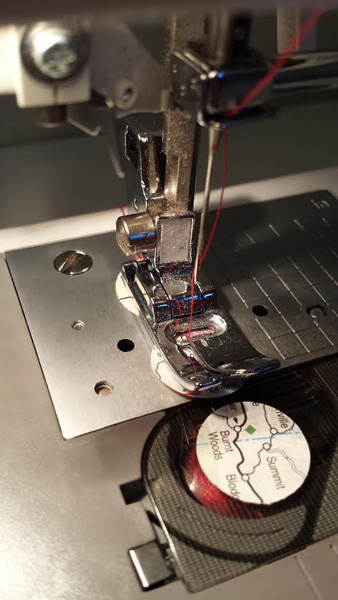
*a sewing machine set to straight stitch, threaded in color of your choice
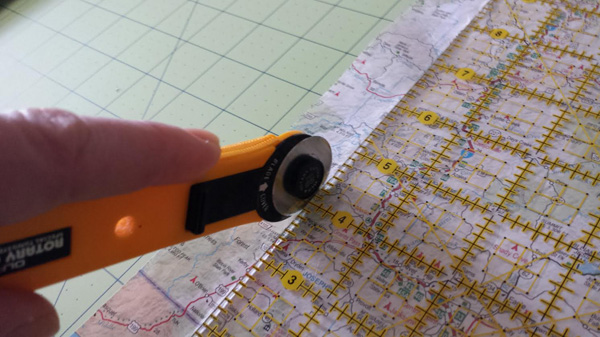
*scissors OR (rotary cutter, straight edge, cutting mat)
*a paper punch (I used a Fiskars 1/2″ paper punch) You can get creative with a vast assortment of paper cutter shapes found at your local craft store in the scrapbook section. Don’t go with anything smaller than 1/2″ because it will be difficult to feed through the sewing machine.
Start by cutting your paper into strips. I cut mine into 1″ strips. Just be sure your strips are larger than your paper punch shape.
Go nuts punching out your shapes.
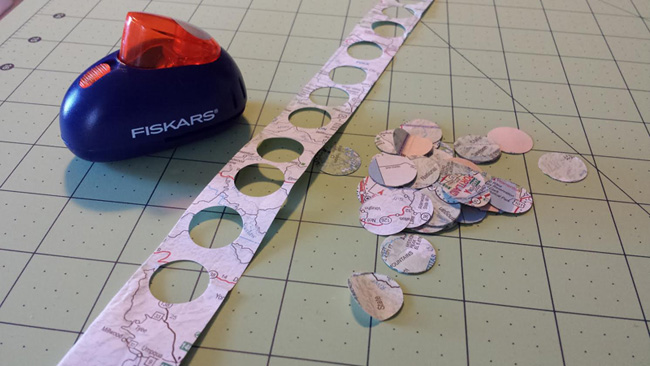
Do a little math to find how many circles you will need to make the length of garland you want. In my case (2) 1/2″ circles equals roughly 1″ of garland.
With your sewing machine set to straight stitch & threaded in the color of your choice, begin feeding each circle under the presser foot. The feed dogs will take it from there. Have a pile of circles very close by and place one circle right after the other without overlapping.
Before you know it you will have yards and yards of garland!
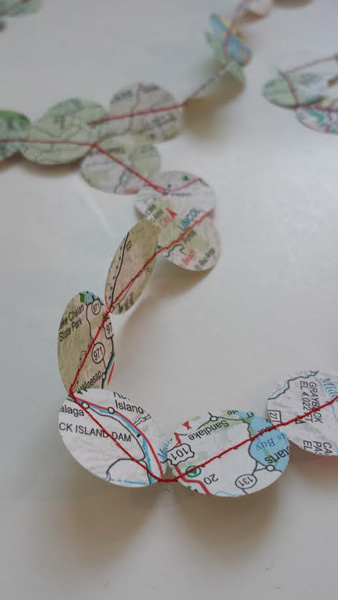
To store: you can carefully wrap around a piece of cardboard until you are ready to use..
Enjoy!
——————————————————————————————————————-
Christie Sommers is the designer and maker behind West Oak Design. She handcrafts small batch and one of a kind goods for home, women, and kids in her Wyndmoor, Pa studio. www.westoakdesign.com
 T
T


 You will need the following:
 Roll out a piece of your clay evenly and not too thin! Mine was probably around an 1/8″ thick.
 Now cut out your little hearts with your cookie cutter! No worries if they don’t come out perfect, you can sand them smooth after baking.
 After you’ve cut out your desired amount of hearts, gather them up on a baking tray or piece of foil and stick them in your preheated oven. Bake at 125 for 15 mins (or whatever it reads on your sculpey packaging). Remove from oven and let cool before handling. Sand the edges, front & back to remove imperfections.
 Grab your sharpie (make sure it is permanent b/c otherwise it will smear) and write in your favorite sayings! This is definitely the fun part. I kept it somewhat sweet and PG-13 for this post, but I did have fun writing in some really naughty ones! I practiced my handwriting on paper first, cuz I’m a dork. They didn’t all come out perfectly but that’s okay – it gives them character!
 Next you will glue on your pin backs. You need just the tiniest dot of glue on the back. Let them dry overnight before handling.
 All finished! They make cute and easy v-day gifts! I pinned this one to my hubby this morning after he tried to eat it. As tasty as they look, don’t eat them. You’ll die.
 I hope you enjoyed this post! Feel free to share but please credit me and link back to our site.
 The lovely Julie Lange of


 We did a wonderful blog feature on Julie & her line of hand printed purses and bags.


 While your here, check out our HUGE SUMMER SALE which is taking up our entire back gallery space. We have Art, Clothing, Housewares, Prints, Ceramics and MORE priced to sell!
 Art Star is pleased to announce a book signing with author and expert crafter, Kayte Terry on First Friday, November 2nd from 6-8pm. Kayte will be here promoting her new book
