Photos + Tutorial by Bonnie Kaye Whitfield
If you’re like me, you can never have too many notebooks. Small notebooks are especially helpful for on-the-go notetaking or making quick grocery lists. Here’s a quick Japanese-stab binding technique that will get you jotting inside in lickety split.

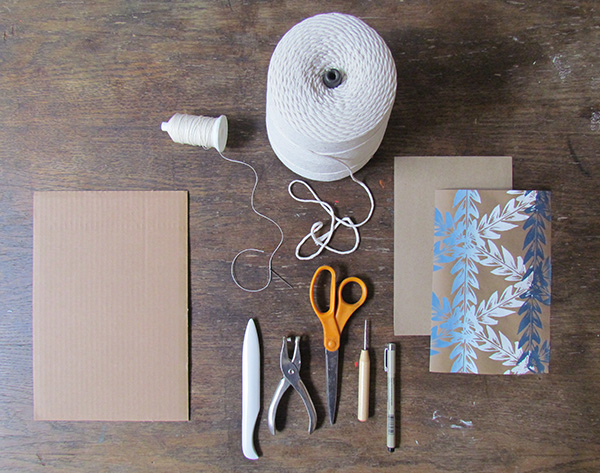
You will need:
- decorative cover paper (I’m using my screen-printed wrapping sheets, available for sale at Art Star)
- filler paper for the inside (I’m using kraft paper sheets, but simple copy paper is fine, just nothing too thick)
- bonefolder (optional)
- needle
- thread, ideally for bookbinding
- awl, a tool used for piercing holes (could probably also use an ice pick or ceramic needle tool)
- piece of cardboard
- scissors
- pen or pencil to mark holes
Once you’ve gathered your materials, you’ll need to cut your papers to the size that you want the notebook. I cut mine to 6×9”, with the filler paper cut ⅛ shorter on both sides so that they don’t poke outside of the cover once folded. If you cut your paper to 6×9”, you’ll end up with a 6×4.5” notebook.
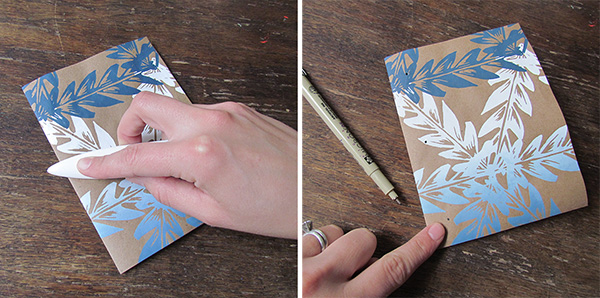
Fold both your cover and filler sheets of paper in half. Use a bonefolder if you have one to firmly crease the fold. You can also just use the back of your fingernail or another smooth, blunt tool. Next, you’ll mark three dots for your holes along the spine/folded edge of the book. Mark the holes in a line at least a ½ an inch from the spine and tops and bottoms of the book.
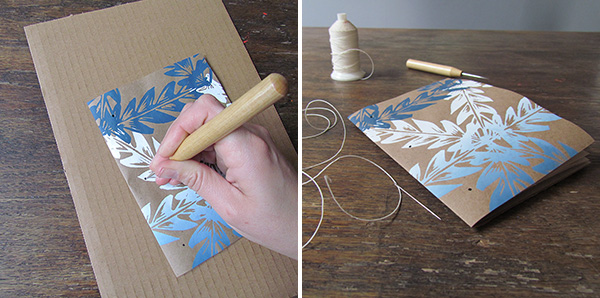
Using your awl, you’ll next pierce the holes, prior to sewing. This is going to make sewing a lot easier. I like to use a piece of cardboard or old magazine underneath the book while making the holes. You can also use a small hole punch. Next, measure your thread at least 3 to 4 times the length of your spine and cut. Thread the needle, but do not make any knots.
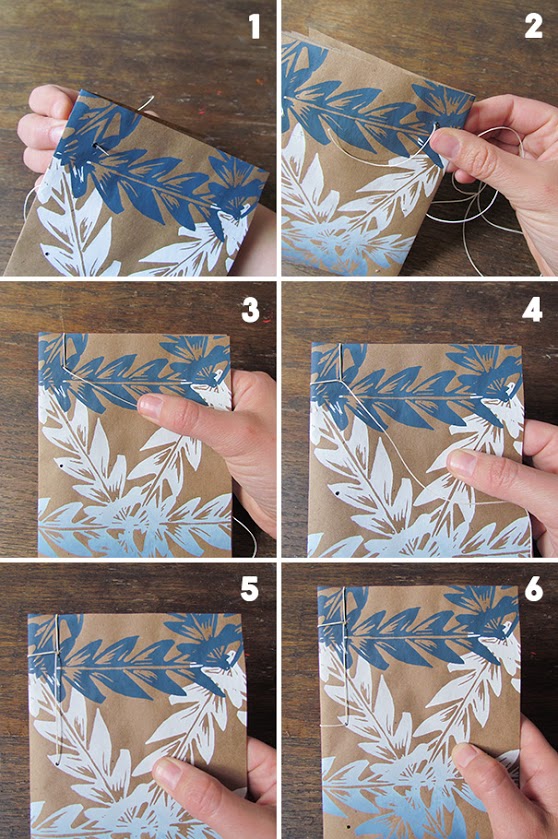
This Japanese stab-binding stitch might look complicated at first, but trust me, it’s quite easy! You really flow through the stitches starting at the top of the book and working your way down.
- Start sewing from the backside of the book, in the top hole.
- Leave about a 2” tail of thread and hold it with your thumb. You’ll be able to let go after the next stitch or two. (The only knot you make for this book is done at the very end.)
- Thread over and around the top of the book and back through the top hole from the back.
- Thread over and around the side of the book and back through the top hole from the back of the book.
- Thread down to the second hole. The needle will now be on the backside of the book.
- Thread over and around the side of the book, going through the second hole again from the front. Your needle will then still be on the backside of the book.
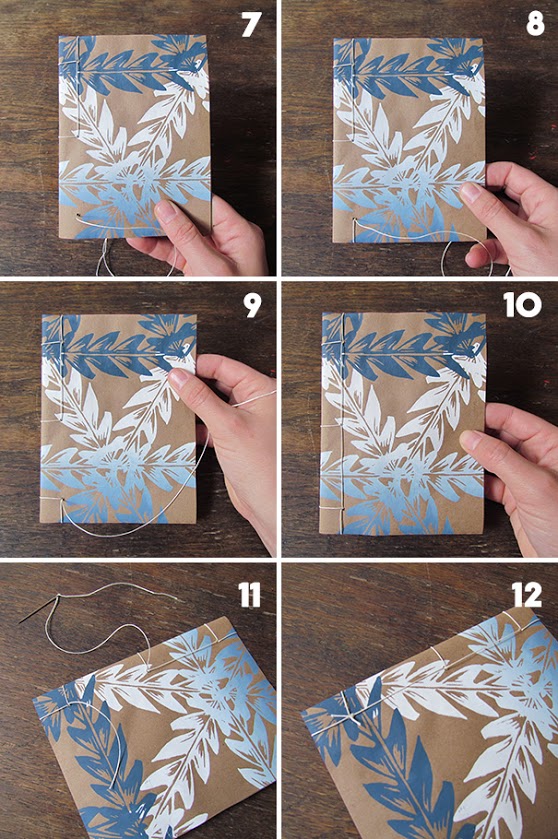 7. From the back, you’ll thread through the third hole at the bottom. You’ll now be back on the frontside of the book.
8. Thread over and around the bottom edge of the book, going back through the bottom hole from the backside.
9. Thread over and around the side edge of the book, going back through the bottom hole from the backside.
10. Thread back up to the middle hole. Your needle and thread will now be on the backside of the book.
11. Flip your book over. It should look like this.
12. Lastly, remove the needle and tie the two loose ends together. Cut threads, leaving about an ½” tail. Voila!
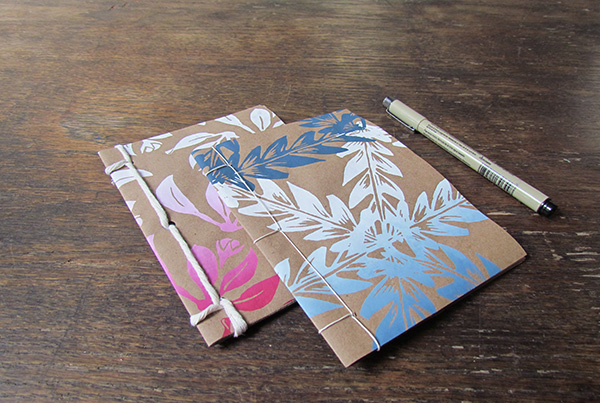
Once you’ve tied your knot, you may want to crease or score the inside pages at the binding so that the book opens more fully. Up to you. Also, variations include making your holes larger and sewing with a thicker thread-like material, such as cord (pictured with the pink notebook), ribbon or yarn.
You now have a notebook that you can take and use anywhere.
_____________________________________________________________
Bonnie Kaye Whitfield designs and screen prints home textiles + paper goods under the name, Bonnie Kaye Studio. www.BonnieKayeStudio.com