Category: Uncategorized

  • Meet New Art Star Craft Bazaar Vendor Jon Wye

    While I write this blog post from my cozy workshop in Washington, DC I sip from a disappointing cup of coffee. Do not use a Keurig coffee maker for anything but coffee. They sell all these fancy coffee packs to use with the machine but they are merely apparatuses to separate you from your money. How the hell am I supposed to get my day started with coffee that a robot would barely analyze as palatable. But I am cheap so I will suffer through the liquefied cardboard.

    My name is Jon Wye and since 2004 I’ve been making a bunch of cool shiz, but mostly known for belts. Many years ago I developed a process for embedding images in leather, which is then turned into belts, guitar straps, camera straps, dog collars, wallets, etc. I also design some t-shirts. The great majority of our production is split between Jeff and myself. The artwork for our goods comes from about 22 artists from all over the world.

    Jeff and I are able to do a lot with so few people because we have continually invested in new processes and equipment over the years, a strategy I had to adopt during the economic downturn, when employing someone new was too risky. Now we have some of the coolest leather working machines out there and I drool over my wishlist of upcoming machines.

    Let’s follow Trolley and take a look at the operation…

    Photo 1
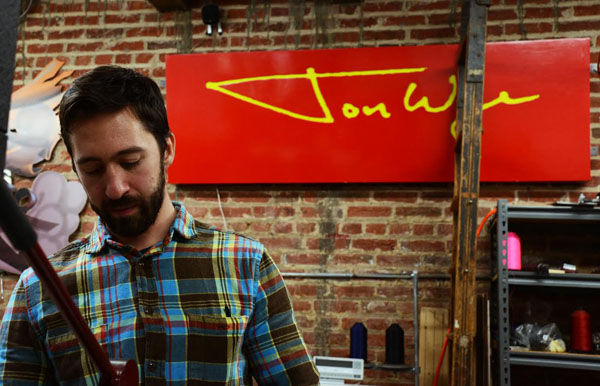
    Ubiquitous branding shot.

    Photo 2
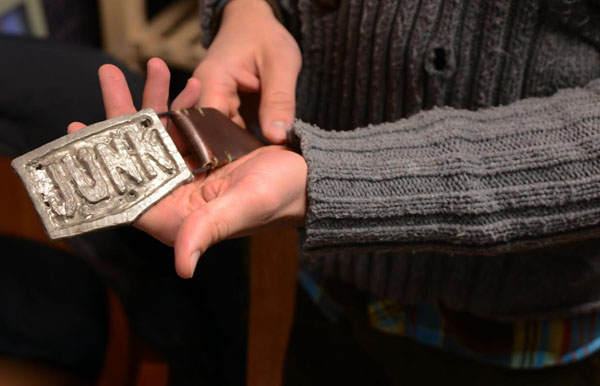
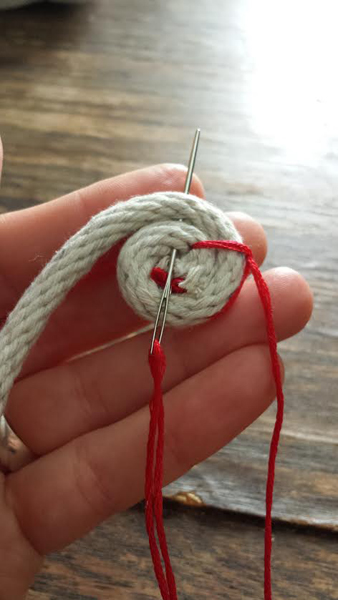
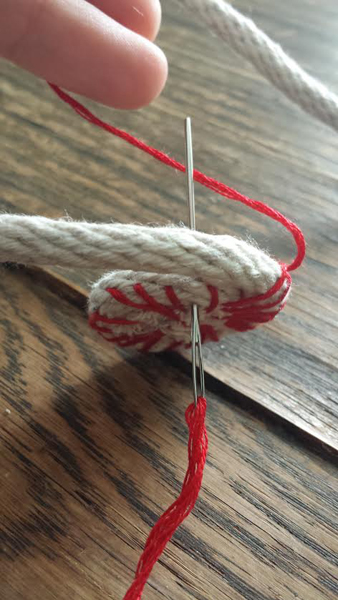
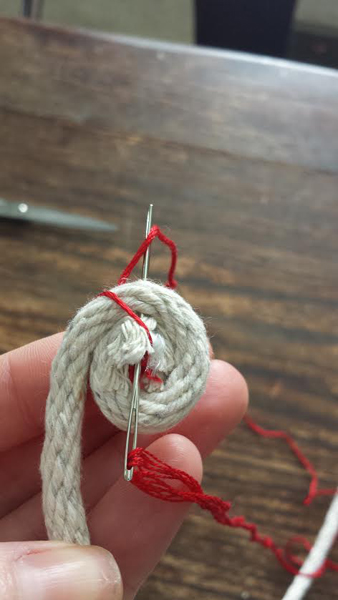
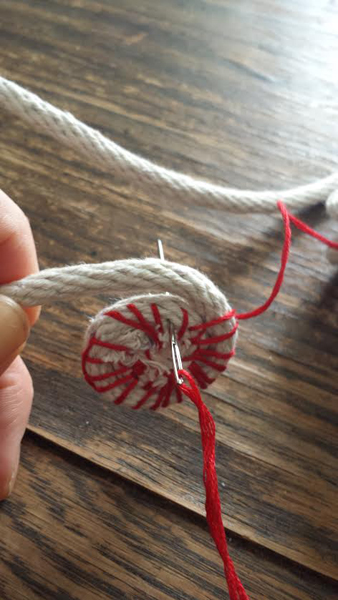
    The first belt buckle I ever made. Hand carved out of wax and cast in plaster. Pewter pellets were dropped into the negative and heated with a blowtorch.

    Photo 3Jeff inspecting the belts after our specially formulated spray coating is added to protect the images in the leather.

    Photo 4

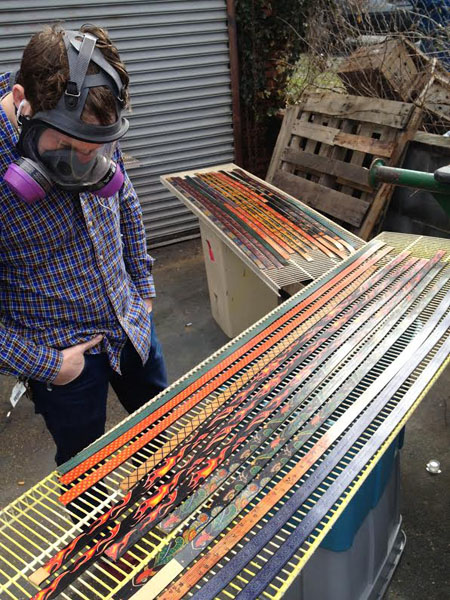
    Inspecting the straps after they are done curing. This one will be a guitar strap.

    Photo 5

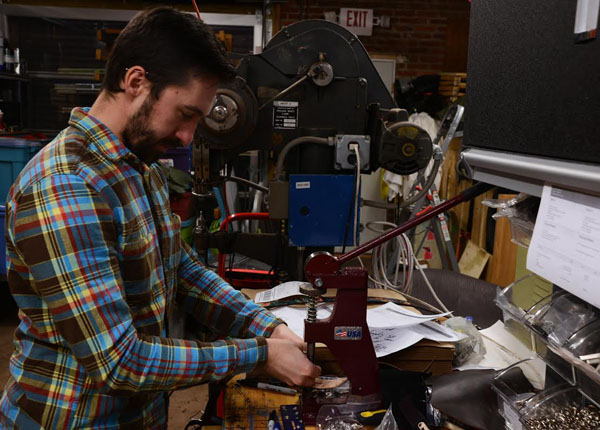
    Hand setting some snaps for a belt order.

    Photo 6

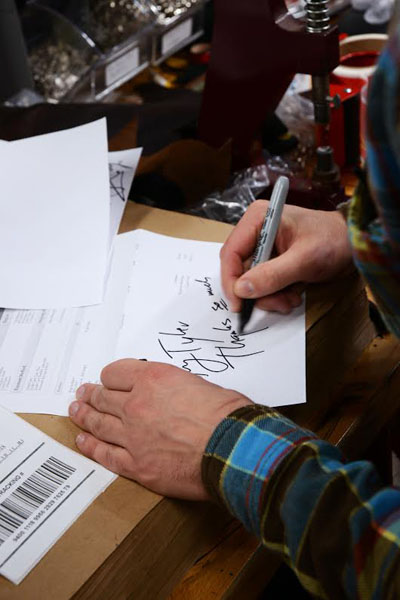
    Every online order gets a personal note.

    Photo 7

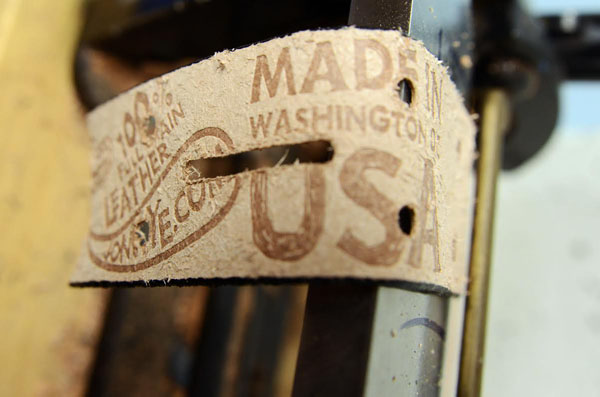
    Our branded MADE IN THE USA, WASHINGTON DC stamp applied with a 1950’s roller embosser.

    Photo 8

    This is our roller embosser.

    Photo 9

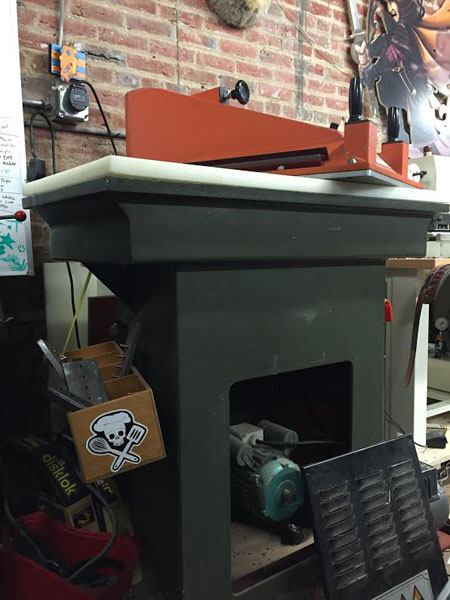
    27 ton clicker press used to punch out of the various shapes for things like guitar straps.

    image 10

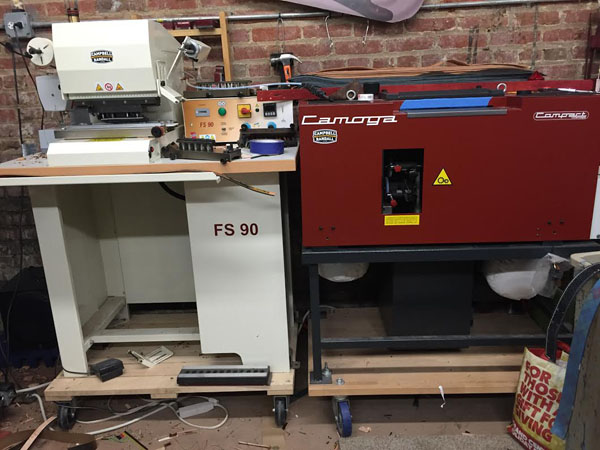
    Left: punch press/stamper for making all the holes in the belts perfect every time.
    Right: Leather splitter for thinning down leather. The whole thing is basically one big blade.

    Photo 11
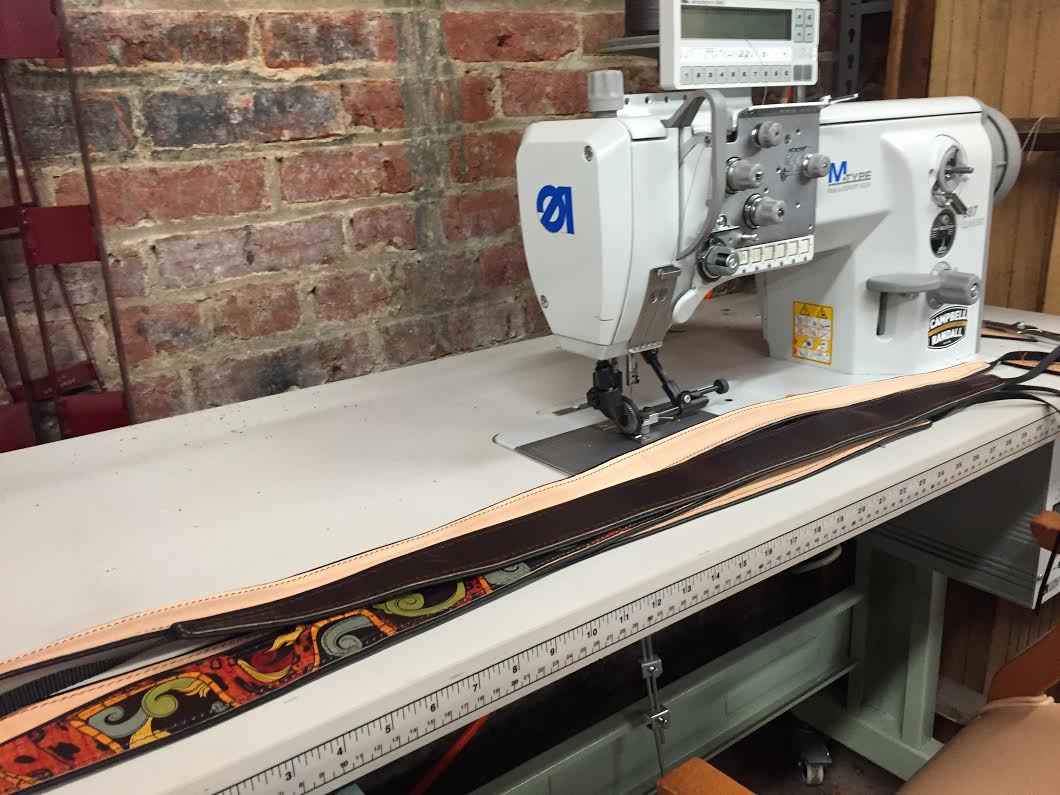
    One of our industrial sewing machines.  I like using the Adlers.

    Photo 13
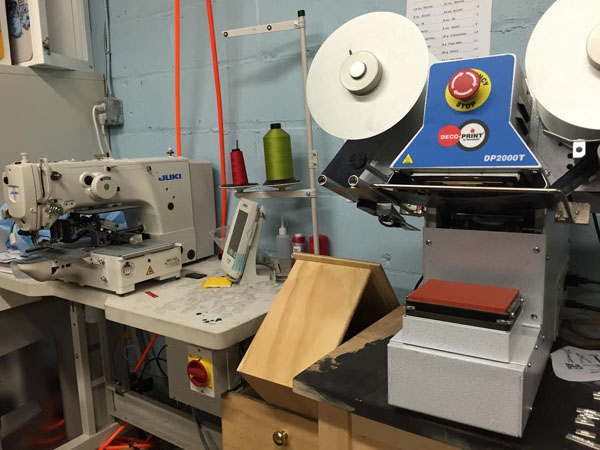
Left: A Juki automatic sewing machine, which helps us put on the tags on all our tees.
    Right: A pneumatic stamping machine for stamping the inside neck of our tees so we can be tag-less. I hate tags in t-shirts.

    Photo 14

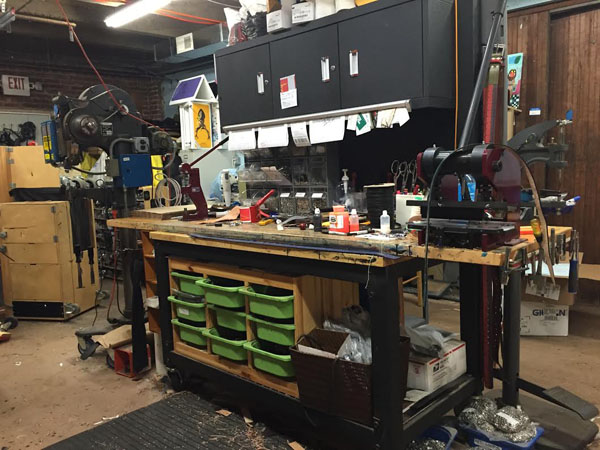
    A wide view of our work bench where we prototype and assemble belts for online orders.

    Photo 15

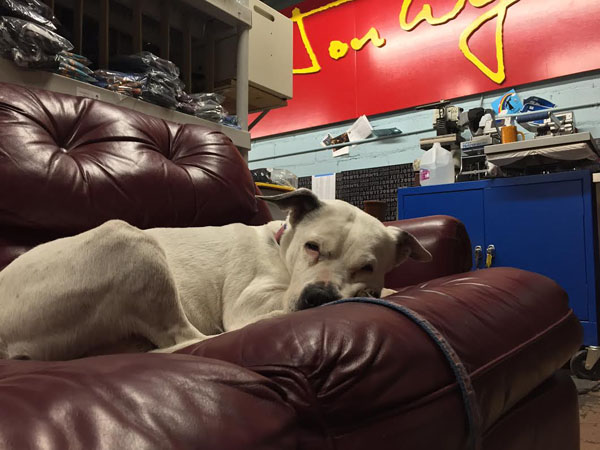
    And this is Scarlett, my girlfriend’s blind dog, who often joins me in the shop. She is not just a little blind, she is totally blind. We have to tie her to the shop couch or she’ll wander around and get scared and poop somewhere. This has happened many times.

    ——————————————————————————————————————-
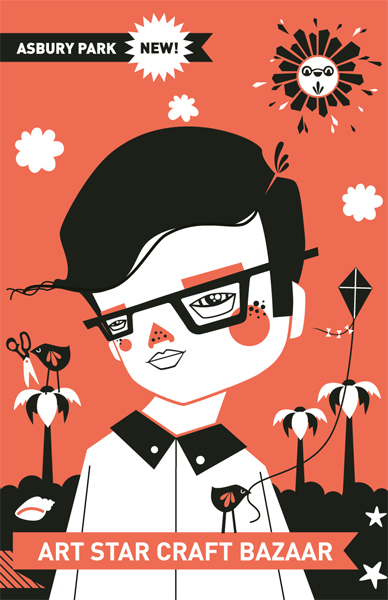
    Thanks to Jon Wye for giving us a glimpse of his process and studio! Visit him at booth #88 at our upcoming Art Star Craft Bazaar on May 9th + 10th at Penn’s Landing Great Plaza! Visit his website and buy his cool shiz HERE.

  • Meet Art Star Craft Bazaar Vendor Jamie Langhoff of Seeing in Fabric!

    Pic 1

    What, at first, appear to be paintings, are actually sewn fabric art.

    Self-taught artist, Jamie Langhoff, creates vibrant urban scenes with just fabric, thread, scissors, and a 1968 Singer sewing machine. Finished artwork is mounted onto ready-to-hang canvas panels.

    Each scene features many dozens of tiny hand-cut fabric pieces. Creating these scenes requires a slow and careful building of many pieces of fabrics, and many layers. All of the fabrics she uses in her artwork are recycled–scrap, remnants and re-purposed clothing. Many of the fabrics Jamie uses are donated to her by her lovely fans.

    Pic 2

    Threadwork and stitching techniques are central to the realism and painterly aspects of Seeing in Fabric. Eschewing the dazzling digital age of newer sewing machines, Jamie enjoys the reliability and rustic sturdiness of her vintage 1968 Singer.

    Pic 3

    By using a color palette of thread in over 200 different colors, but just 2 basic stitch types–straight stitch and zigzag–Jamie creates a multitude of “shading”, “brushstroke” and “drawing” effects. Her stitching technique involves a free-flowing and rapid style, requiring an extreme amount of concentration and skill, but also trust and confidence in her sewing machine.

    Pic 4

    As a self-taught artist, Jamie constantly pushes herself to experiment with her techniques. Through her artwork she shows the world how to “see in fabric” in order to see the vibrant and strange beauty in our modern urban world.

    Pic 5Jamie will be be traveling from Washington, DC to join us at our 12th Annual Spring Art Star Craft Bazaar at Penn’s Landing Great Plaza on May 9th + 10th.  Make sure to stop by her booth #101 to see these incredible pieces in person.  These photos are so beautiful but the pieces are even better in person.  Visit her Etsy Page for more!

    Pic 6

  • Christie’s Mini Weaving Tutorial (on a “junkmail” credit card loom)

    Tutorial and Photos by Christie Sommers 
    pic1
    You will need:
    picnumero1
    *An old card of the un-needed variety… pre-approved credit cards, price club cards, your old West Coast Video card… Just make sure it’s nice and firm, no flimsy paper ones.
    *A variety of string/yarn/twine. In this tutorial I am using a thin cotton cord for my warp (I’ll explain soon). For my weft I am using waxed cotton cord in black, thin gauge yarn in green, and more of the white cotton cord I used for the warp.
    *scissors
    *quilting needle (not shown)
    *ruler
    *pencil
    *toothpick, wooden skewer, or short section of brass tubing
    pic2
    Chances are, the card you are using is 2″ x 3.5″. Turn your card sideways so that the 2″ side is at the top and the bottom. Start by marking every 1/4″ across the top and bottom (see pic).  After all of your marks are made, come back with your scissors and make a small cut in each pencil marking. Cut about 1/4″ into the card each time trying to be consistent.
    You will now begin to lay down your weft. The weft is the base that you will be weaving in and out of. I started in the top left corner bringing the thin cotton cord through the first cut from back to front. Bring the string down to the first cut in the bottom left corner, wrapping around the back and coming back up through the 2nd cut on the bottom left corner (see pics).
    pic3 pic4 pic5
    Continue this motion wrapping back and forth until you get to the end. You will have a tail hanging from your starting and end points. Make sure these tails are at least twice as long as your needle.
    Now you are ready to start weaving!
    I threaded my quilting needle with the black cord and wove under one, over one from left to right. When you come back for your return pass make sure you do the opposite of what you did on the previous pass. If you went under the warp on the last pass, go over the next time. It sounds more confusing than it really is… see pic.
    pic6
    pic8
    Continue for as long as you’d like before changing colors.
    pic9
    To change colors/yarn simply trim your previous weft (black cord) leaving a tail that is at least twice as long as your needle. Begin weaving the next color through starting on the opposite side of the previous weft’s “tail”.
    pic10
    Continue weaving and changing color/yarn as desired until you simply cannot fit any more rows. You can use your needle to push each row up to the top so they fit snugly together.
    You’re probably wondering what to do with all of those little tails hanging out of the sides of your weaving. Some people leave them as a deliberate design choice. For this weaving, I am tucking these little tails in for a nice finished edge.
    To tuck: starting at the top left, thread the first tail onto your needle. Tie the tail to the first string of warp and slide the needle down through the loops of the weft carefully trimming the tail and letting it slide back slightly into the loops so that it is hidden.
    pic11 pic12
    Once all of your tails are tucked in, you can stop here or add fringe if you like.
    For the fringe: Because this is such a small weaving, I am going with a very simple fringe. Cut seven 4″ pieces of the green yarn.
    Thread the first one onto your needle and run the needle through the bottom left warp loop.
    pic13 pic14
    Line up the ends of the 4″ piece of yarn and tie it into a knot, sliding the knot snugly up against the bottom of the weaving before tightening.
    Repeat across the remaining white warp loops with the remaining 4″ yarn pieces.
    Do a final trim across the bottom of your fringe.
    Finish your weaving by lining up a 8″ piece of black string with your toothpick/skewer/tubing and thread it through the top warp loops. Tie a knot in your black string & you can easily hang it on a nail. Heck, you can even use a longer string and make it into a necklace… go nuts.
    You’re finished!
    Once you get the hang of the simple act of weaving one over, one under…. take to the internet or your local library and research some new techniques!
    *Disclaimer: I am not a trained weaver. I am self taught. Most people start with the fringe first and work their way up.  Starting at the top works for me… so that is how this tutorial goes;)
    Enjoy!

    —————————————————————————————————————————————

    Christie Sommers is the designer and maker behind West Oak Design. She handcrafts small batch and one of a kind goods for home, women, and kids in her Wyndmoor, Pa studio.www.westoakdesign.com

  • Art Star Craft Bazaar is Coming to Asbury Park!

    We’ve got some exciting news!! We are bringing our Art Star Craft Bazaar to Asbury Park, New Jersey!

    Asbury Web

    Don’t worry, we will still host our bazaar twice a year in Philly.  We’ve been looking for a 2nd home for our show for quite a while now, so this will just be another location added to our roster.

    Asbury Mural
    Awesome Mural in Asbury Park by Porkchop. Photo Courtesy of Move For Hunger.

    Asbury Park is a perfect fit for our show.  There is already a flourishing creative scene happening there and also tons of independent shops and restaurants.  It is just our style.

    We will be bringing our bazaar to Bradley Park, which is a city owned park situated right across the street from the Asbury Park Boardwalk and their Convention Hall.  The show will be held during the city’s peak summer season, on the weekend July 25th + 26th.  The city has a devoted art/craft community, which is active year round.  We hope to attract this audience, tourists, as well as our own Art Star following.

    We are excited to be partnering with Asbury Park based non-profit, Move For Hunger. We will be collecting a $3 suggested donation at the door and 100% of that will go directly to this amazing organization.

    Move For Hunger is a 501(c)3 nonprofit founded in 2009 to transform moving into an opportunity to reduce food waste and help feed the hungry. Move For Hunger is a national organization working with over 600 relocation partners and thousands of real estate agents to bring awareness to hunger in America. Currently over 1,151,000 residents of New Jersey struggle with hunger. Move For Hunger is working to ensure less food goes to waste and more is delivered to those in need. In just five years, the Move For Hunger program has delivered over 4.5 million pounds of food to community food banks nationwide.

    Food_Drive
    Photo Courtesy of Move For Hunger


    The Asbury Park Art Star Craft Bazaar will be very similar to our popular spring bazaar at Penn’s Landing Great Plaza in Philadelphia.  Around 100 art/craft vendors will be set up selling their wares in Bradley Park.  On that note, we are now accepting vendor applications for this show!  So if you are an artist or crafter who would like to apply to participate, please go here

    We are also looking to bring in some locally based art organizations/non-profits to set up at our show in exchange for providing a free interactive art/craft project, or as we call them “make + takes”, for guests to come and make something that they can take home with them that day.

    We are so excited to bring our bazaar to this amazing city and we hope you are to!  Please continue to check the site for updates on the show.  If you are a business based in Asbury and want to work together – cross promote or provide a make + take, please get in touch with us.  We are looking to collaborate and involve the city as much as possible!

  • Christie’s Hand Stitched Bowl Tutorial

    Photos + Tutorial by Christie Sommers

    Photo 1
    You will need:
    -cotton clothesline
    -quilting needle (you can use a regular sewing needle with a thimble but a larger quilting needle is best for passing through the thick clothesline)
    -embroidery thread, yarn, or string in color of your choice
    -scissors

    Photo 9
    Thread the needle with colored string of choice and tie a knot at the end.

    Use as much thread as you can manage. No more than 3′ should suffice. You can tie more thread on when you run out.

    Start by coiling the clothesline between two fingers as shown.

    Photo 10
    Insert the needle into the center of the coil passing through the layers of rope and exit as shown.

    Photo 11 Photo 12
    We will be using a blanket stitch for this project. Wrap your working thread behind the needle from right to left.

    Photo 13
    Bring the thread back over the needle from left to right and pull the needle through.

    Photo 2
    Repeat going around in a circle, entering in the center, until you reach the first stitch.

    If you want a bowl with a wide flat base, you can continue the flat blanket stitch going around a few more times until the base is as wide as you like.

    Photo 3
    At this point you will be rounding up to give your bowl a curved shape.

    To achieve this, you will be inserting the needle straight through the clothesline from front to back rather than from the center out. See pic.

    Photo 4
    Continue with the blanket stitch inserting the needle through the clothesline from front to back until your bowl is as large as you like.

    You will most likely run out of stitching thread as you are working. To add more, tie a new 3′ length of thread to the tail of the previous working thread. Place the ends together as shown and tie in a knot.

    Photo 5Photo 6
    For the next few stitches, Insert the needle Between the coils instead of through the rope until your knot is hidden.

    Photo 7
    Once you pass the knot, continue stitching through the rope until you reach the desired bowl size.

    Tie off your working thread and then snip the clothesline, You’re done!

    As you can see from the next photo, the placement of your stitches will determine the design of your bowl. For the black bowl, I spaced my stitches out and staggered with each layer, essentially placing new stitches between the stitches on the previous level. For the red bowl, each new stitch was placed right next to the previous level’s stitch.  Play around with stitch placement to see what you can come up with.

    Photo 8
    Enjoy!

    —————————————————————————————————————

    Christie Sommers is the designer and maker behind West Oak Design. She handcrafts small batch and one of a kind goods for home, women, and kids in her Wyndmoor, Pa studio.www.westoakdesign.com


  • Genevieve Geer’s Le Puppet Regime Opens Friday!


    Enjoy this fun trailer for Genevieve Geer of Le Puppet Regime’s solo exhibition at Art Star. The opening reception will be this Friday the 13th from 6-8pm and will include snacks, light refreshments, Cut and Paste Photobooth and first dibs on this incredible work! And find out who is really pulling the strings 😉

    Learn more about Genevieve and her work here.

  • Art Star at Winterfest

    Art Star at Winterfest

    We are excited to announce that we opened up a 2nd Seasonal location within The Lodge at Winterfest this year! For those of you that came last year, it is much different and even better! Instead of having rotating craft vendors, we just have one big Art Star shop that is within a 40 foot shipping container, which is along the perimeter of The Lodge.  The other difference this year (from last) is that our store is accessible from within The Lodge (which is one of the huge heated tents) with giant sliding doors that we will keep open. It is warm, cozy and inviting with a fireplace inside (super excited about that!)

    Inside The Lodge at Winterfest / photo courtesy of DRWC

    Right next door to us is beer and food.  Throughout The Lodge are cozy couches, fireplaces (mantels from the Divine Lorraine Hotel) and much more.  This year is a HUGE improvement from last year (which we all thought was pretty amazing anyway) so just wait until you see it! We encourage guests to make a day (or night) of it and enjoy all that Winterfest has to offer: ice skating, good food, booze, beer, arcade games, pool, the firepits + fireplaces, etc.  PLUS you can get your holiday shopping done at Art Star!  We are fully stocked with gifts to give everyone on your list this holiday!

    Outside of The Lodge (photo courtesy of DRWC)

    DRWC is the fantastic non-profit behind all the development you are seeing along the waterfront, including Spruce Street Harbor Park and Winterfest.  They are an incredible group of passionate people and we feel so honored to be a part of these projects.  If you see any of the DRWC staff walking around, please thank them. They’ve worked so hard to make Winterfest amazing for you to enjoy! And we really think you will!

  • An Interview with Amber Zaraza of Phea Jean

    First time ASCB booth mates Jamie Williams of Dop Dop Designs and Amber Zaraza of Phea Jean interview each other and find out what is in store for the upcoming bazaar! This first post features Jamie’s interview with Amber of Dop Dop Designs.  Enjoy!

    How did you find sewing and what influenced you to turn your skill into a business?  I began sewing around the age of 12. I found my mothers old Kenmore sewing machine and an assortment of my grandmother’s notions and thought I could make things. I didn’t have any fabric so I cut up clothing that I got at the thrift store.  Of course I had no idea what I was doing but managed to make a very simple cross body handbag out of an old blue and white houndstooth polyester suit. I took a crystal clasp off of one of my mothers sweaters to use as a closure and wore that bag for years. I was immediately hooked! I took sewing classes in high school where I was able to hone in on my skills and really learn proper techniques. I went to college for fashion design and during that time made handbags for myself, and then friends, and soon after strangers were asking me where and how to order. So in 2005, phea jean was born, sort of by accident, but once the ball started rolling I just went with it and I love it! It’s still funny to think that I originally set out to be a bridal designer!

     Where did the name phea jean come from?  Settling on a business name seemed daunting at first- what name would I always want to be associated with and never be tired of?!  phea jean, of course, had to be it…phea (Phyllis) and Jean are my two grandmothers, both wonderful and strong women in different ways and both very dear to me.

    Describe your personal style and how that translates into phea jean.
    I love vintage clothing…dresses, coats, hats, etc. The fabric really draws me in, as I find the bright colors and bold patterns hard to resist. I use primarily vintage fabric because I find it so intriguing, I, too, sometimes find inspiration in vintage styles. For example, one of my hat patterns is loosely based on the cloche style made popular in the 1920’s. I also just really like unique, funky pieces. I like when unexpected fabrics are used for traditional silhouettes. I love mixing fabrics and patterns which I do in my designs. In my personal style, I pretty much go for it- wearing and mixing things that other people wouldn’t think to, but somehow (most of the time) ends up working. I never take fashion too seriously, but I want to look good. I want people to look good (great!) in my designs but I also want them to have a good time with the pieces and mix and match them together.

    What inspires your work?
    I am inspired by all the vintage fabric patterns and textures. I “treasure hunt” in attics, basements, estate sales, thrift stores, etc for fabric and I never know what I will bring home, so I have to let each piece speak to me and inspire me as it comes. I’m even often inspired by buttons and will sometimes start with the buttons and design around them. Everything I make is one of a kind and even though I have patterns in place, I do very little planning when it comes to the production aspect of sewing. My process consists of looking around my studio and seeing what catches my eye at the moment.
    My clothing designs are definitely inspired by women, of all shapes and sizes. I really try to accommodate different body types and design pieces that will fit a variety of sizes. I want anyone to come to my booth and be able to find something flattering and leave feeling confident.

    In a literal sense, I am inspired to make things that I want or need for everyday life. My head is cold, therefore I should make hats. I need a specific size/shape handbag so I’ll make it.

    What items will you be bringing to the bazaar? phea jean will be bringing things to keep you warm:  Plenty of hats and scarves of course. I’ll also have my unique wrap tops and ponchos for stylish winter clothing options.

    What item is perfect for gift giving?  The scarves are a great gift and an easy way to spruce up any outfit. At $35-$45 you really can’t go wrong.

    What other artists at the bazaar are you excited to check out?  Considering the shows are our only chance to do our holiday shopping I am excited to see and support all the other vendors!  First thing, I’ll be hitting up my booth mate dop dop designs for a housewarming gift. I’m also a huge fan of miss millie and will be dropping hints to my partner on which of her latest work I need to have. I’m interested to see the coffee drip cones from Melissa Weiss Pottery and the jewelry by Maureen Duffy.

  • Eling of Migration Goods Shares Her ASCB Shopping List

    Hi everyone! Eling from migration goods here. As a maker I rarely get enough time to properly shop at the events I am vending at, and this is doubly so during the fall + holiday seasons. I am always kicking myself at the end of a show because I haven’t had enough time to complete my own shopping!

    This year I decided I would try to organize + plan my holiday shopping ahead of time for events that I know will have really great vendors– like, yup, the upcoming Fall Art Star Bazaar!

    Here’s what’s on my list (so far)!

    All of Dirty Ass Soap‘s soaps are so fun, but this ramen soap is definitely tops on my list for gifts this year (hope none of the potential recipients are reading this)

    Also on my list for gift shopping (and in the category of food related accessories): The everything bagel necklace from inedible jewelry

    and the amazing Old Bay Seasoning earrings from Flat Rat Studio. (Their pet portraits are totally on my own wishlist too).

    I’m obsessed with paper goods & can never find enough time to look at them all! But I’ll be making a point to find Bowerbox Press next weekend for this card & to check out all the rest of the lovely work in person.

     More paper goods please! I can’t wait to see Sarah Ryan‘s sweet cards + illustrations up close!

    For my book-loving friends (and me too), I’m very excited to pick up these bookmarks from New Academy Press, and this super-cute tote from Common Rebels too.

    Common Rebels also makes a ton of cute cat items, which I will be shopping for my cat-loving friends. Speaking of those cat friends, I’ll also be looking for this sweet cat lover scarf from Red Prarie Press.

    If my friends/family are very very good, they might find themselves the recipients of one of these gorgeous spoons or sake cups from Melissa Weiss Pottery (I’m coveting these ramen bowls for myself).

    And how cute is this stegosaurus from By Yivvie? Some tiny (or not so tiny) people I know may need a few of these plushes…

    A couple other items I will be checking out for some potentially very lucky folks include this beautiful whale skeleton necklace from J.TOPOLSKI (I am saving up for this sloth bracelet for ME!)

     and the beautiful printed work of Bonnie Kaye Studio — so good!


    Finally, I’m really excited to see these diorama & miniature pieces from metamorphosis metals up close!


    And I won’t be leaving without a print for myself from Naughty & Nice. I’m pretty sure I want Tag You Are It (below), but I’m also eyeing The Terror of the Sea

    really hope I get a chance to see all of these things in person next weekend, but at least I’ve made my list, right? There are SO MANY talented artists + makers vending at the Fall Art Star Bazaaron November 8th + 9th. Don’t forget to check them out ahead of time here & make your own list!

    ———————————————————————————————————-
    Thanks to Eling from Migration Goods for sharing her Art Star Craft Bazaar Shopping List!  Be sure to stop by her booth to check out her line of adorable felt accessories and illustrated paper goods.


  • Now Hiring PT Shop Manager

    We are look for an outgoing, friendly and reliable person to manage our pop up shop at Winterfest at the Blue Cross River Rink this holiday season.  Applicant must be available to work Thursdays + Fridays 5-9pm, Saturdays 12-8 and Sundays 12-6 (including special preview/press parties on November 24th + 25th).  We are looking for someone with a flexible schedule to be available to stay open later if it is busy.   Position will begin on November 24th and run through February (shorter days in Jan/Feb). The shop will be closed on Christmas, but applicant must be able to work on Dec. 26th and possibly extended days and hours the week before Christmas.

    Responsibilities will include:
    Opening / Closing Shop
    General Sales
    Customer Service

    Requirements:
    Must be reliable and trustworthy
    Must be able to get to the shop in a timely manner,  in all weather conditions
    Excellent interpersonal skills
    Retail experience
    Must be okay to work in cold weather (our shop will have space heaters but still might be chilly)

    Art + Craft knowledge/background a plus
    $12/hr

    If interested, please email us at info(at)artstarphilly(dot)com to schedule a day to drop off a resume and cover letter in person, at our shop.  Deadline to apply is November 11th.

    Thanks!
    Megan + Erin

The owner of this website has made a commitment to accessibility and inclusion, please report any problems that you encounter using the contact form on this website. This site uses the WP ADA Compliance Check plugin to enhance accessibility.