Tag: craft tutorial

  • MAKE THIS: Printed Pinwheels for Spring!

    Photos + Tutorial by Bonnie Kaye Whitfield

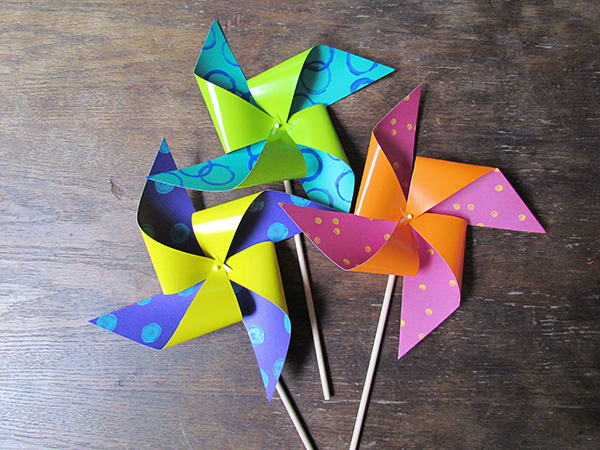
    Ever since I was a kid, I’ve loved pinwheels.  This printed version of pinwheels is a perfect way to lift your spirits after months and months of winter.  Make as festive decor for your next party or create with your kiddo on a rainy day.
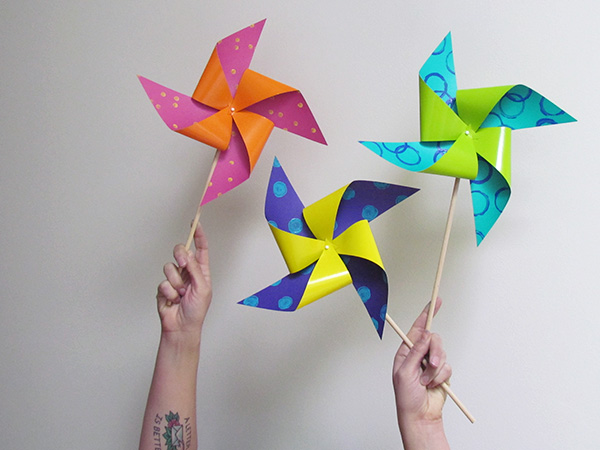
    Blog_5_Pic_15

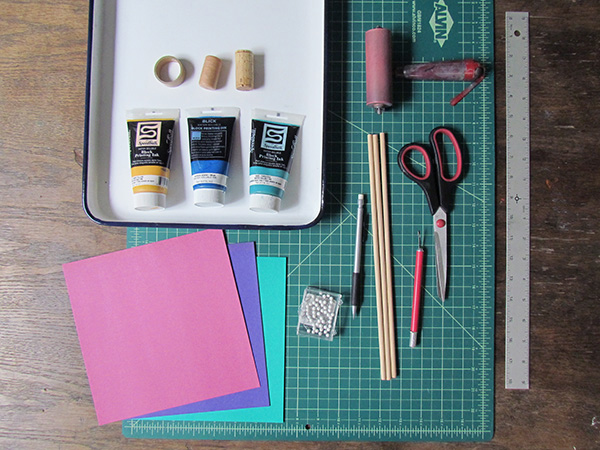
    You will need:

    • square cardstock, ideally different colors on each side
    • scissors or x-acto
    • ink for printing, either water-based block printing or stamp pads
    • ink tray + brayer if using block printing ink
    • circular tools for printing – pencil eraser, wine cork, empty cardboard tape ring
    • dowel rods
    • small tacks/pins
    • scrap piece of cardboard

    Blog_5_Pic_1

    Gather your materials.  Try to work with colored cardstock.  You can test out other papers to see if they hold up to lots of blowing and twirling.  If you have colored ink pads (I didn’t…) then I would use those before turning towards block printing ink, as the prints will take less time to dry.
    Blog_5_Pic_2

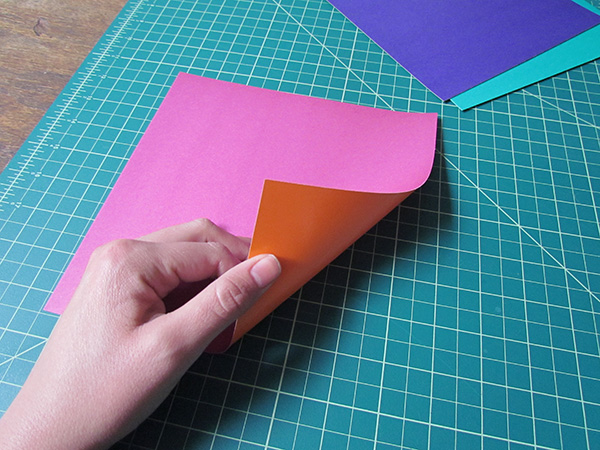
    If you can find paper that is different colors on each side, it will add to the colorful pop of the pinwheels.  If not, no biggie.  Just work with whatcha got.
    Blog_5_Pic_3

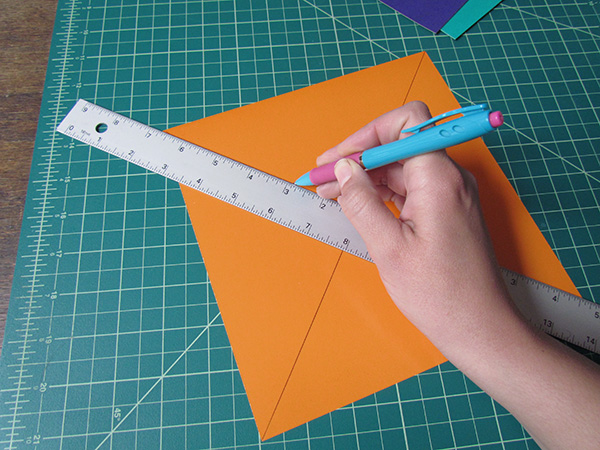
    Before you begin printing, go ahead and draw two lines of the backside of your printing side.  Use a ruler and a pen to line up opposite corners and draw a line, making a big X across the paper.
    Blog_5_Pic_4

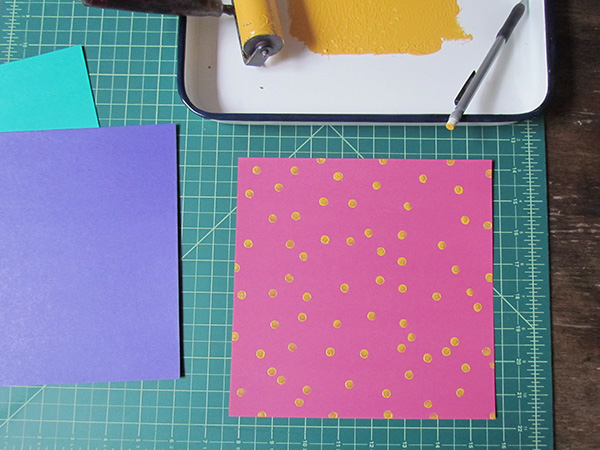
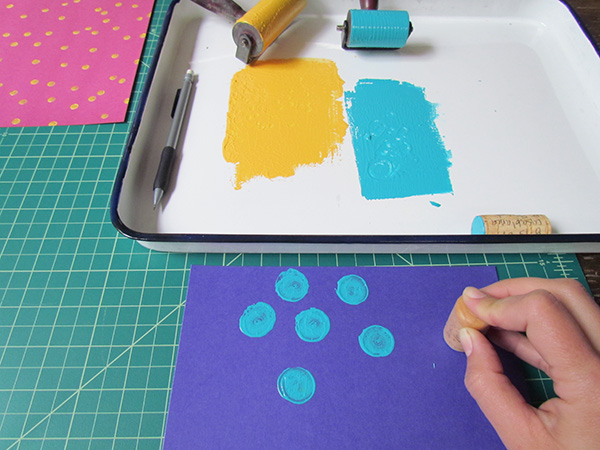
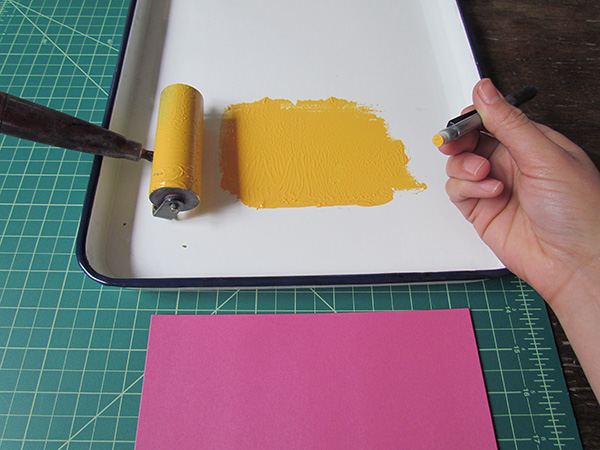
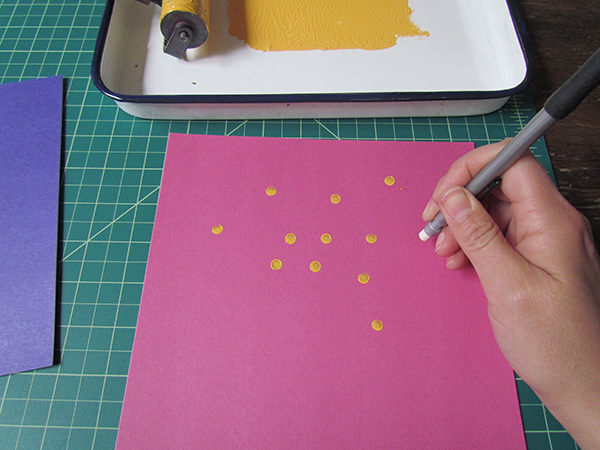
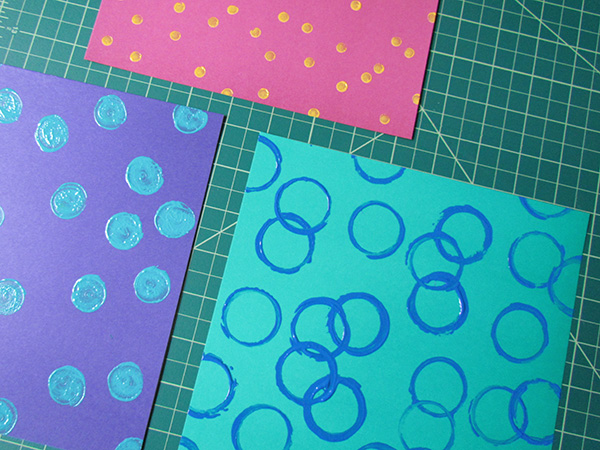
    Now for printing fun!  Roll out some ink in a tray.  Dip your pencil eraser in the ink and go to town.  Pencil erasers make the perfect tiny dot.
    Blog_5_Pic_5 Blog_5_Pic_6

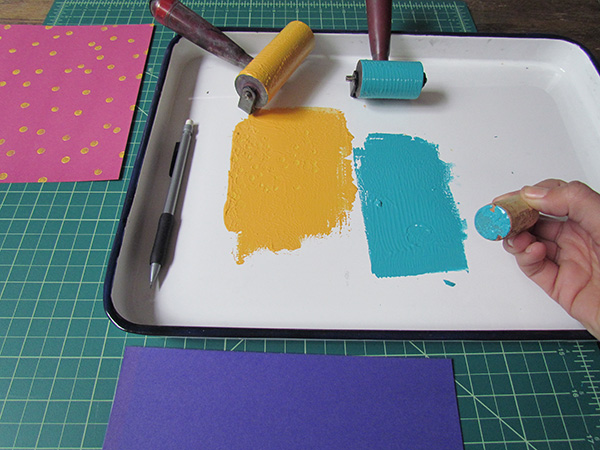
    Feel free to just use a pencil eraser for all your printing, or grab some other circular items to print with.  Here, I’m using a wine cork for a larger circle blob.
    Blog_5_Pic_7 Blog_5_Pic_8

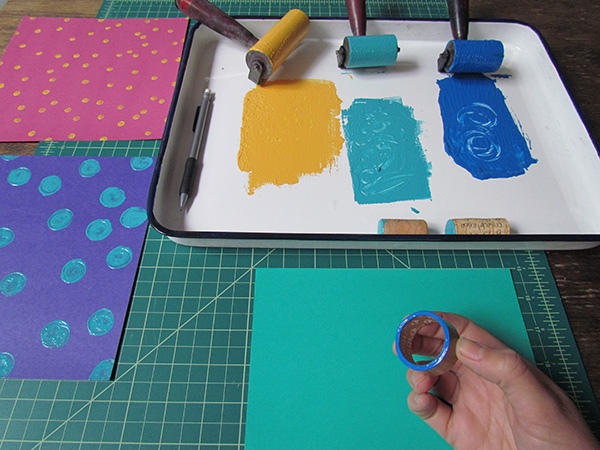
    I also had an empty tape roll on hand.  I recommended scouting out other circular items in your recycling bin, like a toilet paper roll or yogurt container.
    Blog_5_Pic_9 Blog_5_Pic_10

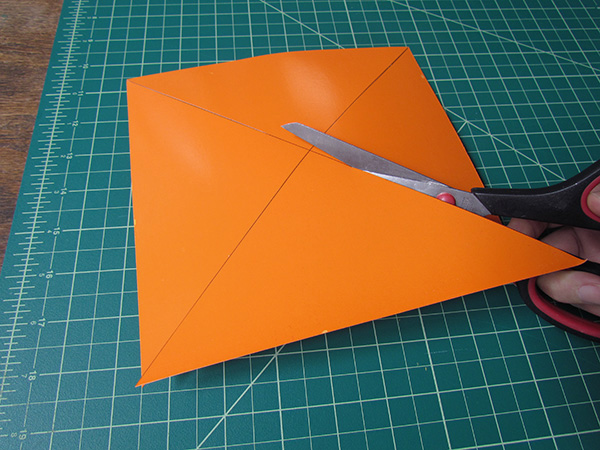
    After the prints have thoroughly dried, grab your scissors and begin to cut on the lines that you drew at the beginning.  Cut on each line until you get about an inch away from the center point – then stop!
    Blog_5_Pic_11

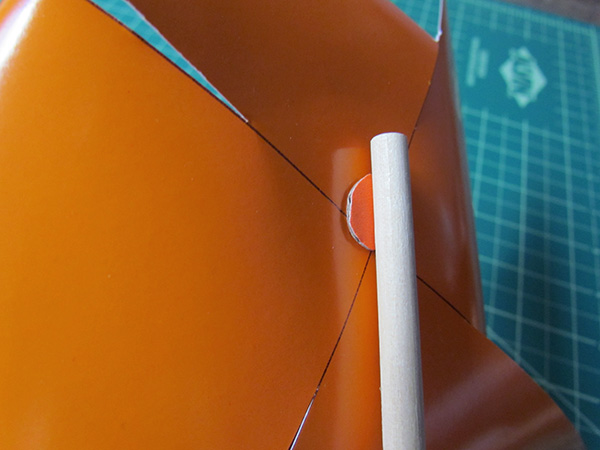
    Now for the only tricky part … pinning them all together.  First, unless these are going to be purely decorative and you don’t want them to spin, you’re going to want to cut out a few dime-sized circles out of cardboard.  This will help the pinwheels spin.  Set the cardboard circles aside.
    Blog_5_Pic_12

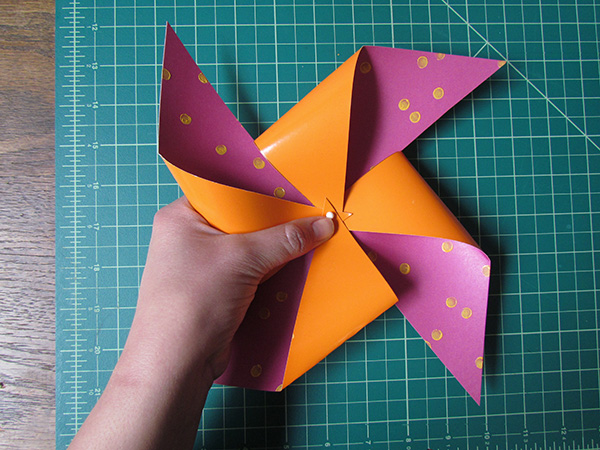
    Begin by folding down every other corner of the pinwheel and hold in one hand.  Grab the pin with your other hand and push through the center, making sure you are going through all 4 corners that you are holding down.  Grab one of your cardboard circles and press it in between the paper pinwheel and the wooden dowel rod.  I find that a couple long presses in the dowel does the trick for me, but then again, I don’t have a 4-year-old that’s going to run around with it.  So if you do, you might want to add a dab of glue before jamming into the dowel.
    Blog_5_Pic_13

    Lastly, if you really want some good spin action, you’ll need to play around with moving the paper around so that it it doesn’t hit the dowel rod when you try to spin it.
    Blog_5_Pic_14

    So there you have it – springtime pinwheels + insta mood lifter!

    ———————————————————————————————————————————–

    Bonnie Kaye Whitfield designs and screen prints home textiles + paper goods under the name, Bonnie Kaye Studio.  Products are created to inspire memories at home and around the table.  A donation is made with every purchase to help feed hungry Americans.

    www.BonnieKayeStudio.com


  • Christie’s Hand Stitched Bowl Tutorial

    Photos + Tutorial by Christie Sommers

    Photo 1
    You will need:
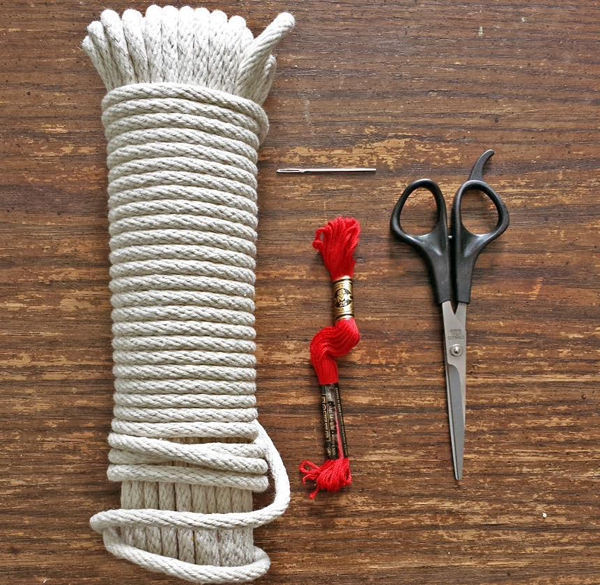
    -cotton clothesline
    -quilting needle (you can use a regular sewing needle with a thimble but a larger quilting needle is best for passing through the thick clothesline)
    -embroidery thread, yarn, or string in color of your choice
    -scissors

    Photo 9
    Thread the needle with colored string of choice and tie a knot at the end.

    Use as much thread as you can manage. No more than 3′ should suffice. You can tie more thread on when you run out.

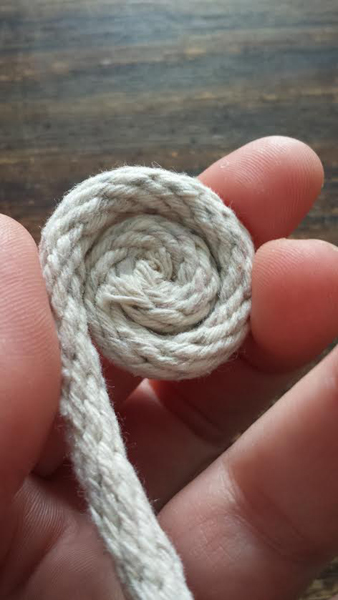
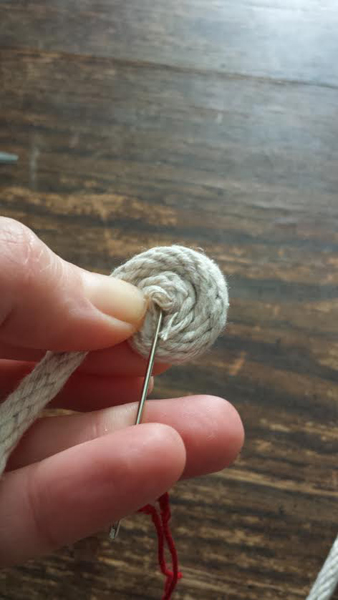
    Start by coiling the clothesline between two fingers as shown.

    Photo 10
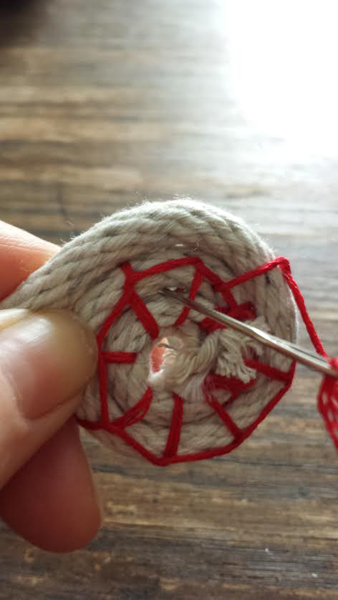
    Insert the needle into the center of the coil passing through the layers of rope and exit as shown.

    Photo 11 Photo 12
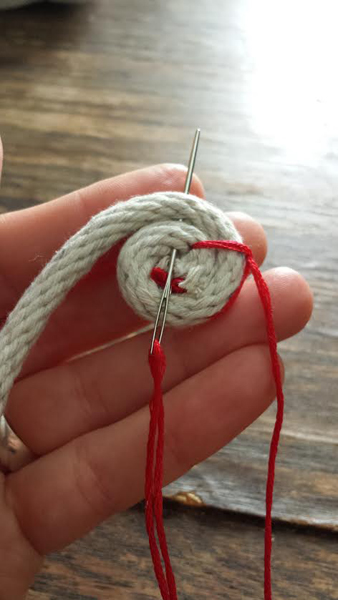
    We will be using a blanket stitch for this project. Wrap your working thread behind the needle from right to left.

    Photo 13
    Bring the thread back over the needle from left to right and pull the needle through.

    Photo 2
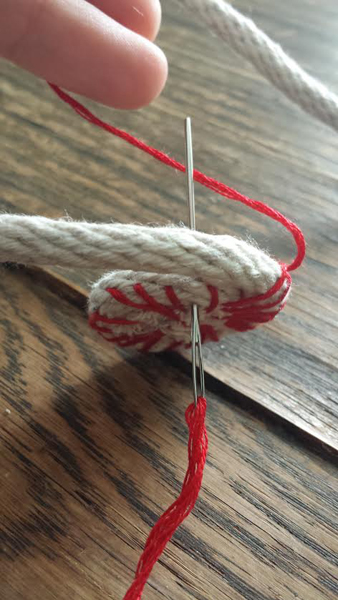
    Repeat going around in a circle, entering in the center, until you reach the first stitch.

    If you want a bowl with a wide flat base, you can continue the flat blanket stitch going around a few more times until the base is as wide as you like.

    Photo 3
    At this point you will be rounding up to give your bowl a curved shape.

    To achieve this, you will be inserting the needle straight through the clothesline from front to back rather than from the center out. See pic.

    Photo 4
    Continue with the blanket stitch inserting the needle through the clothesline from front to back until your bowl is as large as you like.

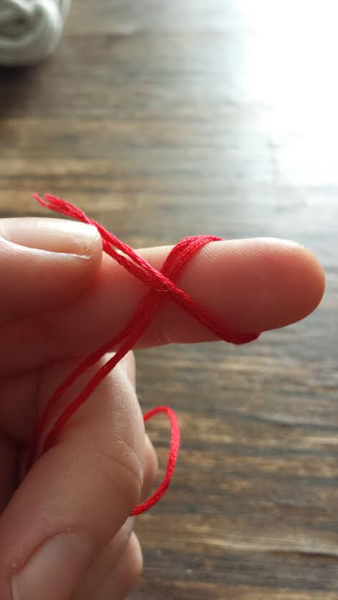
    You will most likely run out of stitching thread as you are working. To add more, tie a new 3′ length of thread to the tail of the previous working thread. Place the ends together as shown and tie in a knot.

    Photo 5Photo 6
    For the next few stitches, Insert the needle Between the coils instead of through the rope until your knot is hidden.

    Photo 7
    Once you pass the knot, continue stitching through the rope until you reach the desired bowl size.

    Tie off your working thread and then snip the clothesline, You’re done!

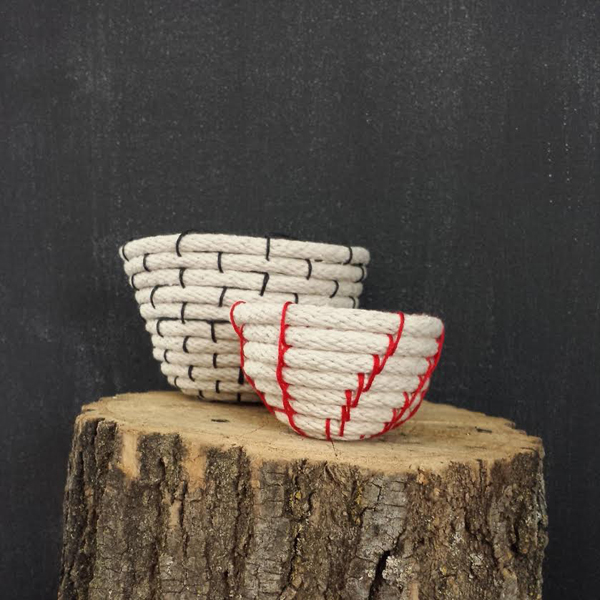
    As you can see from the next photo, the placement of your stitches will determine the design of your bowl. For the black bowl, I spaced my stitches out and staggered with each layer, essentially placing new stitches between the stitches on the previous level. For the red bowl, each new stitch was placed right next to the previous level’s stitch.  Play around with stitch placement to see what you can come up with.

    Photo 8
    Enjoy!

    —————————————————————————————————————

    Christie Sommers is the designer and maker behind West Oak Design. She handcrafts small batch and one of a kind goods for home, women, and kids in her Wyndmoor, Pa studio.www.westoakdesign.com


  • Bonnie’s Inspirational Wall Hanging

    Photos + Tutorial by Bonnie Kaye Whitfield

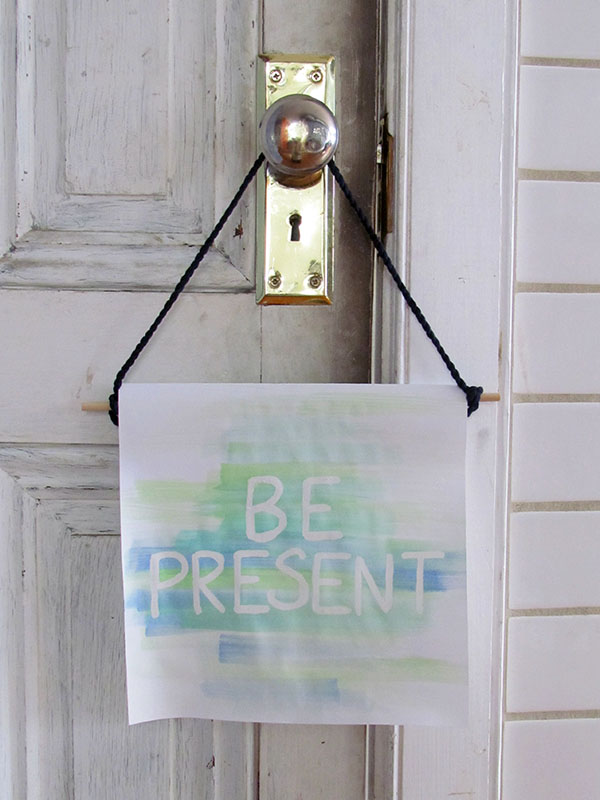
    Bonnie_Blog3_Pic9

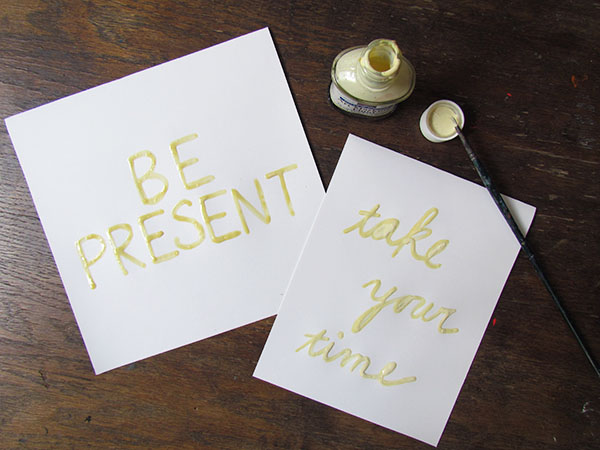
    Sometimes everyone needs a little pick-me-up, especially in the studio or office, where it’s easy to get overwhelmed with projects and deadlines.  These simple inspirational wall hangings combine the magic of masking fluid and watercolor to create your own, personalized message that will keep your chin up and head high.

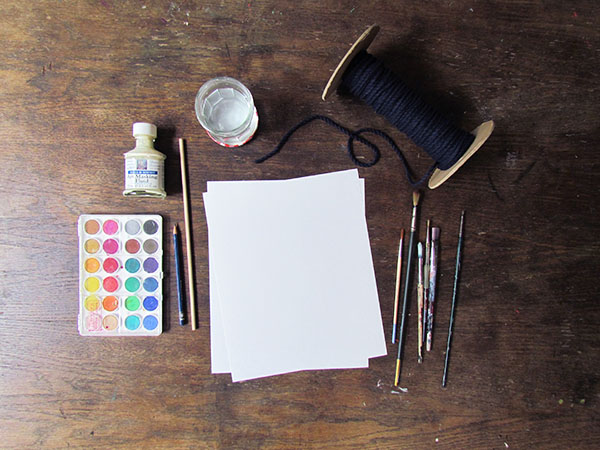
    You will need:

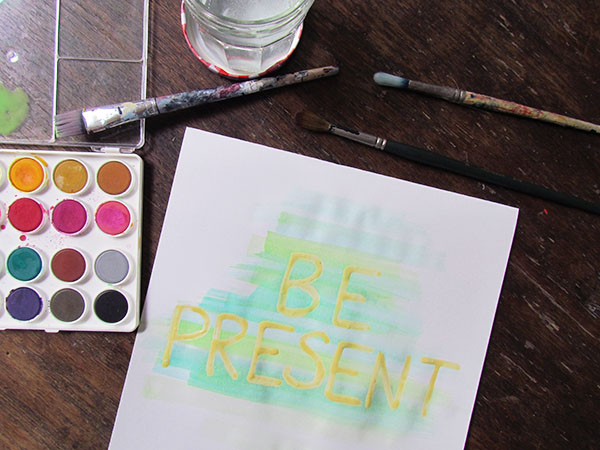
    • white or cream cardstock or smooth watercolor paper
    • pencil
    • art masking fluid
    • old, thin brush (one that you don’t mind tossing in the trash after use)
    • watercolor
    • watercolor brushes
    • container of water
    • wooden dowel (optional)
    • heavy duty tape or hot glue gun (optional)
    • rope or twine (optional)

    Bonnie_Blog3_Pic1

    As you gather your materials, make sure you have thick, smooth paper to work with; any paper that is “soft” or textured will not work well with the masking fluid.  Also, note that the last three materials are optional and needed only if you want to hang your message as pictured.  Otherwise, you could simply cut your wall hanging to size for a frame or pin directly onto your wall.

    Bonnie_Blog3_Pic2

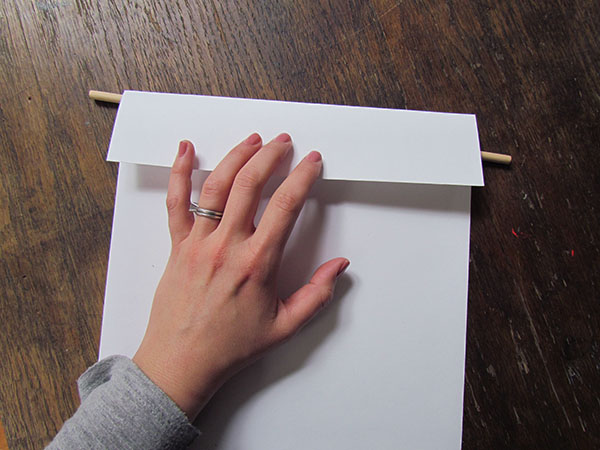
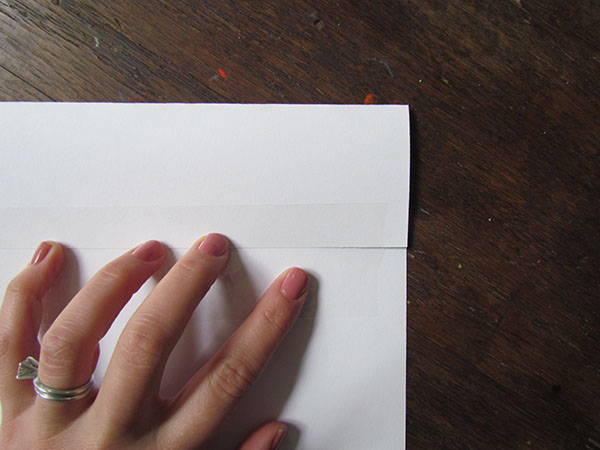
    If you want to hang using a dowel rod, you’ll first want to cut your paper so that the width of the paper is about 2” shorter than your dowel rod.   Next, go ahead and fold down the top edge of the wall hanging (approx, 2”).  This will serve as your loop for inserting your dowel rod.  Wait to tape down the flap until the very end.

    Bonnie_Blog3_Pic3

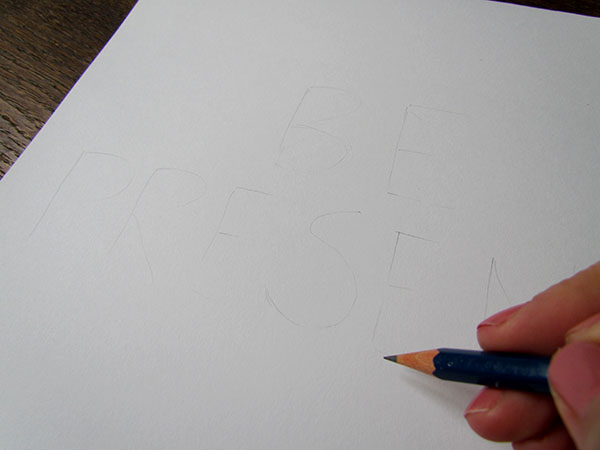
    Flip your wall hanging over, so that you are now working on the front side of the paper. Decide your message, font, and layout, and lightly sketch out the words on your paper using a pencil.

    Bonnie_Blog3_Pic4

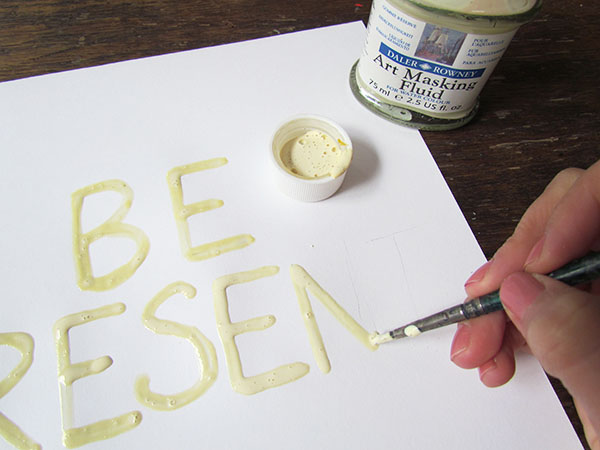
    Next, grab your old brush.  Working quickly, apply the masking fluid over your penciled-in letters.  The masking fluid is basically liquid rubber.  It will be blocking, or masking, the watercolor.  It does dry fairly quickly, so you’ll want to work quickly and then immediately clean your brush after using the masking fluid, otherwise, you might have to throw away your brush.

    Let the masking fluid letters dry thoroughly.  It should dry darker, and you can test if it’s dry just by gently touching it.

    Bonnie_Blog3_Pic5

    Once the masking fluid has dried, you can add watercolor to your wall hanging.  In order for the letters to show up, you’ll need to apply watercolor on top of and around all the letters.

    Bonnie_Blog3_Pic6

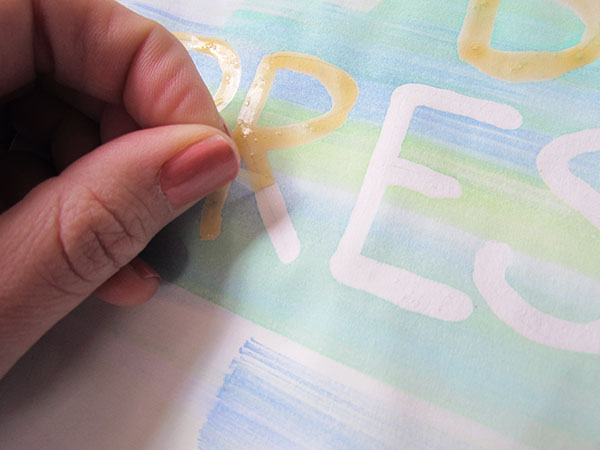
    Now for the hardest part … waiting!  The watercolor and paper must dry completely before peeling off the masking fluid.  Trust me, I have learned this lesson the hard way.  If it’s not dry, the paper will start to pull off with the masking fluid.  When you think it’s dry, you can begin to rub/pull the masking fluid off gently.  When all the dried letters are removed, you can erase any pencil lines showing.

    Bonnie_Blog3_Pic7

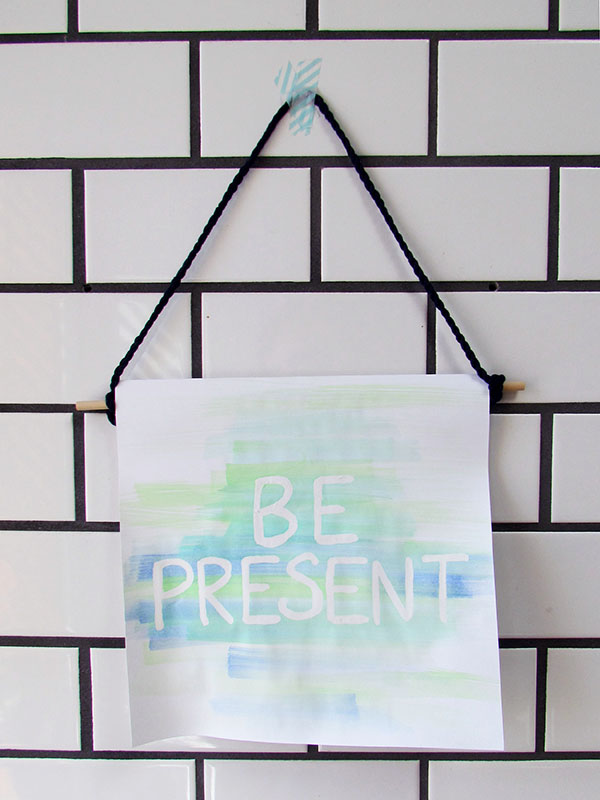
    Lastly, flip the hanging over and tape down the flap.  Insert the dowel rod.  Cut your rope or twine to desired length and tie to the ends of the rod.

    Bonnie_Blog3_Pic8

    Hang in a visible area, get back to work, and stay inspired.

    Bonnie_Blog3_Pic10

    —————————————————————————————————————-

    Bonnie Kaye Whitfield designs and screen prints home textiles + paper goods under the name, Bonnie Kaye Studio.  Products are created to inspire memories at home and around the table.  A donation is made with every purchase to help feed hungry Americans.
    www.BonnieKayeStudio.com


  • Christie’s Spaghetti Scarf Tutorial

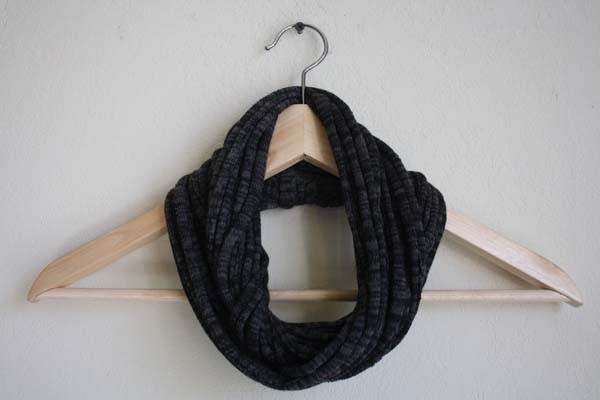
    cowl shotby Christie Sommers of West Oak Design

    This is a nice little project to use up scrap jersey knit fabric or an old t-shirt.

    You will need:
    *scissors OR (a rotary cutter, straight edge, & cutting mat)

    *A “tube” of jersey knit fabric. For a no sew version you can cut the tube from a t-shirt. To use a scrap of jersey knit fabric, cut a rectangular strip roughly 16″ x 42″ and sew the two short ends together to form a tube (folded and sewn it will measure 16″ x 21″)

    01

    Take your tube and cut into 1″ strips taking special care to leave 1″ uncut at the top.

    02 (1)

    03

    When you get to the last strip, cut all the way through. This strip will become the wrap to hide the seam or uncut section at the neck.

    04

    05

    Gather the scarf and hold at the seam/uncut section.

    06

    Tie the last strip to the seam/uncut section and wrap around until it is covered.

    07

    When you have wrapped all the way to the end of the seam/uncut section, lift the last loop and tie the end of the wrapping strip to it. Snip the remaining strip leaving about an inch.  Tuck the leftover inch under the wrapped section.

    08

    09

    10

    Now the fun part….

    Hold the wrapped section and pull each individual strip as far as you can.  You may need to sit on the floor and place the wrapped section under your foot as you pull and stretch each strip which forces the jersey knit fabric to close in on itself, hiding seams and leaving neat strands.

    11

    You’re done! Wear it long or loop it around for a nice looking cowl.

    ______________________________________________________________
    Christie Sommers is the designer and maker behind West Oak Design. She handcrafts small batch and one of a kind goods for home, women, and kids in her Wyndmoor, Pa studio. www.westoakdesign.com

  • Bonnie’s Pop Up Valentine Tutorial


    Bonnie_Blog1_Pic11
    Photos + Tutorial by Bonnie Kaye Whitfield

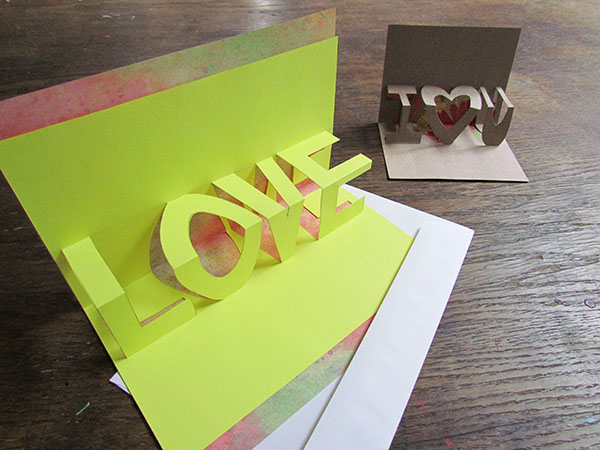
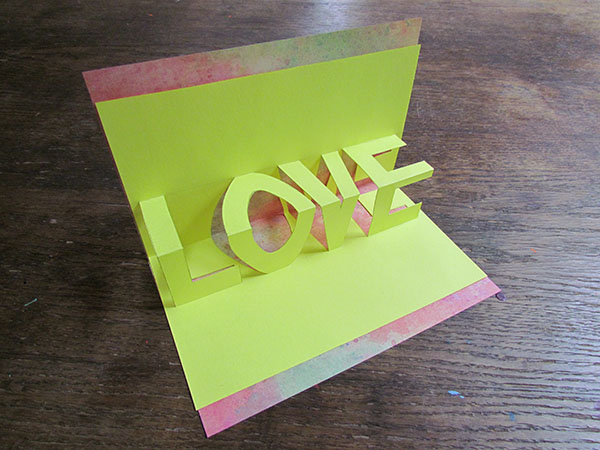
    With Valentine’s Day just a couple weeks away, you might be itching to design some handmade cards for your special valentine(s).  This tutorial will show you how to create a pop-up text card with your favorite little word or message.

    Bonnie_Blog1_Pic1

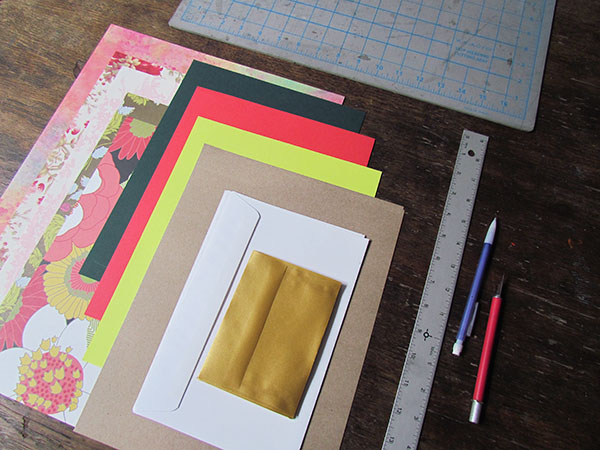
     You will need:

    • paper – both a variety of solid and patterned papers, cardstock is ideal
    • envelopes – if you plan on mailing your cards
    • self-healing mat or an old magazine
    • ruler
    • pencil
    • eraser
    • x-acto knife
    • glue stick (not pictured)

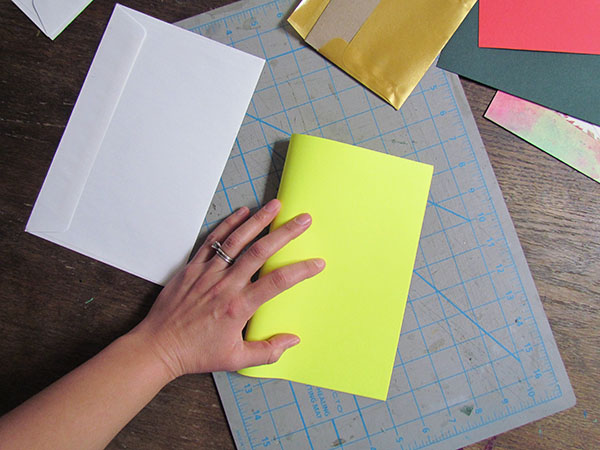
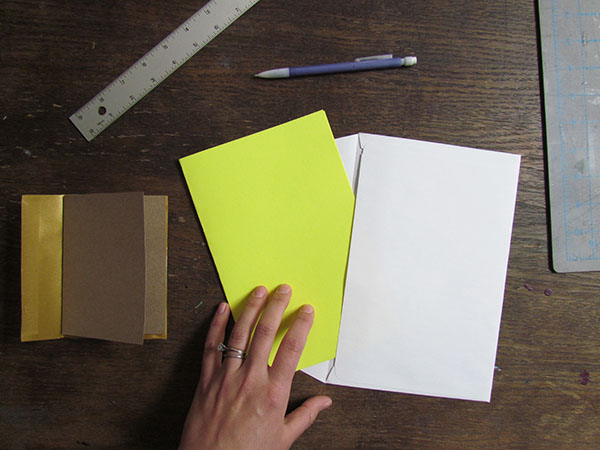
    Bonnie_Blog1_Pic2First, take a solid-colored piece of paper and cut + fold to a card size so that it fits in your envelope.  If you are not mailing it or don’t have an envelop, then simply fold your paper and you can cut the card down to size later.
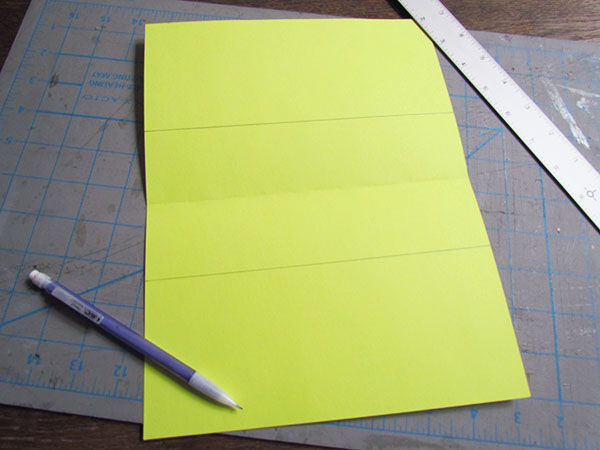
    Bonnie_Blog1_Pic3

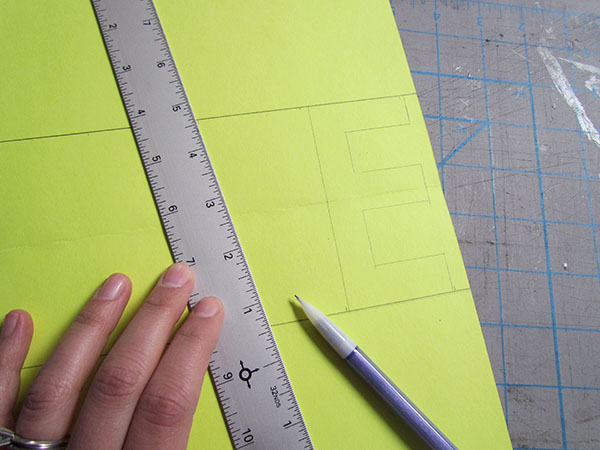
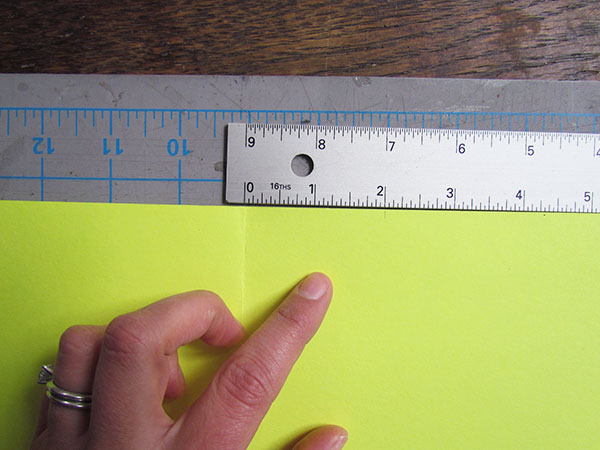
    With your card open, measure 2” from the fold on each side of the fold crease and on each end of the card, and mark with your pencil.

    Bonnie_Blog1_Pic4

    You will connect your two marks on each side of the fold crease.  Feel free to make this line very light, as you will later erase it.  This will serve as the guideline for the top and bottom of your text.  You can also make the measurements closer or further away from the fold depending on how tall you want your letters, but make sure that the fold crease is always in the center of your two pencil guidelines.

    Bonnie_Blog1_Pic5

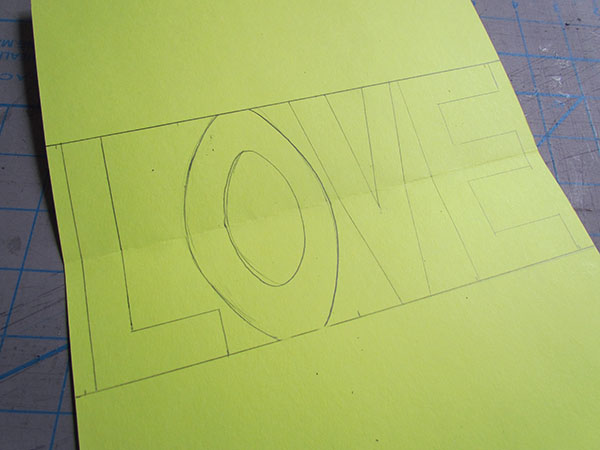
    Next, begin to draw your text in block letter form, making sure that there is space between all letters and the edges of the card.  Draw your letters so that they touch both the top and bottom pencil line, with the center of the letter falling on the fold crease.   If you are using any rounded letters, make sure that they still have a solid connection to the top and bottom pencil guideline (see my “O”).

    Bonnie_Blog1_Pic6 Bonnie_Blog1_Pic7

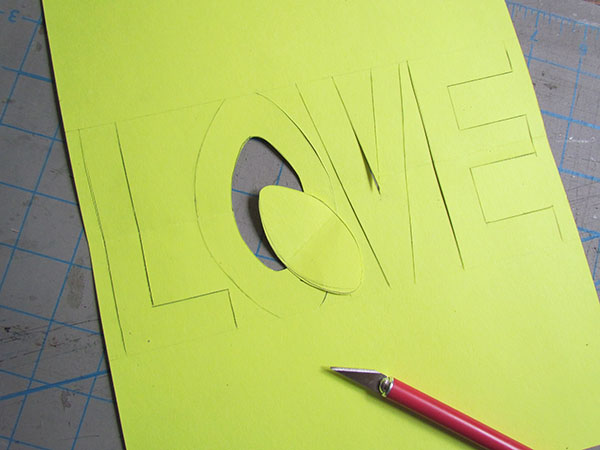
    Once you have drawn out your text, grab your self-healing mat and x-acto blade and begin to carefully cut on all the text lines except the bottom and top lines.  You are not cutting out the letters, just the edges.  If you letter has an enclosed space (like my “O”) then the center will cut out entirely.

    Bonnie_Blog1_Pic8

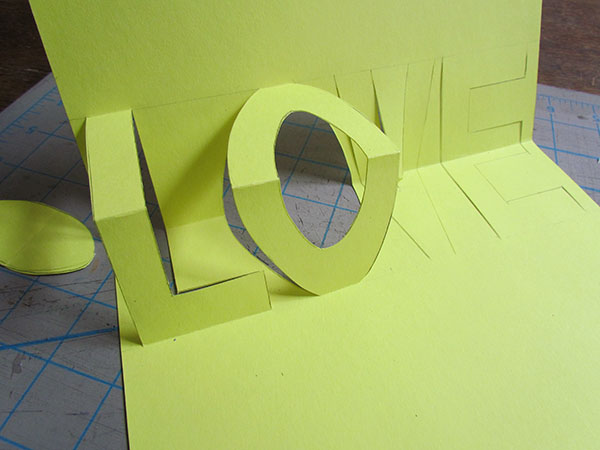
    After cutting, you will refold your card.  One letter at time, you will slowly “pop-out” the letters by reversing the center fold crease and gently folding along the top and bottom line of each letter.

    Bonnie_Blog1_Pic9

     Lastly, when you have finished adjusting all your letters, feel free to erase any pencil lines still showing.  Take a patterned piece of paper or a contrasting solid paper and play around with folding it and adding it to the backside.  At this point you can adjust the overall size of your card if you like, allowing more or less of the second paper to show.  Feel free to glue the two pieces together – just make sure that you don’t glue down any of your letters.

    Bonnie_Blog1_Pic10

    Now you can go wow your sweetheart with your new pop-up skills!  Happy Valentine’s Day, everyone.

    —————————————————————————————————————-

    Bonnie Kaye Whitfield designs and screen prints home textiles + paper goods under the name, Bonnie Kaye Studio.   www.BonnieKayeStudio.com


  • Christie’s Paper Garland Tutorial

    garland2Tutorial + Photos by Christie Sommers

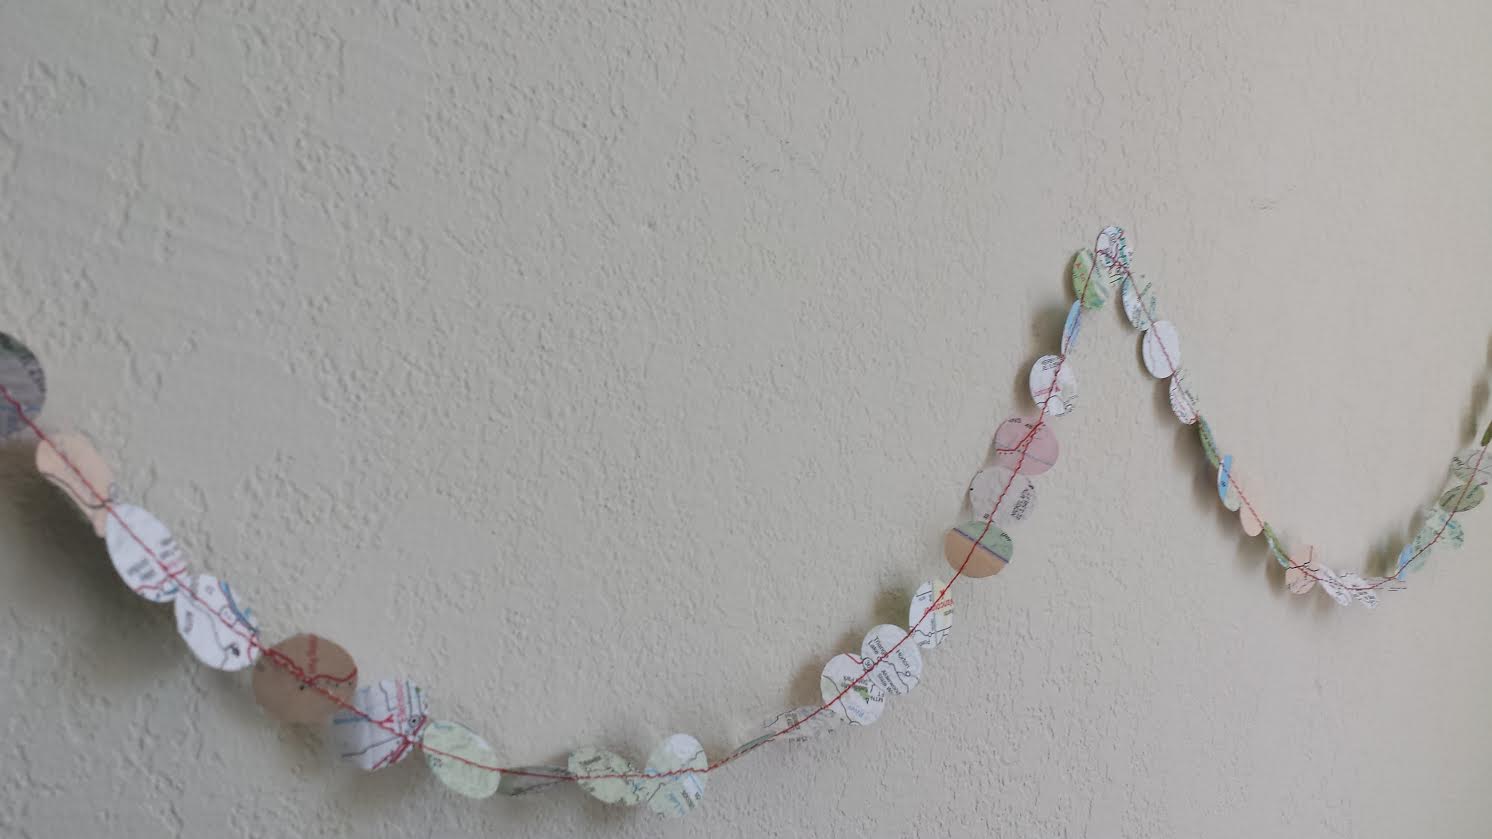
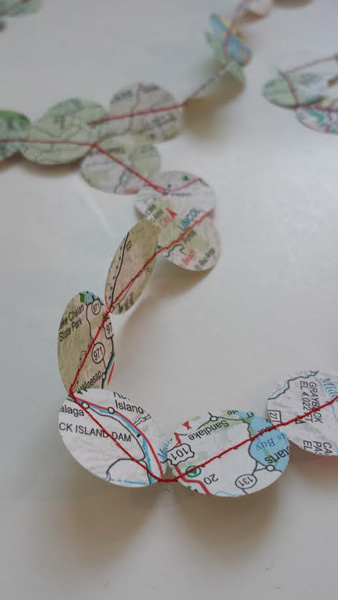
    Try this inexpensive and easy tutorial to spruce up your place or decorate for a party. Paper garland is a great way to reuse old travel maps. You can also use colored or decorative paper purchased at your local craft shop.

    You will need:

    *paper….at least the thickness of printer paper, newspaper may be too thin.

    *a sewing machine set to straight stitch, threaded in color of your choice

    *scissors OR (rotary cutter, straight edge, cutting mat)

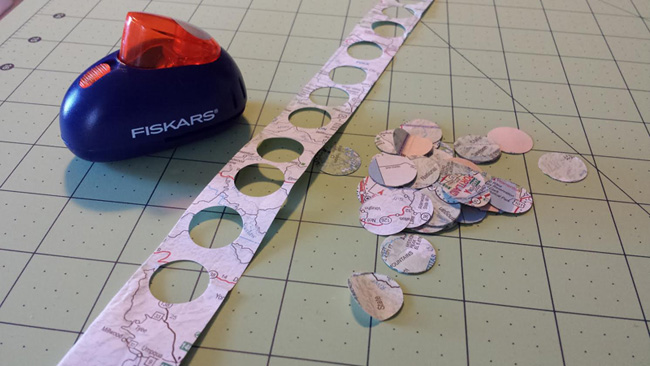
    *a paper punch (I used a Fiskars 1/2″ paper punch) You can get creative with a vast assortment of paper cutter shapes found at your local craft store in the scrapbook section. Don’t go with anything smaller than 1/2″ because it will be difficult to feed through the sewing machine.

    Supplies

    Start by cutting your paper into strips. I cut mine into 1″ strips. Just be sure your strips are larger than your paper punch shape.

    cutting

    Go nuts punching out your shapes.

    punch

    Do a little math to find how many circles you will need to make the length of garland you want. In my case (2) 1/2″ circles equals roughly 1″ of garland.

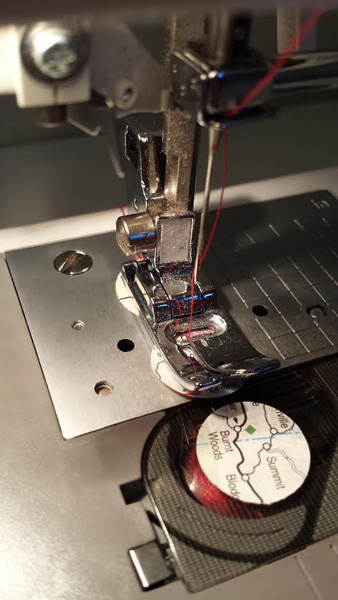
    With your sewing machine set to straight stitch & threaded in the color of your choice, begin feeding each circle under the presser foot.  The feed dogs will take it from there. Have a pile of circles very close by and place one circle right after the other without overlapping.

    stitch

    Before you know it you will have yards and yards of garland!

    garland 3

    To store: you can carefully wrap around a piece of cardboard until you are ready to use..

    Enjoy!
    ——————————————————————————————————————-
    Christie Sommers is the designer and maker behind West Oak Design. She handcrafts small batch and one of a kind goods for home, women, and kids in her Wyndmoor, Pa studio. www.westoakdesign.com


  • Make This: Conversation Heart Pin DIY

    I love conversation hearts! I dreamed up this little DIY to make your own out of sculpey for your friends or sweetheart!  My husband tried to eat one this morning, so that means they look pretty close to the real deal, right?

    Step 1: Gather your supplies
     You will need the following:
    Sculpey in pastel colors
    2 sharpie fine point markers in red or pink
    a little heart shaped cookie cutter (i found this in the baking section at AC Moore)
    a pack of pin backs (make sure they are small enough to fit on the back of your heart)
    Jewelry + Metal Glue (also from AC Moore, any type will do)
    a rolling pin or as you can see, I used a fat knitting needle (whatever works!)
    a small sheet of sandpaper – a nice light grit

    Roll out a piece of your clay evenly and not too thin!  Mine was probably around an 1/8″ thick.

    Now cut out your little hearts with your cookie cutter!  No worries if they don’t come out perfect, you can sand them smooth after baking.

    After you’ve cut out your desired amount of hearts, gather them up on a baking tray or piece of foil and stick them in your preheated oven.  Bake at 125 for 15 mins (or whatever it reads on your sculpey packaging).  Remove from oven and let cool before handling.  Sand the edges, front & back to remove imperfections.

    Grab your sharpie (make sure it is permanent b/c otherwise it will smear) and write in your favorite sayings!  This is definitely the fun part. I kept it somewhat sweet and PG-13 for this post, but I did have fun writing in some really naughty ones!  I practiced my handwriting on paper first, cuz I’m a dork.  They didn’t all come out perfectly but that’s okay – it gives them character!

    Next you will glue on your pin backs.  You need just the tiniest dot of glue on the back.  Let them dry overnight before handling.

    All finished!  They make cute and easy v-day gifts!  I pinned this one to my hubby this morning after he tried to eat it.  As tasty as they look, don’t eat them.  You’ll die.

    I hope you enjoyed this post!  Feel free to share but please credit me and link back to our site.

    If you plan to come to our Crafty Hearts Party on Valentine’s Day, I’ll have some blank ones of these for you to customize and take home.  xo.

    Copyright 2014, Megan Brewster / Art Star / All Rights Reserved.

The owner of this website has made a commitment to accessibility and inclusion, please report any problems that you encounter using the contact form on this website. This site uses the WP ADA Compliance Check plugin to enhance accessibility.