Photos + Tutorial by Bonnie Kaye Whitfield
Sometimes everyone needs a little pick-me-up, especially in the studio or office, where it’s easy to get overwhelmed with projects and deadlines. These simple inspirational wall hangings combine the magic of masking fluid and watercolor to create your own, personalized message that will keep your chin up and head high.
You will need:
- white or cream cardstock or smooth watercolor paper
- pencil
- art masking fluid
- old, thin brush (one that you don’t mind tossing in the trash after use)
- watercolor
- watercolor brushes
- container of water
- wooden dowel (optional)
- heavy duty tape or hot glue gun (optional)
- rope or twine (optional)

As you gather your materials, make sure you have thick, smooth paper to work with; any paper that is “soft” or textured will not work well with the masking fluid. Also, note that the last three materials are optional and needed only if you want to hang your message as pictured. Otherwise, you could simply cut your wall hanging to size for a frame or pin directly onto your wall.
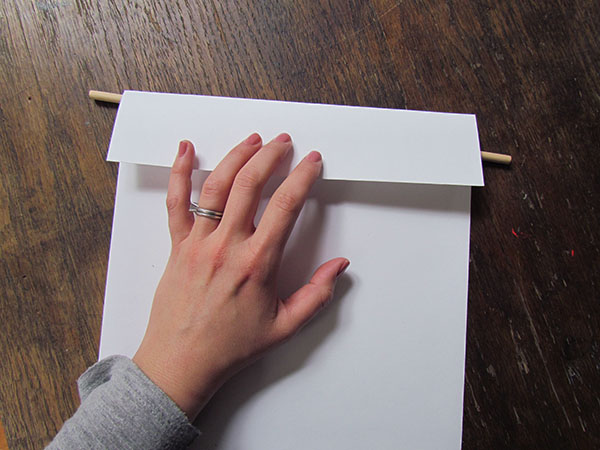
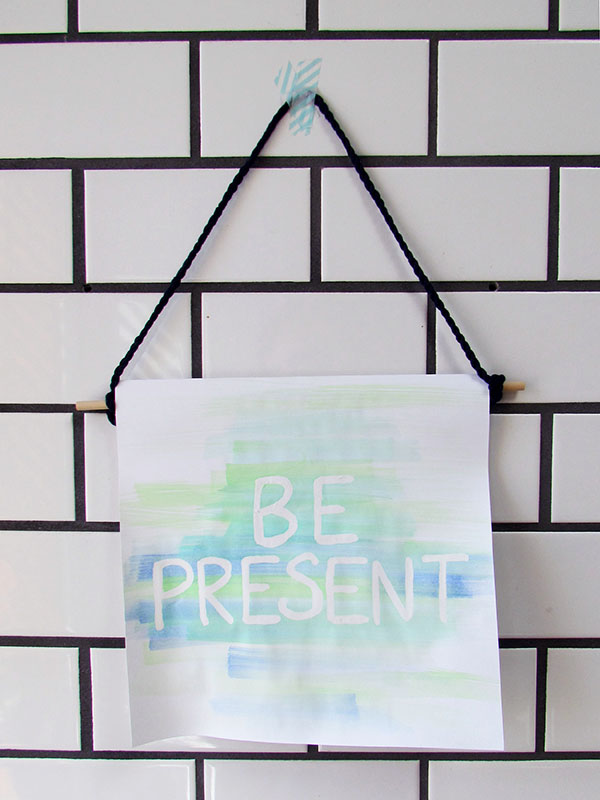
If you want to hang using a dowel rod, you’ll first want to cut your paper so that the width of the paper is about 2” shorter than your dowel rod. Next, go ahead and fold down the top edge of the wall hanging (approx, 2”). This will serve as your loop for inserting your dowel rod. Wait to tape down the flap until the very end.
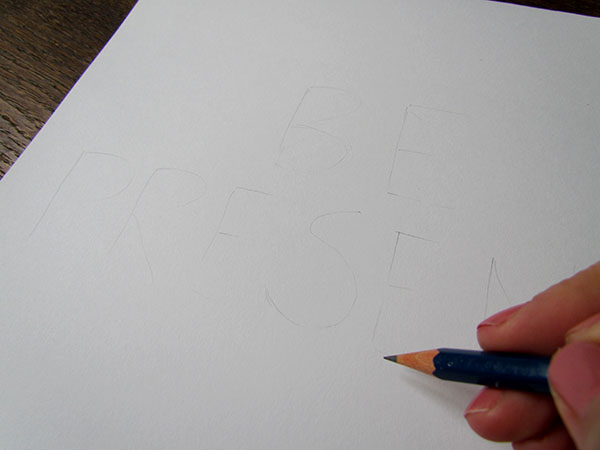
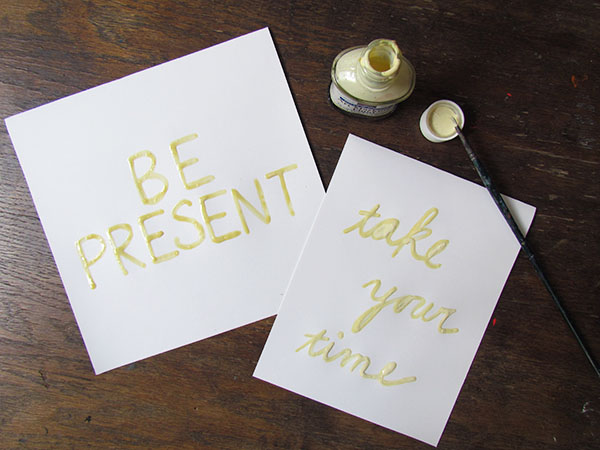
Flip your wall hanging over, so that you are now working on the front side of the paper. Decide your message, font, and layout, and lightly sketch out the words on your paper using a pencil.
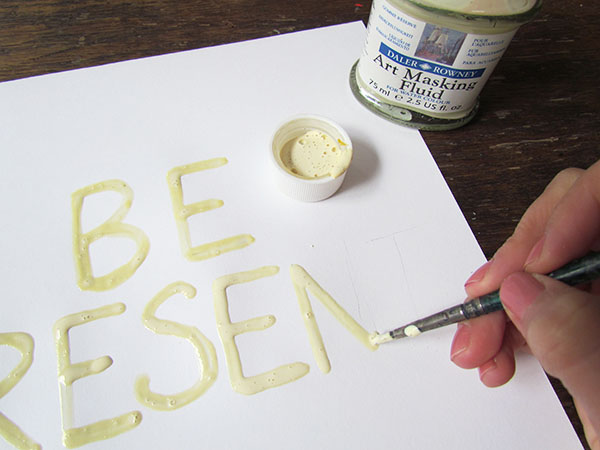
Next, grab your old brush. Working quickly, apply the masking fluid over your penciled-in letters. The masking fluid is basically liquid rubber. It will be blocking, or masking, the watercolor. It does dry fairly quickly, so you’ll want to work quickly and then immediately clean your brush after using the masking fluid, otherwise, you might have to throw away your brush.
Let the masking fluid letters dry thoroughly. It should dry darker, and you can test if it’s dry just by gently touching it.
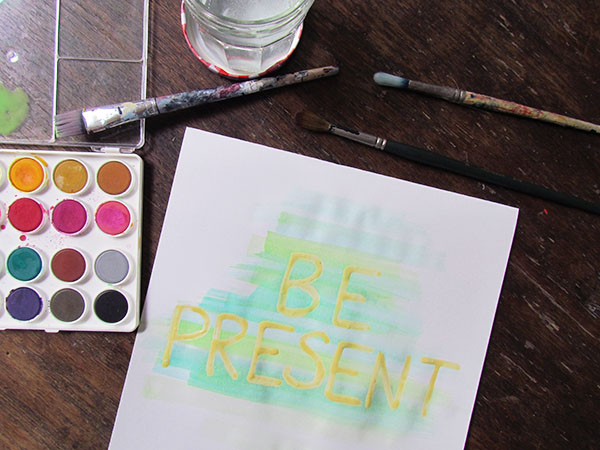
Once the masking fluid has dried, you can add watercolor to your wall hanging. In order for the letters to show up, you’ll need to apply watercolor on top of and around all the letters.
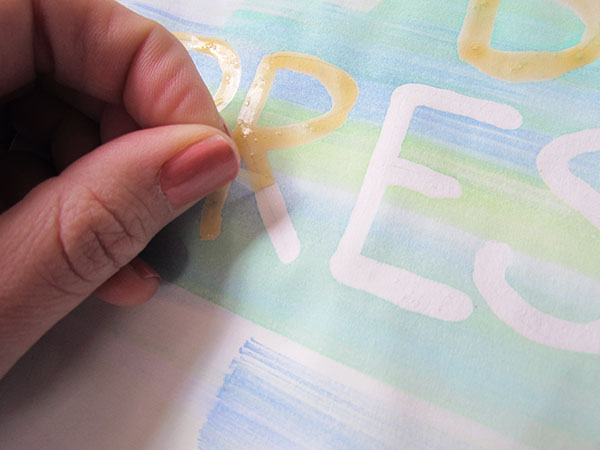
Now for the hardest part … waiting! The watercolor and paper must dry completely before peeling off the masking fluid. Trust me, I have learned this lesson the hard way. If it’s not dry, the paper will start to pull off with the masking fluid. When you think it’s dry, you can begin to rub/pull the masking fluid off gently. When all the dried letters are removed, you can erase any pencil lines showing.
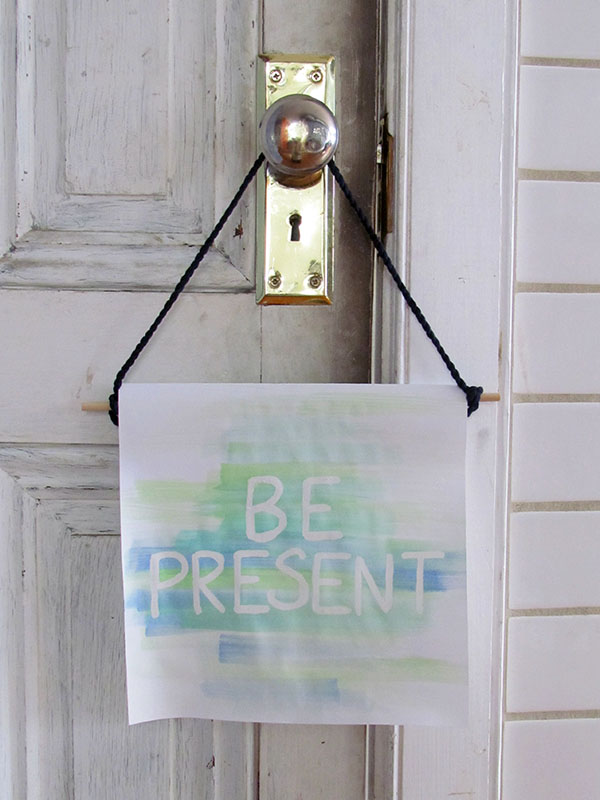
Lastly, flip the hanging over and tape down the flap. Insert the dowel rod. Cut your rope or twine to desired length and tie to the ends of the rod.

Hang in a visible area, get back to work, and stay inspired.
—————————————————————————————————————-
Bonnie Kaye Whitfield designs and screen prints home textiles + paper goods under the name, Bonnie Kaye Studio. Products are created to inspire memories at home and around the table. A donation is made with every purchase to help feed hungry Americans.
Leave a Reply