Tag: pottery

  • Meet The Maker: Monique Platt from DuTill & Daughters

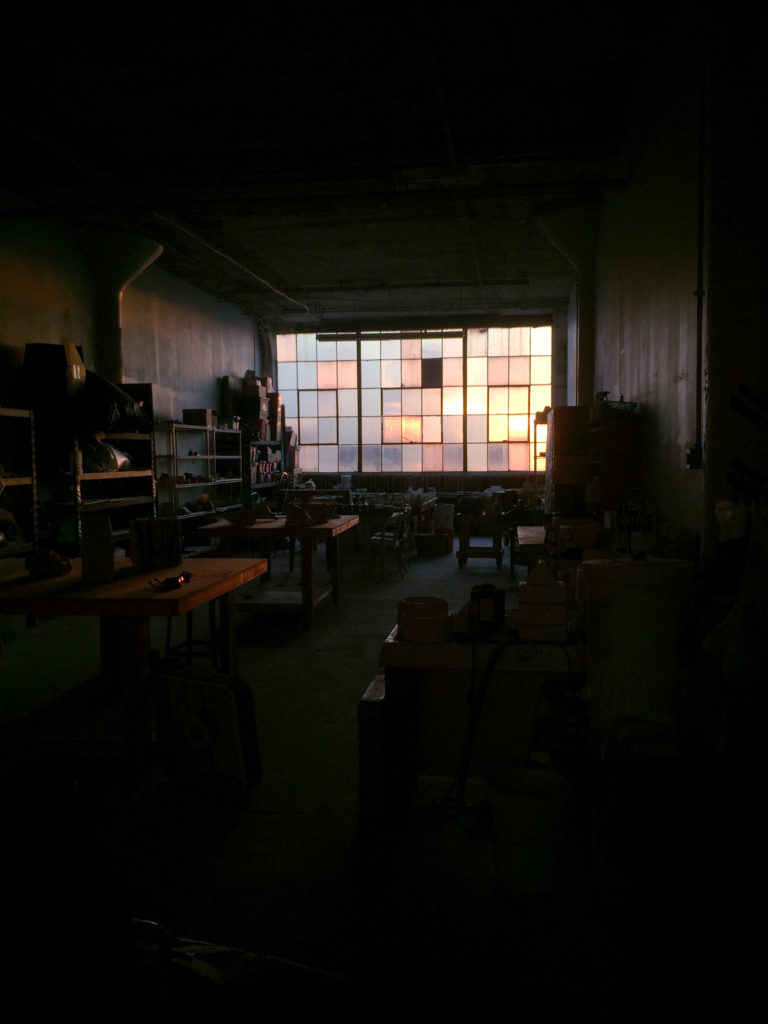
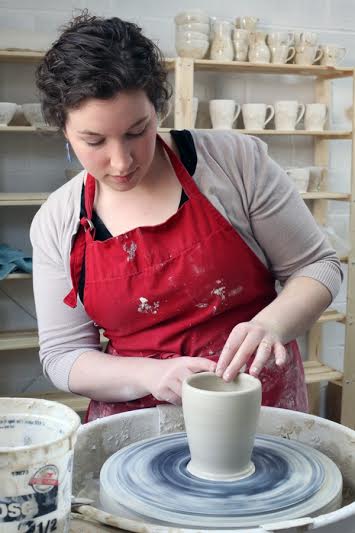
    One of my earliest memories is the smell of gold luster, the tiny jar of minerals sitting on my mother’s studio table (which also passed for our dining table at the time). She was a china painter when I was young, and I’m sure she was frustrated when I got into her precious supplies, but I loved poking through the tiny vials of pigments and oils. So it’s always been a bit surprising to me that I didn’t start working with clay myself until I was in college. Once I did, there was never another medium that felt so naturally like “home”. My father was, among other things, a carpenter at heart, with a full wood shop in our basement, and the ability to execute anything that we women in his life could dream up. Between the two of them, I grew up with a solid love of building and making.

    image 5Once I graduated with my Fine Arts degree from The School of the Art Institute of Chicago (SAIC), I struggled a bit to find footing as an artist trying to make a living. This was before the days of Etsy, Instagram, and the amazing makers’ movement that’s happening now, and there was no real “career path” in ceramics unless you were into the nomadicness of applying for artist residencies. I spent some time working towards a Masters in the History of the Decorative Arts through the Cooper Hewitt National Design Museum, but as much as I love curating, that “publish or perish” environment of museum life didn’t feel like a good fit for someone whose hands itch to be creating. So I took a few years off from art and focused on making a living until the timing was right. Once Etsy emerged onto the scene, I opened a shop with my opposite-coast sister, and between the two of us we started building a small but loyal following. Eventually, her military life took her overseas, and I took over running the shop solo. That was almost 4 years ago. In the time since that change, the focus of the shop has become entirely ceramics. This past year or so I’ve really pushed myself to create a cohesive body of work, focusing on the level of craftsmanship in each piece, and making sure that when viewed together, the entire collection is recognizably DuTill & Daughters.

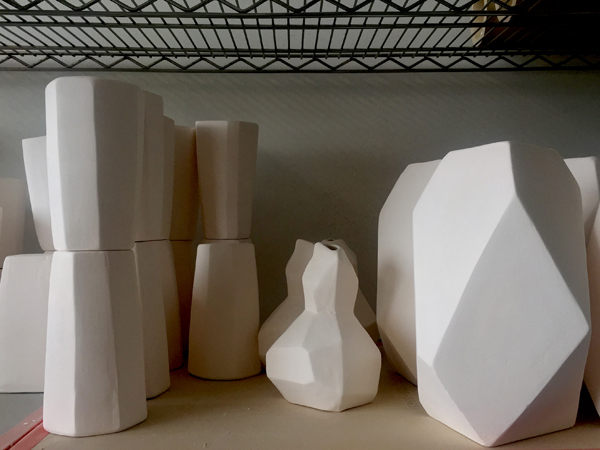
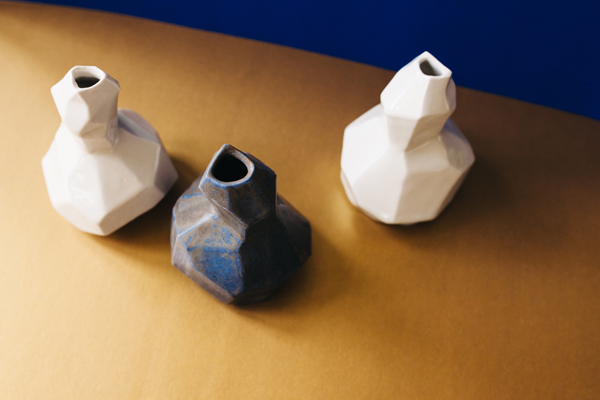
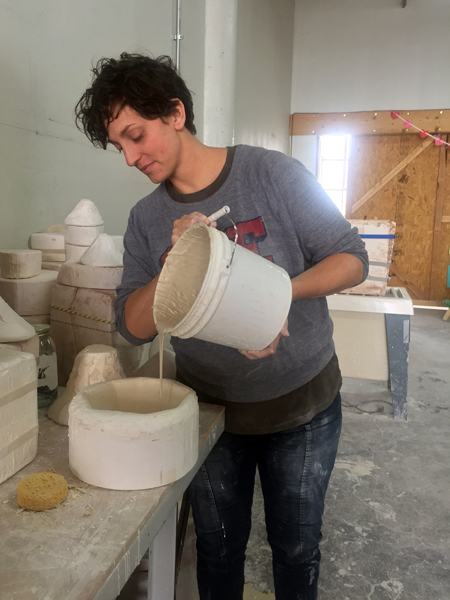
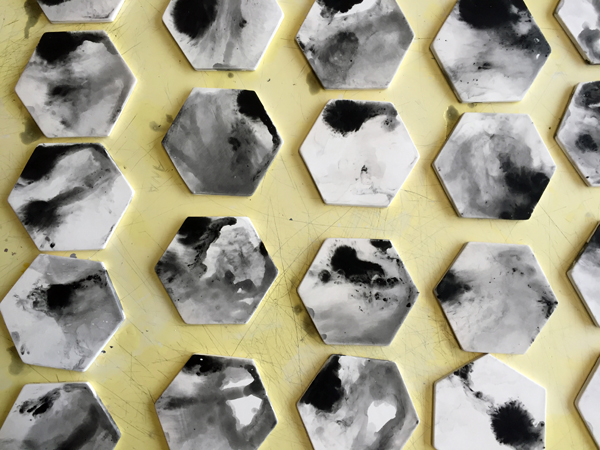
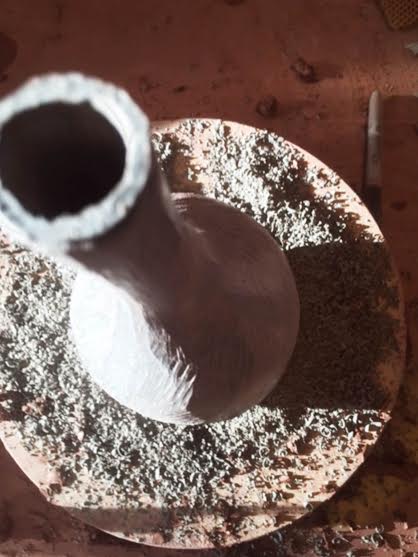
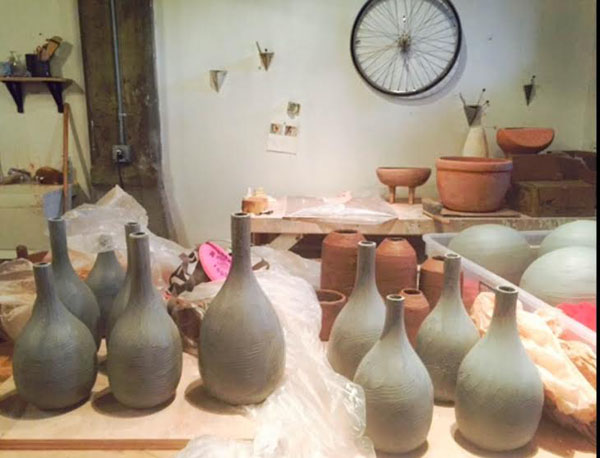
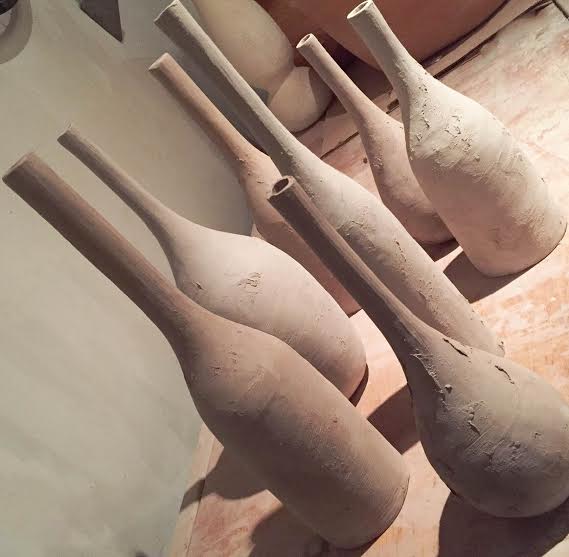
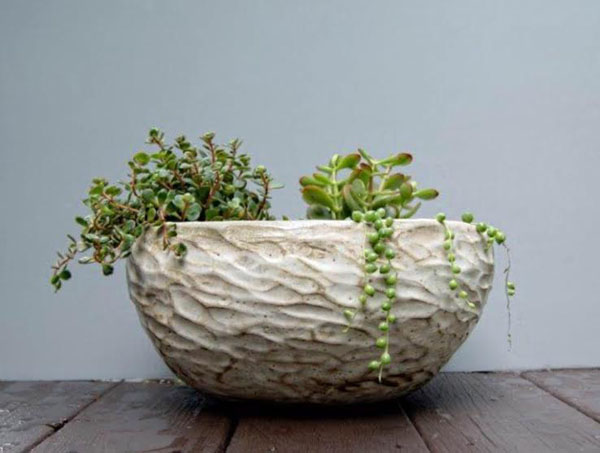
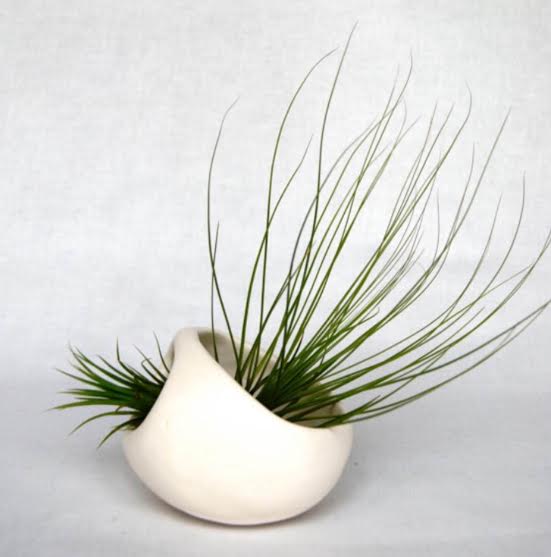
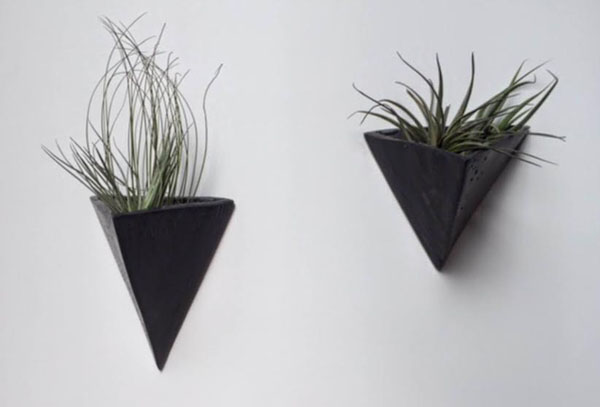
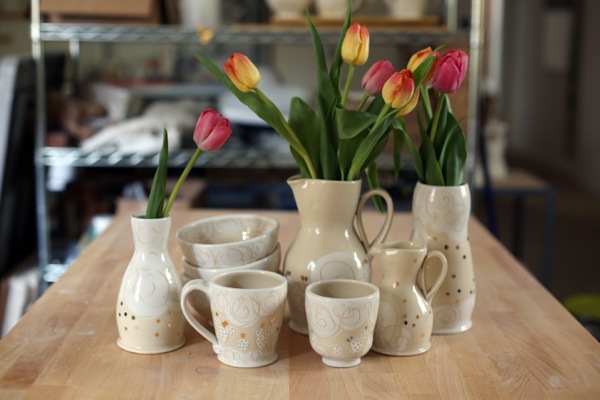
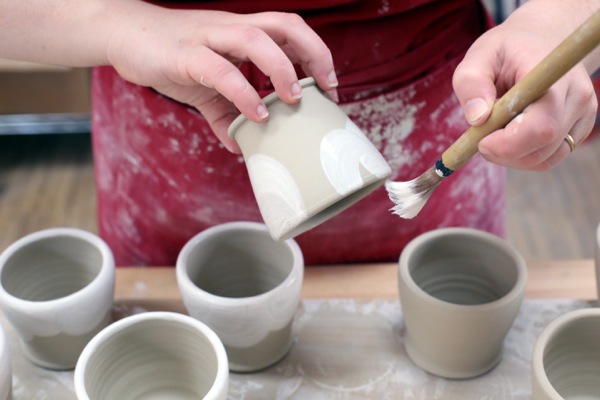
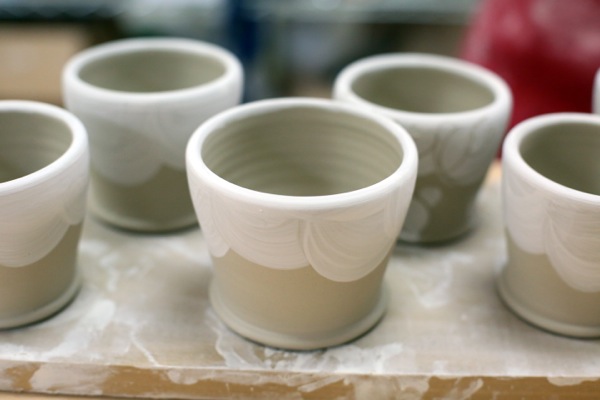
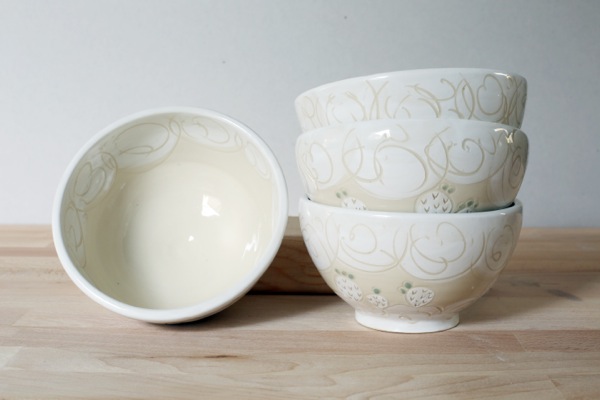
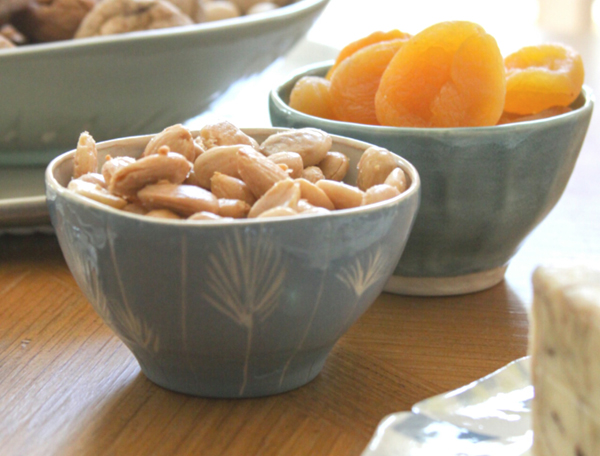
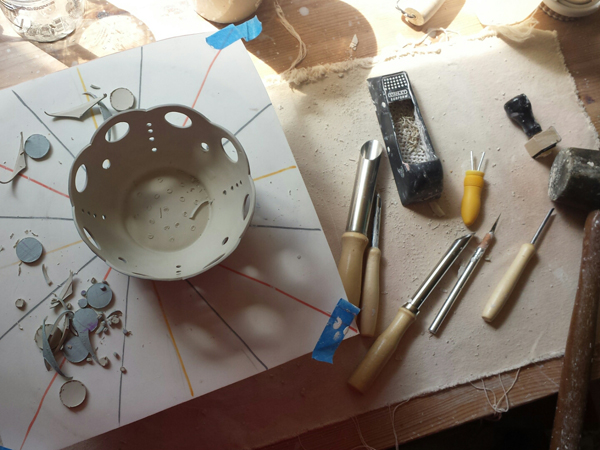
    I was lucky enough at SAIC to work with instructors who were well-versed in nontraditional approaches to clay, so slipcasting is a regular part of my process.  You’ll see repeated shapes throughout the collection, but no two pieces are identical, even if they have similar patterns. With the slipcast pieces, I’ll start out by making a mold of the shape I want, then pouring multiple layers of hand-colored slips (liquid clay) into the molds. Once the pieces come out, I alter them by piercing or carving the surface to reveal the interior colors. Sometimes the rims are smooth and even, like the drinkware, and sometimes I’ll scallop the rim like you’ll see on the berry bowls and colanders.  I use a combination of glazes that complement the colored clays, and leave some exterior surfaces unglazed so you can experience the buttery-smooth texture of polished porcelain. All of my work is glaze-fired to Cone 6, which is a mid-range ceramic temperature, about 2260°F.

    image1 image 6 image 7
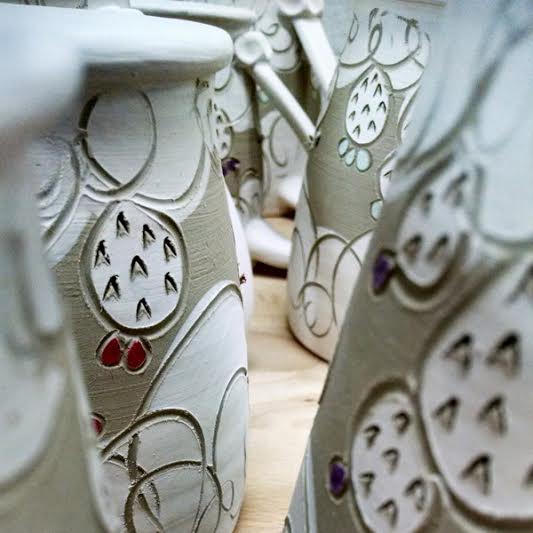
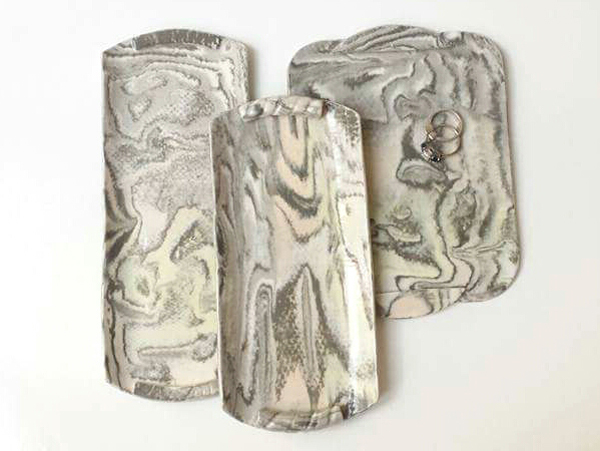
    The other main technique I use is called Nerikomi. Nerikomi (this term is used for hand-built work) and Neriage (for wheel-thrown work) are processes that involve stacking and layering colored clays to create intricate patterns. It can be a bit complicated because your clays need to have a compatible moisture content or they’ll split and crack during the firing process, but the intricate surfaces that come through this way are like no other process in ceramics. Nerikomi is perfect for making plates and platters, and I will sometimes use this technique for bowls. If you were to break one of these pieces in half, you’d see that the colors and patterns are all the way through the clay, not just sitting on the surface. I love how I can roll, stack, texture, add colors, paint on thick layers of slip, roll again, and come out at the end of the day with these crazy beautiful designs that I could never have drawn out on paper. The three jewelry trays below all came from the same Nerikomi block, and you can see how much variety there is from a single block. It’s a process that allows your hands to really be felt in every piece. The Nerikomi pieces are finished in clear glazes with the occasional colored accents, which allow the patterns to shine through.

    image2
    image 3 image 4———————————————————————————————————-

    Monique
    Monique Platt is the designer and maker behind DuTill & Daughters Pottery and has been working with clay for the better part of 20 years. She lives in Cherry Hill, New Jersey with her super-tall, bearded husband, their two astonishing girls, and studio pup/escape artist Nyx. When she isn’t in the studio, Monique is probably soaking up other people’s art, listening to as much music as possible, or eating pie. Maybe cake. Sometimes ice cream. You can see more of her work at dutillanddaughters.com, and on Facebook and Instagram @dutillanddaughters.

    Photo credit: Monique Platt and Renee Zublic.

  • Meet The Maker: Lauren Herzak-Bauman of Lauren H-B Studio

    Hi! My name is Lauren and I make functional ceramics under the name Lauren H-B Studio. I grew up in a suburb near Cleveland, Ohio and always loved when my dad took me to the city. I loved visiting the Old Arcade with its beautiful wrought iron architecture and glass ceiling and window-shopping at all the small businesses that called this place home. My love of Cleveland and its architecture grew to include the century-old warehouses and factories that are found all over the city. My studio is housed in one of these old buildings, one that used to make electric cars at the turn of the century.

    1

    Clay has always been my go-to material. My mother started a community art center when I was young and I learned to throw on a pottery wheel before I could drive. But I did not always make pots. While I started my college education making functional work, I went to graduate school in Minnesota to study ceramic sculpture (you can see that work at laurenhb.com). I moved back to Cleveland from Minneapolis about four years ago and started making pots to support myself until I could find a full-time job. I discovered a lot of support for my work in my hometown and now I am happily self-employed as an artist, working on both my sculpture and my functional work.

    2

    Drawing on my background in sculpture, my forms take inspiration from abstract art and architecture. For surface inspiration, I look to natural phenomenon, such as moving water, rock striations, and star clusters. I love making things that can be both beautiful and useful. I design pots that have multiple uses. My serving bowls serve as tabletop artwork when not in use, but are also food safe and great for passing food around the table.

    3

    Making ceramics is a multi-step process. I work with plaster molds made from original designs to create my forms. This allows me to make geometric shapes and to repeat the same shape with consistency. I pour a porcelain casting slip inside each plaster mold. The plaster absorbs the water from the slip and leaves a skin. After some time passes, I pour out the remaining slip. The remaining ‘skin’ becomes the ceramic object.

    4

    After each piece comes out of the mold, I refine the surface and add any necessary slip details prior to the first firing. After the first firing, I spend a lot of time working on the surfaces of each pot. I really love the glaze process! I enjoy layering colors and finding new ways to add surface to my pieces. After I finish glazing, the pieces go back in the electric kiln for a glaze firing. Some pieces will go in the kiln one more time, this time for a luster firing, which allows me to add a low temperature metallic surface to the pieces.

    5

    This is my first year traveling to Philly for Art Star Craft Bazaar and I couldn’t be more excited to share my work with a new audience. I’m bringing lots of new pieces and a new color palette to the show. Please stop by Booth #55! And thank you for shopping small business and handmade!

  • Meet The Maker: Tara Vaughan Ceramics

    Hey friends! I am starting up our Meet the Makers series again. We will be featuring posts by a selection of our new Art Star Craft Bazaar Vendors every Tuesday and Thursday each week, leading up to the show on May 7th + 8th. We hope you enjoy these profiles as much as we do. First up is new Art Star Craft Bazaar, Tara Vaughan. – Megan

    My name is Tara Vaughan and I make pottery here in Philadelphia.

    image1

    image2

    I was first introduced to clay in freshman year of college at Saint Joseph’s University in Philadelphia. I took the class as an elective, but quickly fell in love with it. I immediately changed my major from Insurance to Ceramics and continued to work in pottery and sculpture throughout my time in undergrad. After graduating in 2014, my friend Morgan and I decided to get a studio together in the Crane Arts building. We were very fortunate to have such amazing friends and mentors that were willing to donate a lot to help us get on our feet. We were given hundreds of pounds of clay, tables, molds, tools, and the best of all, even a 35 year old kiln. (Which after being refurbished, works like a charm!)

    image3

    I hand build all of my work. Pinching and coiling are my most used methods, while I do slab work for more geometric pieces. Almost all of my work is made using the same technique, but usually with different results. Bottles are my favorite piece of pottery to make, because they never turn out the same. I always have an idea of how I would like it to look, but the result is always very different, sometimes better. Each form is new and unique to the one made before it.

    image4
    image 5
    image6

    I love plants, and decided to make a planter for every type of plant lover. Small to large, indoor to outdoor, hanging or sitting, I have got one for you.

    image7 image8 image9

    I am very excited to be a part of ASCB this year. Please come and say hi! I would love to meet you.

    www.taravaughanceramics.com
    Find a selection of Tara’s work year round in our Shop

  • Meet New ASCB Vendor Eve Mobley of Cedar + Fawn

    SONY DSC
    I’m Eve Mobley, the illustrator working as Cedar + Fawn, based in Baltimore. I studied digital illustration in my undergrad, it wasn’t until I took an internship as a display artist at Anthropologie that I really fell in love with household objects as art. Cedar + Fawn actually began as my Senior Thesis project, and I’ve just kept it going ever since!

    SONY DSC

    I have a love affair with the romanticized image of the 50’s-era housewife, which is why so much of my work is geared towards the domestic setting, specifically the kitchen and dining. My illustrations are also influenced by feminine fashions, Parisian imagery, and colorful Scandanavian design.

    SONY DSC

    I collect all my “blank” dishes from restaurant supply wholesalers, but occasionally I’ll score a vintage piece or two and do a special limited edition design. I’m very picky about the shape and form of the dishes I will buy to paint on. Because my illustrations are so minimal, every detail of the final object—how it looks on the table and how it feels in the hand—is extremely important.

    SONY DSC

    First I mark guides on the ceramic using a soft pencil or carbon paper, and then I use an overglaze technique to paint. As yes, I hand-paint each and every dish! Luckily, the more I repeat a design, the faster I get at painting it! After the paint is dry, the piece is fired again to set the paint and make the design permanent, food safe, and dishwasher safe. It’s just as important to me to make a functional piece as it is to make a beautiful one!

    Cedar_Fawn6

    More often than not, the illustration you see on a dish is a doodle copied straight from my sketchbook. I try not to make too many revisions from paper to plate, because that relaxed, lazy line of the original doodle is exactly what makes the image so charming! The warm and approachable personality of an airy doodle is the perfect complement to the solidity of a heavy ceramic dish.

    SONY DSC

    You can find my work for purchase online, as well as at all of the Charm City Craft Mafia’s shows. To see all designs past and present, and to take a peek at my 2D illustrations, check out evemobleyillustration.com!
    —————————————————————————————————————–
    Make sure to check out Eve’s work at our upcoming Art Star Craft Bazaar in Asbury Park on July 25th + 26th. This will be her first Art Star event!

  • Meet New ASCB Vendor, Julia Walther!

    Well hello there! I’m Julia Walther and I make pottery in Washington, DC.

    Image 1

    My journey with pottery began nearly six years ago during my senior year of college when my ceramics professor told us that clay can do anything, you just have to ask it at the right time. That mix of constraints and possibilities is a large part of why I’m so in love with ceramics.

    Image 2

    I throw almost all of my work on the wheel using a porcelaneous stoneware that’s a beautiful creamy color when fired. I then spend most of my time decorating those pieces with slips and colored underglazes and carving back through the layers to reveal the bare clay underneath. In the midst of those decorative choices, I’m constantly surprised by threads of ideas that can lead my work down completely new paths.

    Image 3 Image 4 Image 5

    The cacti decorations have come out of my appreciation of papercutting, and other folk crafts that use abstracted shapes to convey stories and show evidence of the human hand. I also really enjoy carving out the spikes!

    Image 6

    After the glaze firing, I’ll choose a few pieces to which I’ll apply metallic luster accents and do another firing specifically for that. So your pot may have had a trial by fire three times before it ends up in your hands.

    Image 7

    I work alongside about twenty artists working at Red Dirt Studio, a repurposed firehouse just outside Washington, DC. I love the community we’ve established through weekly seminar meetings and by sharing the building. It’s easy to accidentally isolate yourself as an artist, so I’m glad to have this flow of interesting people around my studio space.

    Image 8
    At the same time, this is also the first instance in my career where I’ve had freedom to call nearly all the shots. I want to spend the precious time I have in the studio actually making work and taking care of my body to prevent injuries from overwork. In the last year, that has meant switching to a commercially produced pre-mixed clay, and changing the firing temperature of my work so I can use electric kilns, which tend to be more compatible with an urban environment. Additionally, for the past three years I’ve been throwing standing up, which will hopefully prevent future back issues related to sitting and leaning forward (the worst possible position for your back!).

    Image 9
    Pots are special because they can be both a sculpture and a canvas. I’ve found a lot of joy in scribbling on the surfaces of my pots, freezing the movement of a hand in time. I’m excited about creating those juicy points of interest that ask you to turn the pot in your hands to soak up the details while you eat your meal or admire your flowers or engage with the piece in any other way. The last step of making pottery is getting it into the hands of the user, and that’s where a new adventure begins.

    This will be my first year at the Art Star Craft Bazaar, and I’m so looking forward to the show! I’d love it if you stopped on by Booth #59 and said hello.

  • Guest Post: Melissa Weiss Pottery


    We are thrilled to welcome new Art Star Craft Bazaar Vendor, Melissa Weiss, to our November 8th and 9th show at the 23rd Street Armory and as a guest writer on our blog today!  Melissa is a studio potter from Asheville, NC.  She digs all of her own clay off her land in NW Arkansas and each piece is made entirely by hand.  Enjoy her post about her work and process. Be sure to check out her website and her booth (#47) at our upcoming bazaar!

    Melissa Weiss in her studio

    About 6 years ago on a visit to my land in NW Arkansas I dug a bucket of clay out of the ground and brought it home.  I made a cup and fired it.  It withstood the firing but had some issues. On my next trip to Arkansas I dug a few hundred pounds.  I brought it back to my studio in Asheville, NC and started adding feldspars, sand and other commercially available dried clays.  I made about 13 variations of clay bodies incorporating my hand dug clay in different percentages.  I tested all of these variations with all of my slips and glazes and after hundreds of tests came up with a working clay body that was what I wanted based on functionality and aesthetics.  The clay I dug from land is 25% of the body and this is the clay I use to make every single pot.  The process is arduous but the reward is grand.

    About once a year I drive to the land I bought in 2002 with friends.  I was not a potter then.  We bought 75 acres of wild woods an hour from town.  This land is full of a beautiful iron rich, red clay. I dig about 1000 lbs on a trip and bring it home.  This will enable me to make 4000 lbs of clay.  I make clay at my studio in batches of 1000 lbs.  I put the Arkansas clay in a 55 gallon drum and add water.  I let it sit for a while and drill it up until it’s a slurry.


    Then I screen it to remove the big rocks and debris.  This now liquid clay is in a giant metal trough.  I then add all my commercial ingredients and drill it up.  At this point the clay is mixed and is the consistency of yogurt.  I remove this liquid clay by the bucket full into racks lined with old bed sheets.  The racks are basically wood frames with a chicken wire bottom.  These racks get stacked upon each other until they are all filled with the clay.  They will then sit for 2 weeks or more depending on the weather.  At this stage the water slowly drains through the sheets and screen and eventually I am left with a useable clay.

    the clay’s water slowly drains through bed sheets

    The reason I do this is not to save money on clay.  After all the labor and driving it costs much more than buying clay at the store.  I do this for many reasons.  The most basic is aesthetics.  The clay I make looks different.  It is imperfect and slightly varying.  Small rocks and bits of iron remain, which melt out in the firings and give the pots a raw, wild look. This clay also feels different.  It feels alive.  It has a character and a life of its own.  I also love the process of autonomy.  I like being involved in the making process from the beginning to the end.  The finished pot was made by me every step of the way.  It gives me a connection to my work I don’t think I would have if the clay was more easily come by.

    hand formed spoons made from Melissa’s own clay body

    I work out of an 8000 square foot warehouse in an industrial section of Asheville, NC between the railroad and the river.  It’s called SouthSide Studios which I founded in 2013. I run the studio which houses about 20 other artists working in a variety of media.  My studio hours are dictated by the fact that I have a 10 year old in public school.  I get to the studio by 8am, Monday through Friday.  I work until 3 most days and later when I have the opportunity.  I spend time there on weekends when I can.  On average I spend about 40-50 hours a week in the studio.


    I work in a rhythm. It starts with making clay, slips, glazes and washing ash for glazes.  I then make pots.  I usually have the pots I want to make laid out by weeks.  This is dictated partly by orders and deadlines.  This system seems to give me structure and keep me from becoming overwhelmed with too much to do.  For example, I will lay out the month of making by Week 1: slab pots, Week 2: mugs and drip cones, Week 3: pitchers and animal pots, Week 4 thrown bowls and teacups. This is never rigid and I ALWAYS make or do something new in every cycle.  When the making is complete I bisque fire all the pots. Then I glaze and decorate all the pots.  They are now ready for the final firing.  I fire the pots in a gas reduction kiln at the studio.  The firing lasts about 10 hours.  The kiln cools for a day and then I unload the pots.  All the pots get their bottoms sanded to make them smooth.  They then get washed and priced.

    Everyday I am in my studio I feel grateful and lucky.  So grateful that I do what I love for a living.  It takes a strict discipline and sacrifice of certain things but they are all worth it.  I will be making pots in my studio, listening to music with my dog and drinking coffee thinking – “I am at work right now!”  I work hard and it feels easy.

    Iron + White “V” Lidded Elephant Jar by Melissa Weiss Pottery

    Purchase Melissa’s work at our upcoming bazaar or on her website here

  • Spotlight on Audrey Cooper

    I will be posting a spotlight on each of the participating Farmhaus & Friends artists now through October 20th.  This first spotlight features potter Audrey Cooper.  We weren’t familiar with Audrey’s work until Ben introduced it to us and we are so happy he did!

    AUDREY O. COOPER (b. 1971) has been working with clay since 2005. Born and raised in Philadelphia, Audrey graduated with a degree in literature from the University of Pennsylvania and studied sculpture at the Pennsylvania Academy of Fine Arts. She has studied with potters in Maine and Pennyslvania, and worked for two years at The Clay Studio in Philadelphia. She lives and works in Northern Liberties.


    Audrey is interested in using local materials, creating as little waste as possible, and in the life cycle of materials. She embraces the unpredictability, combined with the control of craftsmanship, inherent in the ceramic process. For this project, Audrey made functional tableware, hand-thrown on her electric wheel. She fired one group of porcelain pieces in a wood-fired kiln, fueled by scraps from Ben McBrien’s woodshop. These pieces are unglazed, fired in the salt-chamber of the kiln, colored by the intense atmosphere created by wood fire. The other group was fired in her electric kiln. They are stoneware glazed entirely or partially with ash glazes she made by burning woodshop scraps, applied in combination with commercial glazes.

    Check out all of Audrey’s pieces from Farmhaus & Friends online here but if you can, please come and see them in person.  The photos do not truly capture the richness and beauty of the glazes PLUS they all feel great in your hands.

The owner of this website has made a commitment to accessibility and inclusion, please report any problems that you encounter using the contact form on this website. This site uses the WP ADA Compliance Check plugin to enhance accessibility.