Tag: craft project

  • Make This: Avocado Seed Dye Tutorial

    Photos and Tutorial by Christie Sommers

    In my last tutorial, I showed you one way to carve avocado seeds to make a pendant necklace. Today I will show you how to turn those failed attempts and carving scraps into a dye suitable for dying natural fibers like wool and cotton.

    This is a simplified method that will result in a subtle, warm pink/rust color. If you are looking for deeper color saturation, or if you require colorfast results for fabric that must hold up through multiple washing, you will need to use a mordant. I’m keeping it simple and will be using my dyed fabric to make zip pouches.
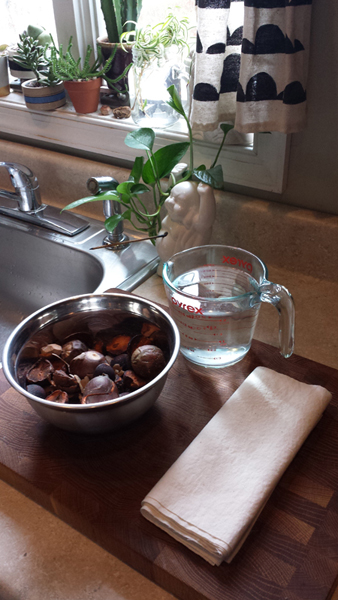
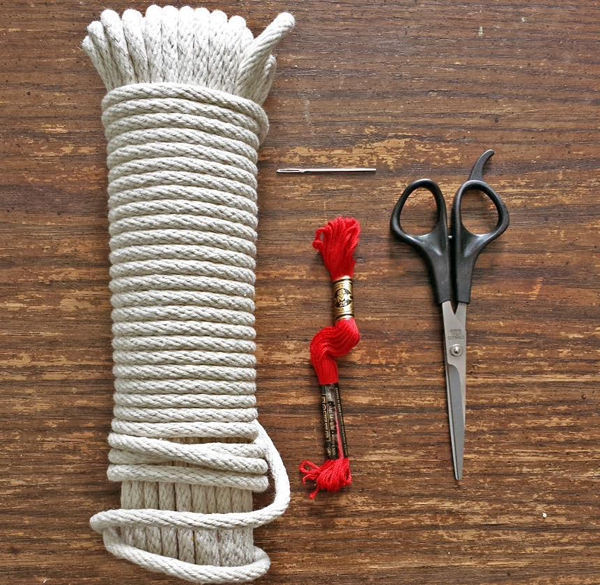
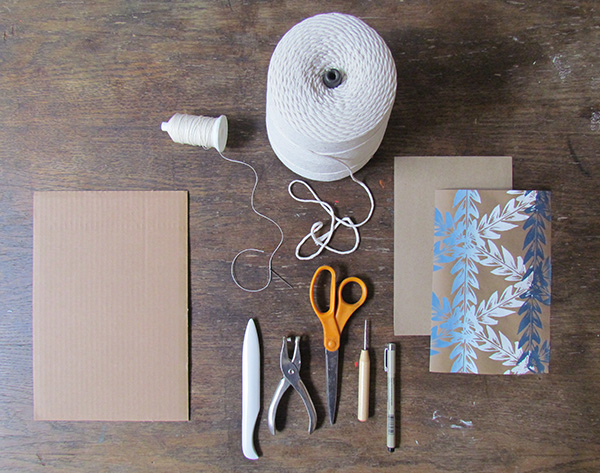
    You will need:
    – avocado seeds, carving scraps from last tutorial (I used about 2 cups)
    – 4 cups of filtered water
    – 100% natural fabric or yarn (synthetic fabrics will not hold the dye without a mordant) I used a half yard of 100% cotton fabric. As with any newly purchased fabric, you should give it a run through the wash.
    – fine mesh sieve
    – a bowl or container large enough to hold dye and fabric. Stainless steel is great for this, plastic will stain.
    1

    To make your dye:
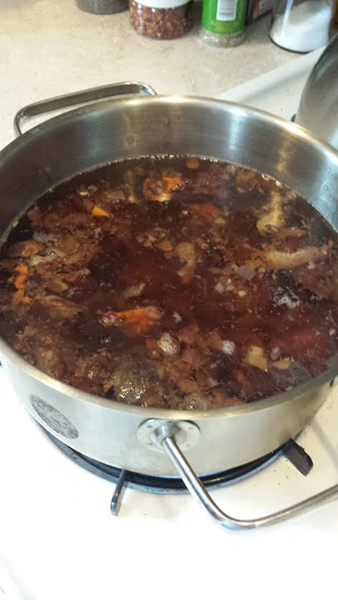
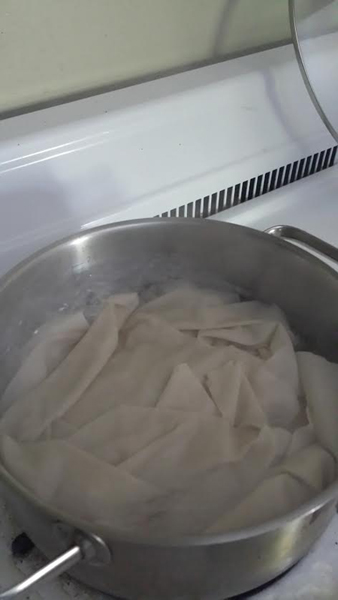
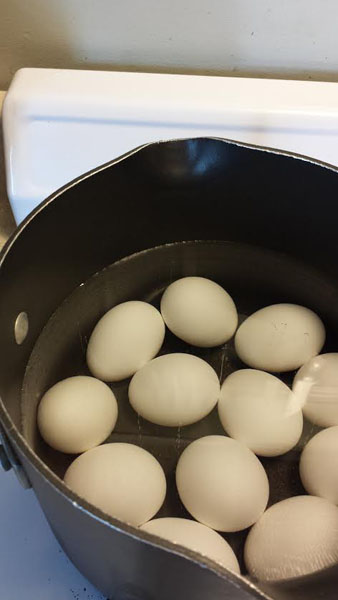
    Bring 4 cups of water to a boil, add avocado seeds and scraps. Cover lightly.
    Boil for at least 30 minutes. *note… the seeds have an astringent, cedar wood smell. You may want to crack a window or use the oven fan.
    I let my seeds sit in the water overnight in attempt to pull out as much color as possible. You can skip this step if you’re feeling impatient.

    2When you are ready to dye:
    Put your fabric into a pot and cover completely with tap water. Bring to a boil and let simmer for 5-10 minutes. This should strip away anything clinging to the natural fibers… (like soap residue or oils) and make it more susceptible to absorbing and holding dye.

    3

    Remove fabric from water and set aside

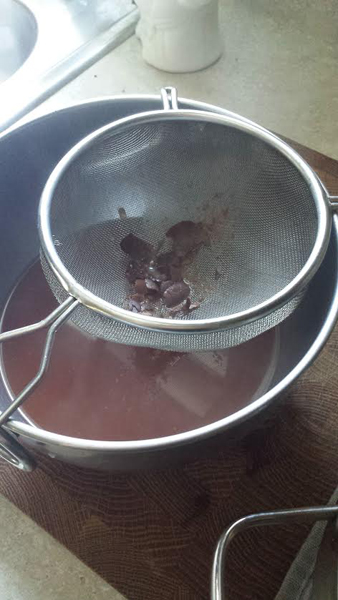
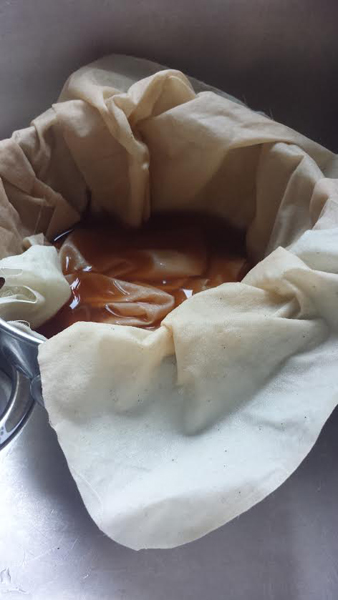
    Pour your dye through a fine mesh sieve to remove all seeds and bits. Submerge fabric into dye and let sit for at least 30 minutes. The longer it steeps, the deeper the resulting color.
    For a color gradient effect, try submerging your fabric for 10 minutes, pulling it out of the dye bath a few inches every hour for a few hours. I fully submerged a few pieces of fabric and tried a gradient effect with the others.

    45

    After dyeing:
    Taking note that your fabric will fade when it dries, remove fabric from dye bath when you have reached a desired depth of color.  Allow your fabric to air dry.

    6

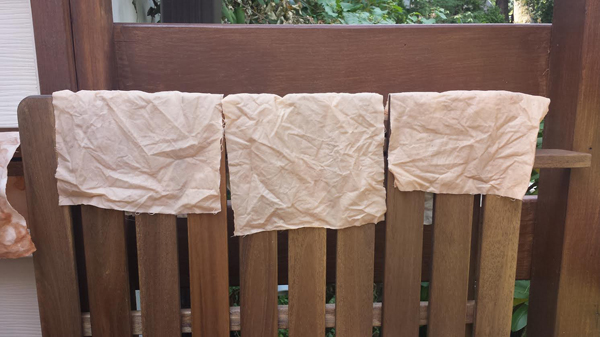
    After your fabric has completely dried, rinse it in cold water. Let dry again, and your fabric is ready to use!

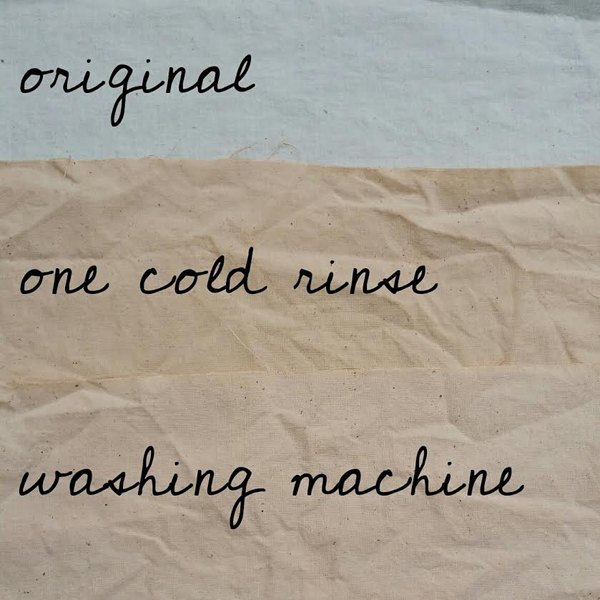
    Here’s a little color chart to show the results I got from rinsing in cold water once, and placing the other in a full laundry cycle.

    7

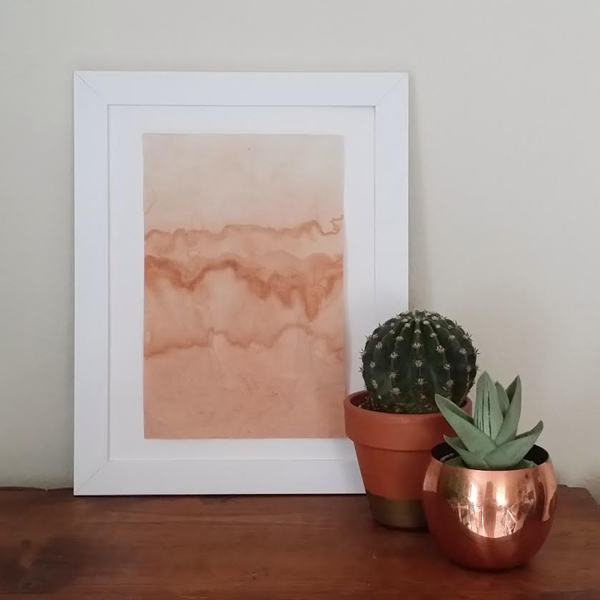
    When I removed my gradient dyed fabric from the dye bath, I was really happy with the result. There was a bit of sediment in my dye which clung to the fabric creating a marbled effect that I loved. I decided to frame that one without giving it a rinse.

    8

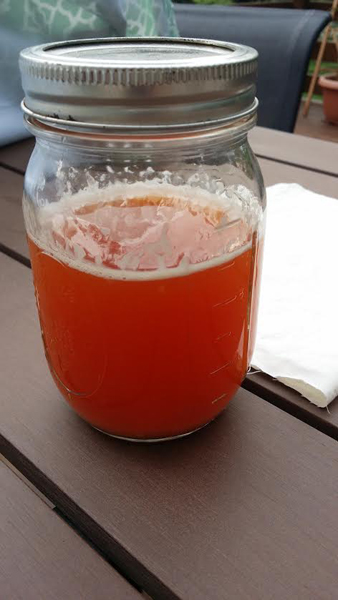
    You can save your dye liquid in a sealed jar in the fridge for up to one week.

    9
    Christie Sommers is the designer and maker behind West Oak Design. She handcrafts small batch and one of a kind goods for home, women, and kids in her Wyndmoor, Pa studio.www.westoakdesign.com


  • Make This: Easiest Handmade Book Ever

    Photos + Tutorial by Bonnie Kaye Whitfield

    I am obsessed with this book form. It is the fastest way to turn a simple sheet of paper into an 8-page book, all without gluing or sewing. Use this tutorial to whip up a quick notebook, zine or to quickly transform an old work of art.

    Blog_9_Pic_14

    You will need:

    paper – either blank or an old print, etc
    scissors or cutting knife
    bonefolder – optional

    Blog_9_Pic_1

    Gather your materials. I’ll demo with a blank sheet of 12 x 18” paper, but I also have an old test print to make into a book, too.

    Blog_9_Pic_2
    Blog_9_Pic_3

    Start by carefully folding your paper in half, with the shortest ends together (like a “hamburger”). If you have a bonefolder, a super handy tool for making tight creases, then use it. Otherwise, your finger/fingernail will work just fine.

    Blog_9_Pic_4 Blog_9_Pic_5

    Next, fold your paper once more in the same direction. When you open it, you should have 4 sections created on your paper.

    Blog_9_Pic_6 Blog_9_Pic_7

    Then fold your paper in the opposite direction, where the longest ends touch (like a “hotdog”). Make a tight crease. When you open your paper up you should now have 8 sections.

    Blog_9_Pic_8 Blog_9_Pic_9

    Fold you paper back in half again, on the very first crease you created (like a “hamburger”). Hold the paper carefully, and begin to cut into the folded edge on the crease – STOP when you get to the corner where the 4 creases come together. When you open your paper, it should look like you have a big slit in the middle.

    Blog_9_Pic_10 Blog_9_Pic_11

    Refold you paper long ways (like a “hotdog”) and begin to squeeze the two ends of the paper together so that the hole in your paper closes to form 2 more pages. Fold these 4 page “spokes” together to close the book. Sometimes the book has a mind of its own, and you just let the pages tell you how to close up the book.

    Blog_9_Pic_12

    And there you have it, your new 8-page, no-glue, no-sew book!

    Blog_9_Pic_15

    —————————————————————————————————————–
    Bonnie Kaye Whitfield designs and screen prints home textiles + paper goods under the name, Bonnie Kaye Studio. Products are created to inspire memories at home and around the table. A donation is made with every purchase to help feed hungry Americans.

    www.BonnieKayeStudio.com

  • Make This: Striped Screen Printed Clipboards

    Photos + Tutorial by Bonnie Kaye Whitfield

    Sometimes things just needs a little sprucing up. This time of year, when many of us try to focus on spring cleaning and organizing, I find that I need a bit of motivation. Here’s a speedy screen printing method to jazz up old clipboards, but could also be used on other flat office supplies, such as binders, folders, box lids, etc.

    Blog_6_Pic_11

    You will need:

    clipboards
    screen printing frame
    screen printing ink
    spatula or plastic spoon
    squeegee
    packaging or blue tape
    a friend to hold down your screen / or a hinge clamp board

    Blog_6_Pic_1

    Gather your materials. I had a few old clipboards lying around my studio that definitely needed a facelift, but you can always purchase plain ones at Staples or Target. The screen printing frame that I am using is from Blick. It’s pretty amazing what you can do without fancy screen printing equipment. With screen printing, you are masking, or blocking, parts of the open screen to create a stencil. Whatever is “open” will print, whatever is “blocked” – in our case with tape – won’t print. I find that you can create fun geometric designs by simply using tape. If you’re looking for something more complex, try cutting a stencil out of contact paper. Same idea.

    Blog_6_Pic_2

    When you screen print, the screen needs to be directly flush and in contact with whatever you are printing on, with the frame facing upwards. Place your clipboard underneath your screen, as you’ll be printing, to get a sense of size. Your screen should be larger than your clipboard, and needs at least a 2” border buffer, as printing too closely to the edge of the screen is tricky and just doesn’t print well.

    Blog_6_Pic_3

    Flip your screen over. You’ll now block parts of the screen using tape. Begin with the sides and bottom of the screen so that you get closer to the actual size of the clipboard. Then have fun with creating open stripes or geometric patterns with your tape. Just keep in mind that you’ll eventually have to flip your screen over again, so remember that your print will come out in reverse of what you are taping.

    Blog_6_Pic_4

    Before printing, flip your screen over to get a better sense as to what will print. I’m going to print off the edges of my clipboard, which is why the open area is larger than my clipboard, but feel free to keep the printing contained within the printing surface. It’s definitely less messy that way.

    Blog_6_Pic_5

    To print, you’ll need the frame to be held in place, either by a handy friend or in my case, a hinge-clamp board. Gather your ink + squeegee.

    Blog_6_Pic_6

    Position the clipboard directly under the screen where you want to print. Using a spatula or spoon, spread ink to the top of your screen in a line.

    Blog_6_Pic_7

    Before printing, you need to “flood” your screen. Using your squeegee, which should be a little wider than your design, in your dominant hand and holding the frame up in your other hand, pull the ink towards you at a 45 degree angle. This is filling the open screen with ink prior to printing. (Since I was taking a picture, I just rested my frame on my tape roll.)

    Blog_6_Pic_8

    Once the screen is full of ink, place the screen down directly on the clipboard. With the screen firmly in place, pull the squeegee down again at a 45 degree angle. Don’t be afraid of really applying some pressure here. In fact, you may want to do 2 or 3 pulls, as wood will absorb some of the ink.

    Blog_6_Pic_9 Blog_6_Pic_10

    Gently pull up the frame and you should have a new, fancy updated clipboard. If you are printing on various size clipboards, as I did, be sure to print in order from large to small. And with printing, the time is in the setup not the printing, so why not line up a pile of flat items to print on while you’re at it!

    Blog_6_Pic_11

    —————————————————————————————————————————
    Bonnie Kaye Whitfield designs and screen prints home textiles + paper goods under the name, Bonnie Kaye Studio. Products are created to inspire memories at home and around the table. A donation is made with every purchase to help feed hungry Americans.

    www.BonnieKayeStudio.com

  • Naturally Dyed Egg Tutorial

    Tutorial and Photos by Christie Sommers of West Oak Design

    Pic 6

    Here’s a fun little tutorial that you should be able to do for under $5… unless you use what you already have! Just about any vegetable, fruit or herb that will stain your clothes, will stain an egg.  For this tutorial I used red cabbage and blueberries for the blue, and turmeric powder for the yellow.  My original intention was to make a nice set of color gradient ombre dyed eggs but it didn’t exactly work out that way. I was able to somewhat achieve that effect with the blue ones, but the turmeric eggs seemed to stay about the same shade.  If you’re looking for perfect, evenly dyed eggs, this may not be for you. I personally love the earthy mottled effect you get from using natural dyes.Here are a few suggestions you can try:

    RED/PINK: beets,hibiscus tea, frozen or canned cherries, pomegranate, paprika
    YELLOW/GOLD: yellow onion skins, chamomile, turmeric, chili powder
    BLUE/PURPLE: red cabbage, blueberries (fresh, canned, or frozen), grape juice
    GREEN: spinach, dill

    *NOTE last year I used curry powder for the turmeric…. my eggs tasted like curry. If you’re into that.. go for it!

    Pic 1
    For the blue eggs I used:
    – 1/2 dozen hard boiled white eggs (to hard boil: cover eggs completely in cool water, bring to a boil, remove from heat and let sit covered for 7 minutes, then place in cold water to stop cooking process, drain and set aside in the fridge until your dye is ready)
    – 1/2 head of red cabbage cut into 1″ chunks
    *I had some blueberries in the freezer from last summer that were looking freezer burnt so I tossed them in too.
    – a large stock pot
    -mesh sieve or cheesecloth
    -4 cups water (distilled is recommended but I used tap water because that’s what I had and it worked out for me)
    *a lot of the resources I checked recommend using vinegar but when I used it last year, all of my eggshells became soft and weird… so I left it out this time and the shells stayed in tact.Start by adding the water & cabbage (& blueberries if you have ’em) into your pot and bring to a boil.
    Pic 3
    Reduce the heat to low and let simmer for at least 30-45 minutes. You will notice the liquid becoming opaque and the cabbage will start to look drained of its color.
    Pic 2
    At this point you can strain the solids by pouring through cheesecloth or a fine mesh strainer.You can reduce the liquid at this point making it more concentrated, OR proceed to the next step.

    Place the dye liquid into the fridge and let it cool.For an ombre effect:
    Place all eggs into the cooled dye liquid and place back in the fridge
    Every 15-30 minutes, remove one egg from the liquid.Otherwise, add all eggs to the dye liquid and let sit refrigerated until they reach the desired depth of color.

    *This method can be used for any of the vegetables, fruits, or herbs listed. If you would like to try this with the turmeric powder, Use 3 tablespoons turmeric to 2 cups of water and boil until the turmeric dissolves (this is the ratio that worked for me).

    Pic 4
    Your naturally dyed eggs will have an soft matte color. You can brush a light coat of vegetable oil on them for a nice shine that will really make the color pop.Hope you give this easy & inexpensive technique a try!————————————————————————————————————————————————
    Christie Sommers is the designer and maker behind West Oak Design. She handcrafts small batch and one of a kind goods for home, women, and kids in her Wyndmoor, Pa studio.www.westoakdesign.com
  • MAKE THIS: Printed Pinwheels for Spring!

    Photos + Tutorial by Bonnie Kaye Whitfield

    Ever since I was a kid, I’ve loved pinwheels.  This printed version of pinwheels is a perfect way to lift your spirits after months and months of winter.  Make as festive decor for your next party or create with your kiddo on a rainy day.

    Blog_5_Pic_15

    You will need:

    • square cardstock, ideally different colors on each side
    • scissors or x-acto
    • ink for printing, either water-based block printing or stamp pads
    • ink tray + brayer if using block printing ink
    • circular tools for printing – pencil eraser, wine cork, empty cardboard tape ring
    • dowel rods
    • small tacks/pins
    • scrap piece of cardboard

    Blog_5_Pic_1

    Gather your materials.  Try to work with colored cardstock.  You can test out other papers to see if they hold up to lots of blowing and twirling.  If you have colored ink pads (I didn’t…) then I would use those before turning towards block printing ink, as the prints will take less time to dry.

    Blog_5_Pic_2

    If you can find paper that is different colors on each side, it will add to the colorful pop of the pinwheels.  If not, no biggie.  Just work with whatcha got.

    Blog_5_Pic_3

    Before you begin printing, go ahead and draw two lines of the backside of your printing side.  Use a ruler and a pen to line up opposite corners and draw a line, making a big X across the paper.

    Blog_5_Pic_4

    Now for printing fun!  Roll out some ink in a tray.  Dip your pencil eraser in the ink and go to town.  Pencil erasers make the perfect tiny dot.

    Blog_5_Pic_5 Blog_5_Pic_6

    Feel free to just use a pencil eraser for all your printing, or grab some other circular items to print with.  Here, I’m using a wine cork for a larger circle blob.

    Blog_5_Pic_7 Blog_5_Pic_8

    I also had an empty tape roll on hand.  I recommended scouting out other circular items in your recycling bin, like a toilet paper roll or yogurt container.

    Blog_5_Pic_9 Blog_5_Pic_10

    After the prints have thoroughly dried, grab your scissors and begin to cut on the lines that you drew at the beginning.  Cut on each line until you get about an inch away from the center point – then stop!

    Blog_5_Pic_11

    Now for the only tricky part … pinning them all together.  First, unless these are going to be purely decorative and you don’t want them to spin, you’re going to want to cut out a few dime-sized circles out of cardboard.  This will help the pinwheels spin.  Set the cardboard circles aside.

    Blog_5_Pic_12

    Begin by folding down every other corner of the pinwheel and hold in one hand.  Grab the pin with your other hand and push through the center, making sure you are going through all 4 corners that you are holding down.  Grab one of your cardboard circles and press it in between the paper pinwheel and the wooden dowel rod.  I find that a couple long presses in the dowel does the trick for me, but then again, I don’t have a 4-year-old that’s going to run around with it.  So if you do, you might want to add a dab of glue before jamming into the dowel.

    Blog_5_Pic_13

    Lastly, if you really want some good spin action, you’ll need to play around with moving the paper around so that it it doesn’t hit the dowel rod when you try to spin it.

    Blog_5_Pic_14

    So there you have it – springtime pinwheels + insta mood lifter!

    ———————————————————————————————————————————–

    Bonnie Kaye Whitfield designs and screen prints home textiles + paper goods under the name, Bonnie Kaye Studio.  Products are created to inspire memories at home and around the table.  A donation is made with every purchase to help feed hungry Americans.

    www.BonnieKayeStudio.com


  • Christie’s Hand Stitched Bowl Tutorial

    Photos + Tutorial by Christie Sommers

    Photo 1
    You will need:
    -cotton clothesline
    -quilting needle (you can use a regular sewing needle with a thimble but a larger quilting needle is best for passing through the thick clothesline)
    -embroidery thread, yarn, or string in color of your choice
    -scissors

    Photo 9
    Thread the needle with colored string of choice and tie a knot at the end.

    Use as much thread as you can manage. No more than 3′ should suffice. You can tie more thread on when you run out.

    Start by coiling the clothesline between two fingers as shown.

    Photo 10
    Insert the needle into the center of the coil passing through the layers of rope and exit as shown.

    Photo 11 Photo 12
    We will be using a blanket stitch for this project. Wrap your working thread behind the needle from right to left.

    Photo 13
    Bring the thread back over the needle from left to right and pull the needle through.

    Photo 2
    Repeat going around in a circle, entering in the center, until you reach the first stitch.

    If you want a bowl with a wide flat base, you can continue the flat blanket stitch going around a few more times until the base is as wide as you like.

    Photo 3
    At this point you will be rounding up to give your bowl a curved shape.

    To achieve this, you will be inserting the needle straight through the clothesline from front to back rather than from the center out. See pic.

    Photo 4
    Continue with the blanket stitch inserting the needle through the clothesline from front to back until your bowl is as large as you like.

    You will most likely run out of stitching thread as you are working. To add more, tie a new 3′ length of thread to the tail of the previous working thread. Place the ends together as shown and tie in a knot.

    Photo 5Photo 6
    For the next few stitches, Insert the needle Between the coils instead of through the rope until your knot is hidden.

    Photo 7
    Once you pass the knot, continue stitching through the rope until you reach the desired bowl size.

    Tie off your working thread and then snip the clothesline, You’re done!

    As you can see from the next photo, the placement of your stitches will determine the design of your bowl. For the black bowl, I spaced my stitches out and staggered with each layer, essentially placing new stitches between the stitches on the previous level. For the red bowl, each new stitch was placed right next to the previous level’s stitch.  Play around with stitch placement to see what you can come up with.

    Photo 8
    Enjoy!

    —————————————————————————————————————

    Christie Sommers is the designer and maker behind West Oak Design. She handcrafts small batch and one of a kind goods for home, women, and kids in her Wyndmoor, Pa studio.www.westoakdesign.com


  • Bonnie’s Inspirational Wall Hanging

    Photos + Tutorial by Bonnie Kaye Whitfield

    Bonnie_Blog3_Pic9

    Sometimes everyone needs a little pick-me-up, especially in the studio or office, where it’s easy to get overwhelmed with projects and deadlines.  These simple inspirational wall hangings combine the magic of masking fluid and watercolor to create your own, personalized message that will keep your chin up and head high.

    You will need:

    • white or cream cardstock or smooth watercolor paper
    • pencil
    • art masking fluid
    • old, thin brush (one that you don’t mind tossing in the trash after use)
    • watercolor
    • watercolor brushes
    • container of water
    • wooden dowel (optional)
    • heavy duty tape or hot glue gun (optional)
    • rope or twine (optional)

    Bonnie_Blog3_Pic1

    As you gather your materials, make sure you have thick, smooth paper to work with; any paper that is “soft” or textured will not work well with the masking fluid.  Also, note that the last three materials are optional and needed only if you want to hang your message as pictured.  Otherwise, you could simply cut your wall hanging to size for a frame or pin directly onto your wall.

    Bonnie_Blog3_Pic2

    If you want to hang using a dowel rod, you’ll first want to cut your paper so that the width of the paper is about 2” shorter than your dowel rod.   Next, go ahead and fold down the top edge of the wall hanging (approx, 2”).  This will serve as your loop for inserting your dowel rod.  Wait to tape down the flap until the very end.

    Bonnie_Blog3_Pic3

    Flip your wall hanging over, so that you are now working on the front side of the paper. Decide your message, font, and layout, and lightly sketch out the words on your paper using a pencil.

    Bonnie_Blog3_Pic4

    Next, grab your old brush.  Working quickly, apply the masking fluid over your penciled-in letters.  The masking fluid is basically liquid rubber.  It will be blocking, or masking, the watercolor.  It does dry fairly quickly, so you’ll want to work quickly and then immediately clean your brush after using the masking fluid, otherwise, you might have to throw away your brush.

    Let the masking fluid letters dry thoroughly.  It should dry darker, and you can test if it’s dry just by gently touching it.

    Bonnie_Blog3_Pic5

    Once the masking fluid has dried, you can add watercolor to your wall hanging.  In order for the letters to show up, you’ll need to apply watercolor on top of and around all the letters.

    Bonnie_Blog3_Pic6

    Now for the hardest part … waiting!  The watercolor and paper must dry completely before peeling off the masking fluid.  Trust me, I have learned this lesson the hard way.  If it’s not dry, the paper will start to pull off with the masking fluid.  When you think it’s dry, you can begin to rub/pull the masking fluid off gently.  When all the dried letters are removed, you can erase any pencil lines showing.

    Bonnie_Blog3_Pic7

    Lastly, flip the hanging over and tape down the flap.  Insert the dowel rod.  Cut your rope or twine to desired length and tie to the ends of the rod.

    Bonnie_Blog3_Pic8

    Hang in a visible area, get back to work, and stay inspired.

    Bonnie_Blog3_Pic10

    —————————————————————————————————————-

    Bonnie Kaye Whitfield designs and screen prints home textiles + paper goods under the name, Bonnie Kaye Studio.  Products are created to inspire memories at home and around the table.  A donation is made with every purchase to help feed hungry Americans.

    www.BonnieKayeStudio.com


  • Bonnie’s Insta-Notebook Tutorial

    Photos + Tutorial by Bonnie Kaye Whitfield

    If you’re like me, you can never have too many notebooks.  Small notebooks are especially helpful for on-the-go notetaking or making quick grocery lists.  Here’s a quick Japanese-stab binding technique that will get you jotting inside in lickety split.

    Bonnie_Blog2_Pic8

    You will need:

    • decorative cover paper (I’m using my screen-printed wrapping sheets, available for sale at Art Star)
    • filler paper for the inside (I’m using kraft paper sheets, but simple copy paper is fine, just nothing too thick)
    • bonefolder (optional)
    • needle
    • thread, ideally for bookbinding
    • awl, a tool used for piercing holes (could probably also use an ice pick or ceramic needle tool)
    • piece of cardboard
    • scissors
    • pen or pencil to mark holes

    Bonnie_Blog2_Pic1

    Once you’ve gathered your materials, you’ll need to cut your papers to the size that you want the notebook.  I cut mine to 6×9”, with the filler paper cut ⅛ shorter on both sides so that they don’t poke outside of the cover once folded.  If you cut your paper to 6×9”, you’ll end up with a 6×4.5” notebook.

    Bonnie_Blog2_Pic2

    Fold both your cover and filler sheets of paper in half.  Use a bonefolder if you have one to firmly crease the fold.  You can also just use the back of your fingernail or another smooth, blunt tool.  Next, you’ll mark three dots for your holes along the spine/folded edge of the book.  Mark the holes in a line at least a ½ an inch from the spine and tops and bottoms of the book.

    Bonnie_Blog2_Pic3

    Using your awl, you’ll next pierce the holes, prior to sewing.  This is going to make sewing a lot easier.  I like to use a piece of cardboard or old magazine underneath the book while making the holes.  You can also use a small hole punch.  Next, measure your thread at least 3 to 4 times the length of your spine and cut.  Thread the needle, but do not make any knots.

    Bonnie_Blog2_Pic4

    This Japanese stab-binding stitch might look complicated at first, but trust me, it’s quite easy!  You really flow through the stitches starting at the top of the book and working your way down.

    1. Start sewing from the backside of the book, in the top hole.
    2. Leave about a 2” tail of thread and hold it with your thumb.  You’ll be able to let go after the next stitch or two.  (The only knot you make for this book is done at the very end.)
    3. Thread over and around the top of the book and back through the top hole from the back.
    4. Thread over and around the side of the book and back through the top hole from the back of the book.
    5. Thread down to the second hole.  The needle will now be on the backside of the book.
    6. Thread over and around the side of the book, going through the second hole again from the front.  Your needle will then still be on the backside of the book.

    Bonnie_Blog2_Pic5
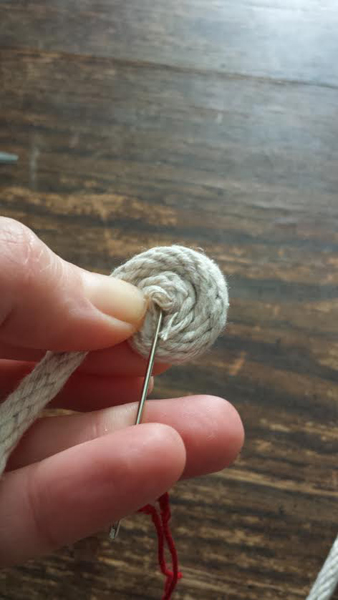
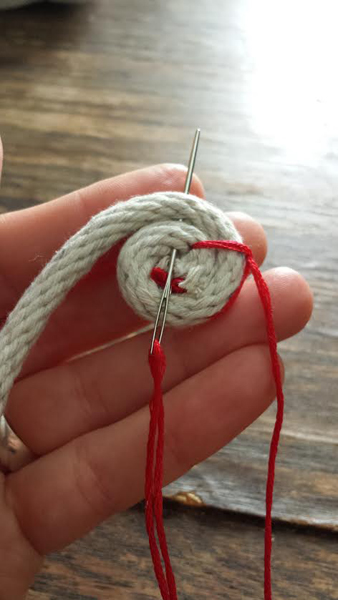
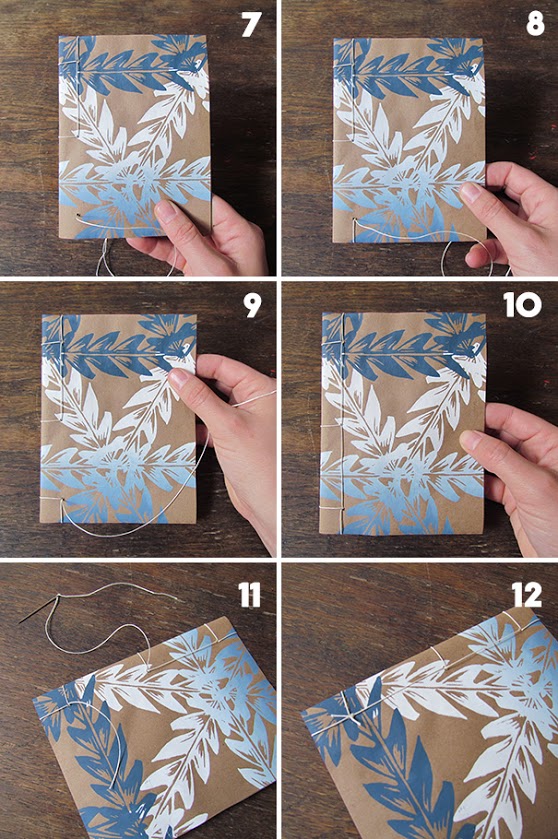
7.  From the back, you’ll thread through the third hole at the bottom.  You’ll now be                         back on the frontside of the book.

    8. Thread over and around the bottom edge of the book, going back through the                                 bottom hole from the backside.

    9.  Thread over and around the side edge of the book, going back through the bottom                       hole from the backside.

    10.  Thread back up to the middle hole.  Your needle and thread will now be on the                              backside of the book.

    11.  Flip your book over.  It should look like this.

    12.  Lastly, remove the needle and tie the two loose ends together.  Cut threads, leaving                    about an ½” tail.  Voila!

    Bonnie_Blog2_Pic7

    Once you’ve tied your knot, you may want to crease or score the inside pages at the binding so that the book opens more fully.  Up to you.  Also, variations include making your holes larger and sewing with a thicker thread-like material, such as cord (pictured with the pink notebook), ribbon or yarn.

    You now have a notebook that you can take and use anywhere.

    _____________________________________________________________

    Bonnie Kaye Whitfield designs and screen prints home textiles + paper goods under the name, Bonnie Kaye Studio.    www.BonnieKayeStudio.com

  • Christie’s Spaghetti Scarf Tutorial

    cowl shotby Christie Sommers of West Oak Design

    This is a nice little project to use up scrap jersey knit fabric or an old t-shirt.

    You will need:
    *scissors OR (a rotary cutter, straight edge, & cutting mat)

    *A “tube” of jersey knit fabric. For a no sew version you can cut the tube from a t-shirt. To use a scrap of jersey knit fabric, cut a rectangular strip roughly 16″ x 42″ and sew the two short ends together to form a tube (folded and sewn it will measure 16″ x 21″)

    01

    Take your tube and cut into 1″ strips taking special care to leave 1″ uncut at the top.

    02 (1)

    03

    When you get to the last strip, cut all the way through. This strip will become the wrap to hide the seam or uncut section at the neck.

    04

    05

    Gather the scarf and hold at the seam/uncut section.

    06

    Tie the last strip to the seam/uncut section and wrap around until it is covered.

    07

    When you have wrapped all the way to the end of the seam/uncut section, lift the last loop and tie the end of the wrapping strip to it. Snip the remaining strip leaving about an inch.  Tuck the leftover inch under the wrapped section.

    08

    09

    10

    Now the fun part….

    Hold the wrapped section and pull each individual strip as far as you can.  You may need to sit on the floor and place the wrapped section under your foot as you pull and stretch each strip which forces the jersey knit fabric to close in on itself, hiding seams and leaving neat strands.

    11

    You’re done! Wear it long or loop it around for a nice looking cowl.

    ______________________________________________________________
    Christie Sommers is the designer and maker behind West Oak Design. She handcrafts small batch and one of a kind goods for home, women, and kids in her Wyndmoor, Pa studio. www.westoakdesign.com

  • Bonnie’s Pop Up Valentine Tutorial


    Bonnie_Blog1_Pic11
    Photos + Tutorial by Bonnie Kaye Whitfield

    With Valentine’s Day just a couple weeks away, you might be itching to design some handmade cards for your special valentine(s).  This tutorial will show you how to create a pop-up text card with your favorite little word or message.

    Bonnie_Blog1_Pic1

     You will need:

    • paper – both a variety of solid and patterned papers, cardstock is ideal
    • envelopes – if you plan on mailing your cards
    • self-healing mat or an old magazine
    • ruler
    • pencil
    • eraser
    • x-acto knife
    • glue stick (not pictured)

    Bonnie_Blog1_Pic2
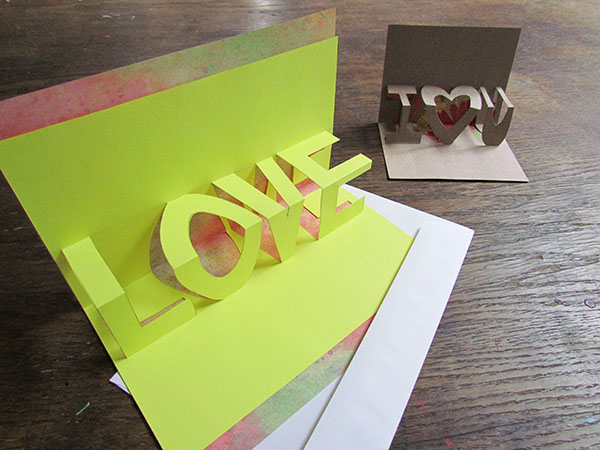
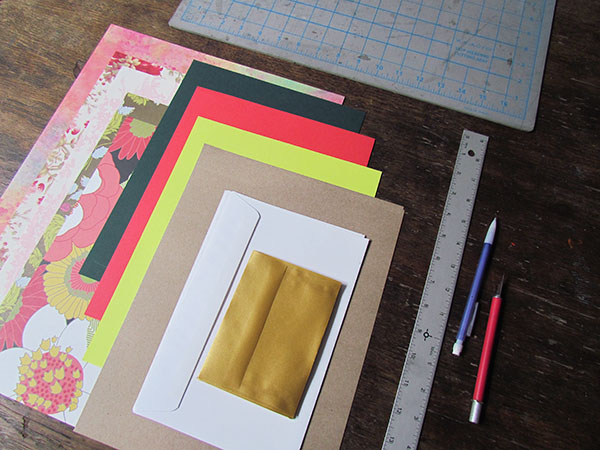
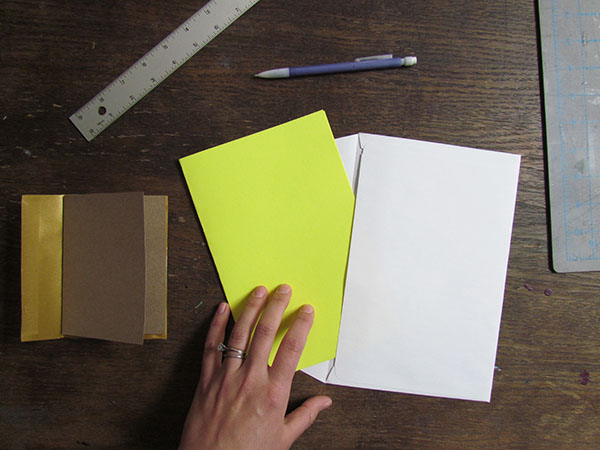
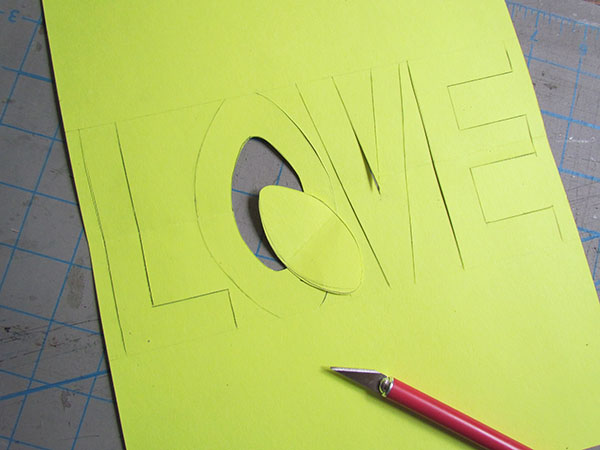
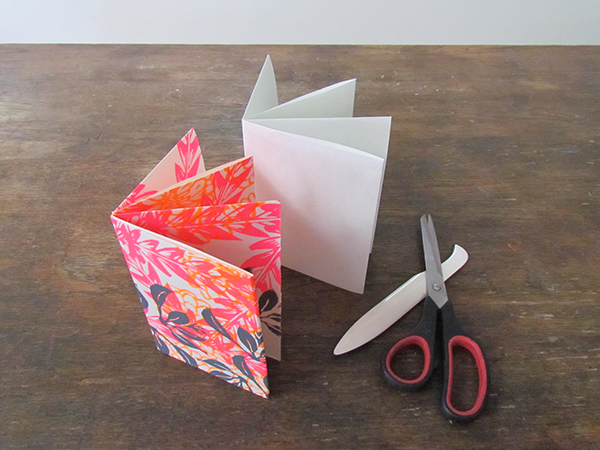
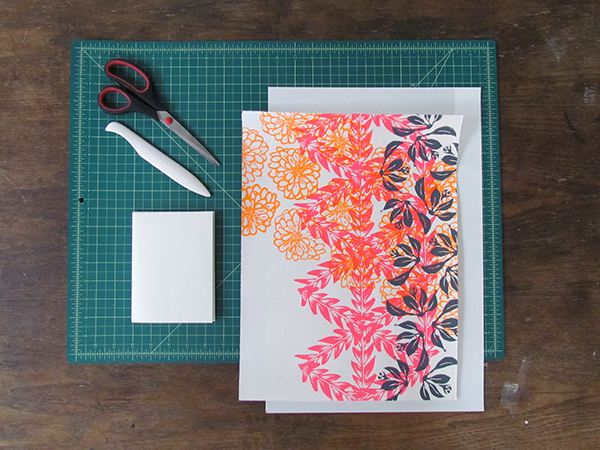
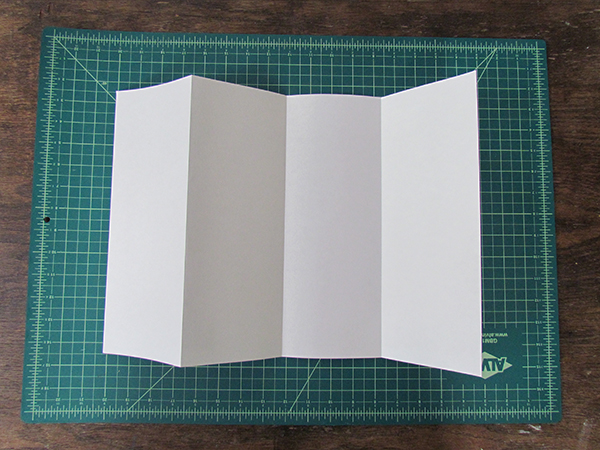
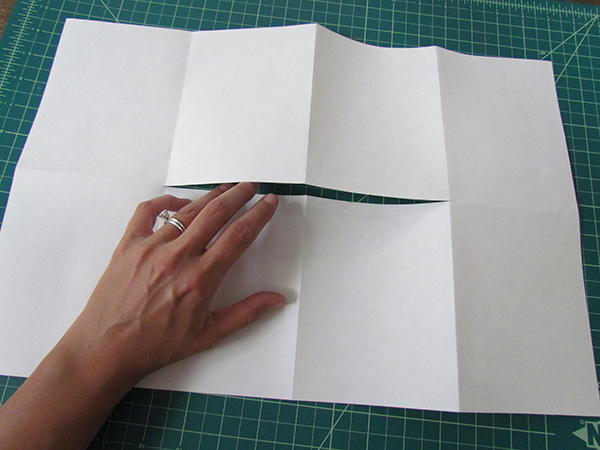
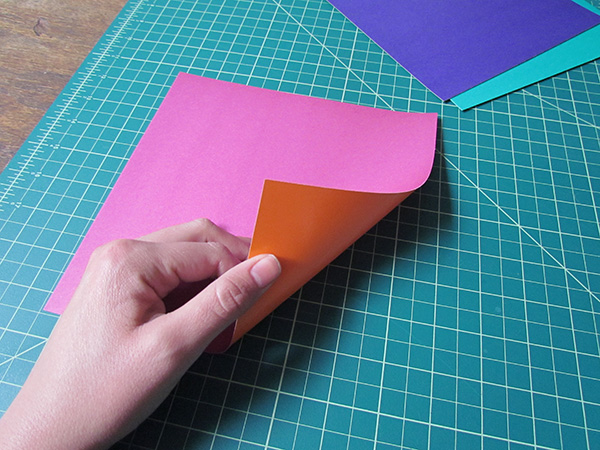
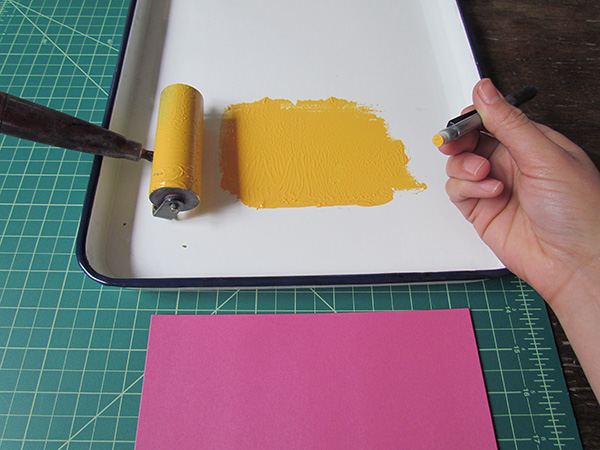
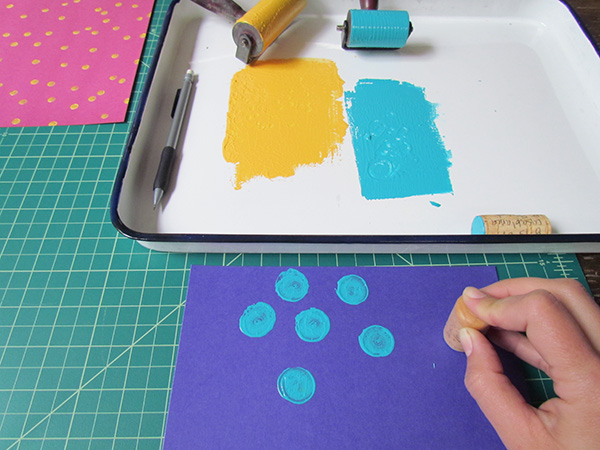
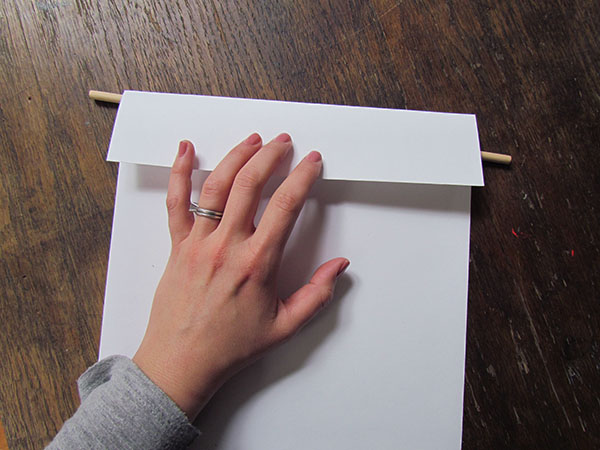
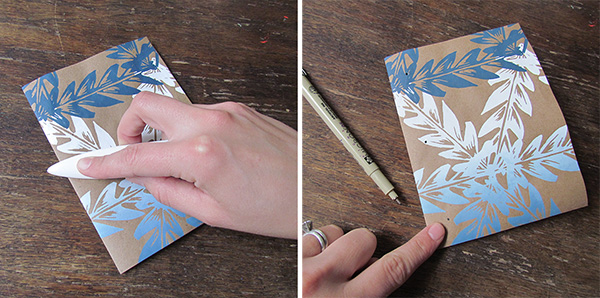
First, take a solid-colored piece of paper and cut + fold to a card size so that it fits in your envelope.  If you are not mailing it or don’t have an envelop, then simply fold your paper and you can cut the card down to size later.

    Bonnie_Blog1_Pic3

    With your card open, measure 2” from the fold on each side of the fold crease and on each end of the card, and mark with your pencil.

    Bonnie_Blog1_Pic4

    You will connect your two marks on each side of the fold crease.  Feel free to make this line very light, as you will later erase it.  This will serve as the guideline for the top and bottom of your text.  You can also make the measurements closer or further away from the fold depending on how tall you want your letters, but make sure that the fold crease is always in the center of your two pencil guidelines.

    Bonnie_Blog1_Pic5

    Next, begin to draw your text in block letter form, making sure that there is space between all letters and the edges of the card.  Draw your letters so that they touch both the top and bottom pencil line, with the center of the letter falling on the fold crease.   If you are using any rounded letters, make sure that they still have a solid connection to the top and bottom pencil guideline (see my “O”).

    Bonnie_Blog1_Pic6 Bonnie_Blog1_Pic7

    Once you have drawn out your text, grab your self-healing mat and x-acto blade and begin to carefully cut on all the text lines except the bottom and top lines.  You are not cutting out the letters, just the edges.  If you letter has an enclosed space (like my “O”) then the center will cut out entirely.

    Bonnie_Blog1_Pic8

    After cutting, you will refold your card.  One letter at time, you will slowly “pop-out” the letters by reversing the center fold crease and gently folding along the top and bottom line of each letter.

    Bonnie_Blog1_Pic9

     Lastly, when you have finished adjusting all your letters, feel free to erase any pencil lines still showing.  Take a patterned piece of paper or a contrasting solid paper and play around with folding it and adding it to the backside.  At this point you can adjust the overall size of your card if you like, allowing more or less of the second paper to show.  Feel free to glue the two pieces together – just make sure that you don’t glue down any of your letters.

    Bonnie_Blog1_Pic10

    Now you can go wow your sweetheart with your new pop-up skills!  Happy Valentine’s Day, everyone.

    —————————————————————————————————————-

    Bonnie Kaye Whitfield designs and screen prints home textiles + paper goods under the name, Bonnie Kaye Studio.   www.BonnieKayeStudio.com


The owner of this website has made a commitment to accessibility and inclusion, please report any problems that you encounter using the contact form on this website. This site uses the WP ADA Compliance Check plugin to enhance accessibility.