Tag: craft

  • Meet ASCB Vendor Faryn Davis of Fernworks

    Faryn

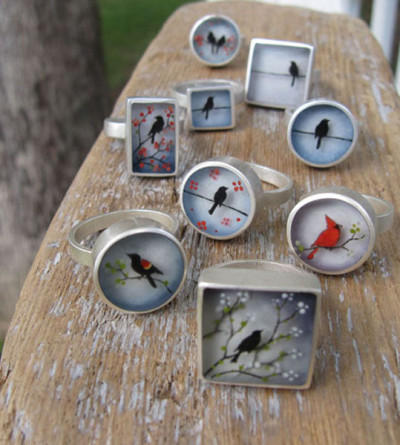
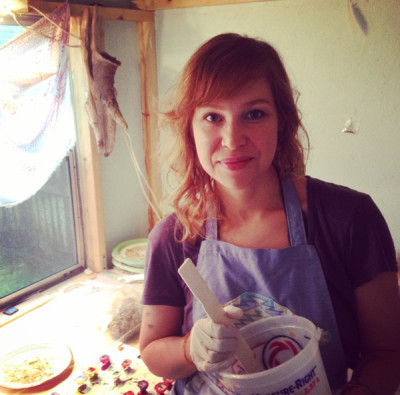
    Hello my name is Faryn and my little biz is called Fernworks. I grew up on a farm in western North Carolina and I spent many afternoons there collecting little odds and ends that I found on our land like bird nests, feathers, interesting clumps of dirt, moss, leaves, bones, fur, twigs, bugs, and other tiny things. I continue that tradition of collecting and gathering in my paintings and line of resin jewelry today.

    Group

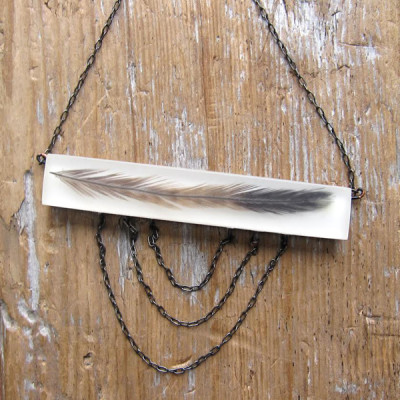
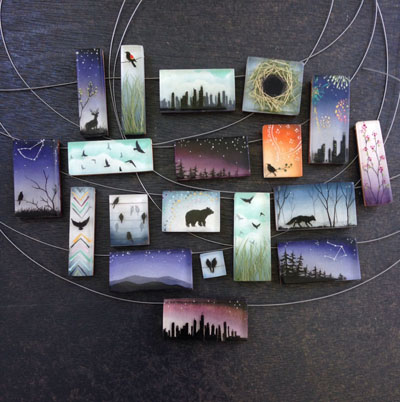
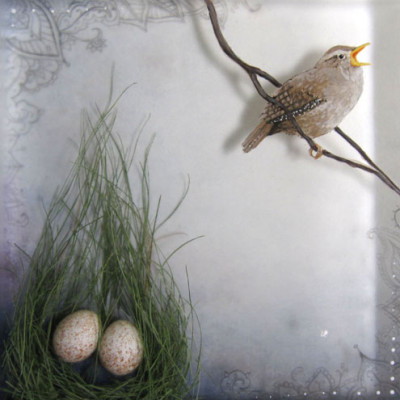
    My mixed media paintings and jewelry combine hand painted scenes and found natural ephemera into layers of polished resin. Each piece is painted with toothpicks and tiny brushes, embedded in multiple layers of resin, then cut and polished into delicate, dreamlike 3-D landscapes populated by plants, birds, bears, foxes and other woodland creatures.

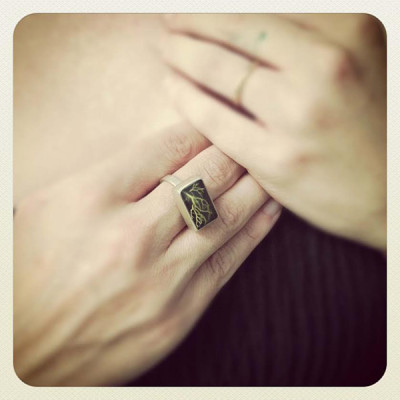
    bird nest Rings

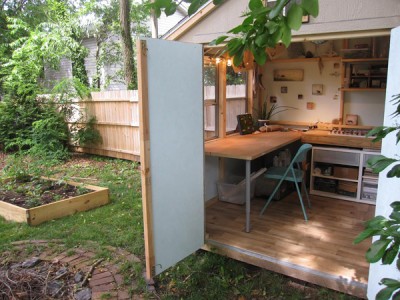
    My studio is a modified 8’x8’ garden hut in our backyard. This is where I paint, pour resin, and store all my many boxes and jars of found objects.

    studio 2

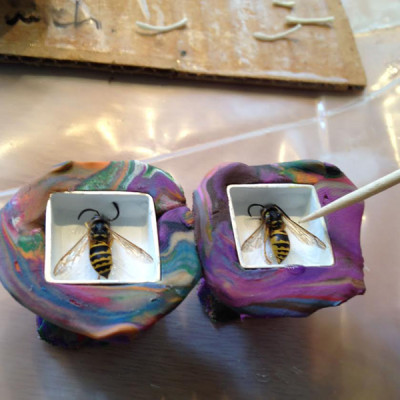
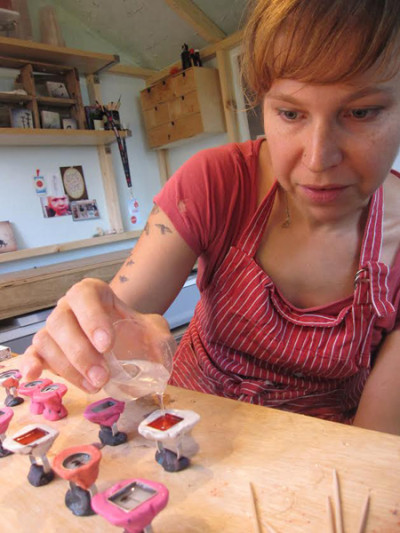
    Here are a few pics of me making some new resin rings. I embed little found objects or tiny hand painted scenes into silver settings and then layer resin on top. I then polish and sand each piece by hand on my tabletop sander. (A really dusty, messy process.)

    Bees in progress
    Pouring

    You can find me and my creations at galleries, shops, and craft shows all over the US. I’m always on the go. I recently returned to live in Asheville, NC with my husband and 5 year old son after an 8 year hiatus in the Pacific Northwest.

    Feather Necklace Ring
    This is my first time showing at the Art Star Craft Bazaar and I’m so excited! I’ll have tons of new necklaces, earrings, rings, cufflinks, little paintings and more! Please come say hi at booth #30.

  • Make This: Fabric Storage Bins

    by Christie Sommers 

    16
    I have way too many “things” in little piles all over my workspace. It was time to do a little organizing so I made some storage bins and bowls in various sizes to store loose buttons, bobbins and more. They have really brightened up the place so I’d like to share them with you:)

    You will need:

    -a pencil compass
    -scrap paper
    -fabric (one outer and one liner)
    -fusible interfacing (you want something very rigid, I recommend Pellon Decor Bond Fusible)
    -an iron/ironing board
    -a sewing machine
    -scissors
    -ruler

    You will need to draft up a little pattern for this one. I made a bin that was 6.5″ in diameter and 4.5″ high. To figure out how long to cut your rectangular pieces you will need to break out the calculator… or your brain. To find the circumference of your base, multiply the diameter by 3.14. The circumference will be the length of your rectangular sides.
    In my case: 6.5″ diameter x 3.14= 20.14 ….
    Use this calculation to make your bin in any size.

    OR….

    You can just use my dimensions and make the same sized bin.

    Cut:
    (3) rectangles: 21″ long by 5″ high (1) liner, (1) outer, (1) interfacing
    (3) circles with 3.25″ radius (1) liner, (1) outer, (1) interfacing

    1 2 3 4 5

    You will iron on the interfacing to the backside of the outer fabric.
    Take the shiny adhesive side of the interfacing and line it up to the back of your outer fabric.
    Iron on holding firmly for 6 seconds to establish a good bond.
    Do the same for the circular outer fabric.

    6

    Now you will sew the side wall (rectangular piece) to the base (circular) for both the liner and the outer fabric.

    Pin as shown.

    8 7

    Straight stitch the liner wall to the liner base

    9

    Do the same for the outer wall and base making sure to place the fabric “right” sides together, right side being the printed side that you want to see on the outside when the bin is done.

    9.1

    Line up your two ends of the rectangular piece and stitch up the side wall. Trim

    10

    You should have two pieces now (liner and outer) that look like this….

    11

    Cut into the seam allowance around the base so that the basket sits evenly when assembled. Take care to not cut into your stitching.

    12

    Turn the liner inside out and fit (right sides together) into the outer piece.

    13

    Line up your seams and pin all the way around

    14 15

    Sew all the way around leaving a small section about 1.5″ unsewn. You will turn the whole bin right side out through this hole.

    When you turn it right side out, use your iron to get all of your seams looking nice and clean.
    I liked how it looked with a little of the liner as a trim at the top.

    Top stitch all the way around and be sure to carefully seal the opening with your top stitch.

    Toss in some sewing notions, or whatever bits you need to wrangle and enjoy!

    16 17

    ——————————————————————————————————————————————-
    Christie Sommers is the designer and maker behind West Oak Design. She handcrafts small batch and one of a kind goods for home, women, and kids in her Wyndmoor, Pa studio.www.westoakdesign.com
  • Meet Art Star Craft Bazaar Vendor Jamie Langhoff of Seeing in Fabric!

    Pic 1

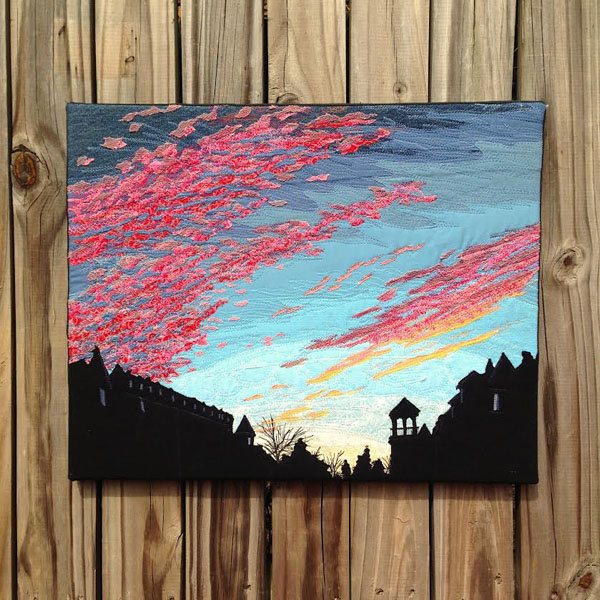
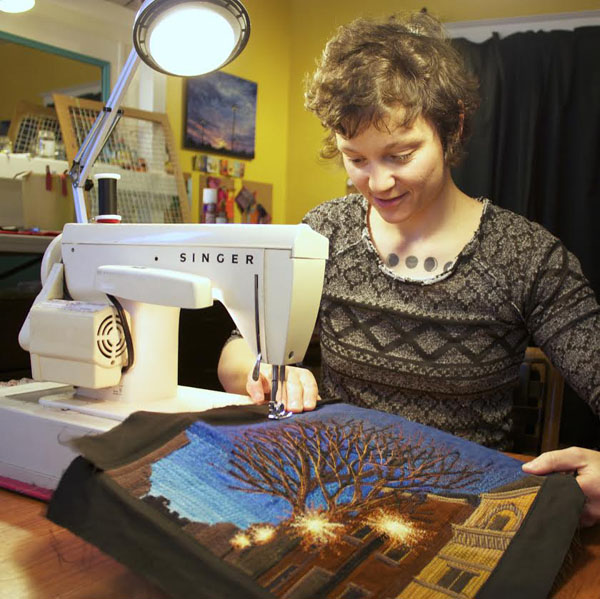
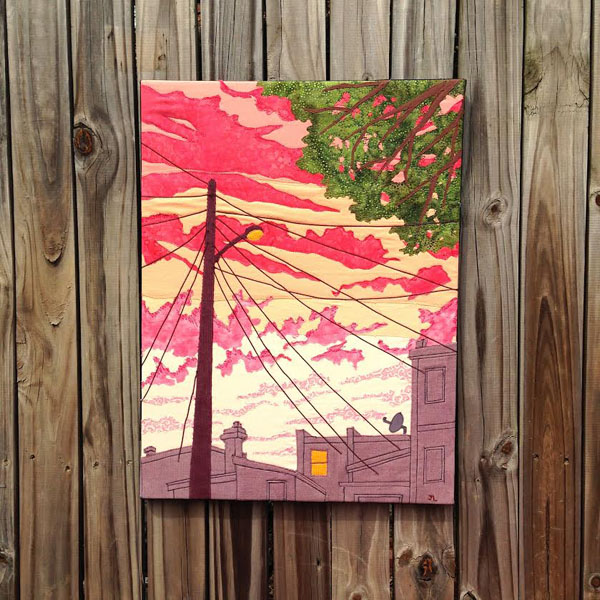
    What, at first, appear to be paintings, are actually sewn fabric art.

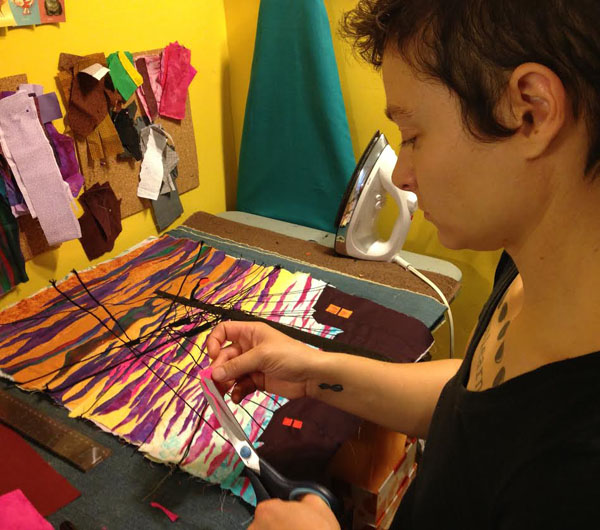
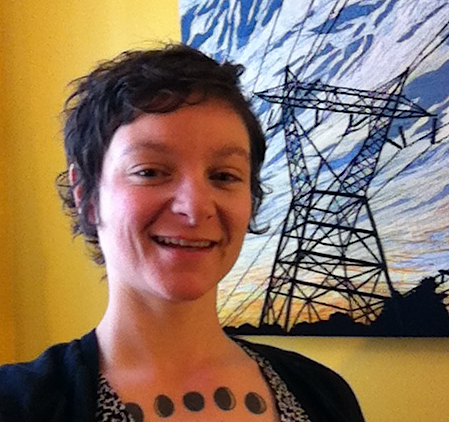
    Self-taught artist, Jamie Langhoff, creates vibrant urban scenes with just fabric, thread, scissors, and a 1968 Singer sewing machine. Finished artwork is mounted onto ready-to-hang canvas panels.

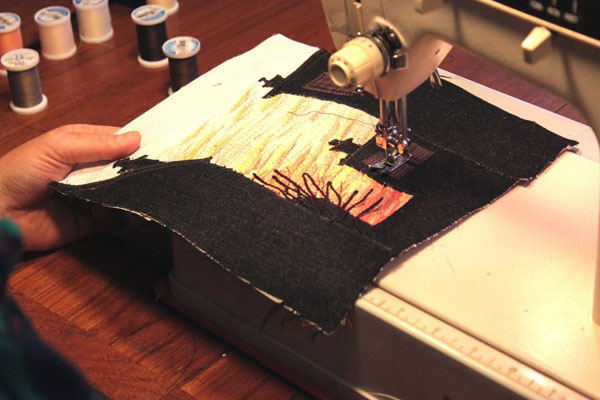
    Each scene features many dozens of tiny hand-cut fabric pieces. Creating these scenes requires a slow and careful building of many pieces of fabrics, and many layers. All of the fabrics she uses in her artwork are recycled–scrap, remnants and re-purposed clothing. Many of the fabrics Jamie uses are donated to her by her lovely fans.

    Pic 2

    Threadwork and stitching techniques are central to the realism and painterly aspects of Seeing in Fabric. Eschewing the dazzling digital age of newer sewing machines, Jamie enjoys the reliability and rustic sturdiness of her vintage 1968 Singer.

    Pic 3

    By using a color palette of thread in over 200 different colors, but just 2 basic stitch types–straight stitch and zigzag–Jamie creates a multitude of “shading”, “brushstroke” and “drawing” effects. Her stitching technique involves a free-flowing and rapid style, requiring an extreme amount of concentration and skill, but also trust and confidence in her sewing machine.

    Pic 4

    As a self-taught artist, Jamie constantly pushes herself to experiment with her techniques. Through her artwork she shows the world how to “see in fabric” in order to see the vibrant and strange beauty in our modern urban world.

    Pic 5Jamie will be be traveling from Washington, DC to join us at our 12th Annual Spring Art Star Craft Bazaar at Penn’s Landing Great Plaza on May 9th + 10th.  Make sure to stop by her booth #101 to see these incredible pieces in person.  These photos are so beautiful but the pieces are even better in person.  Visit her Etsy Page for more!

    Pic 6

  • Christie’s Mini Weaving Tutorial (on a “junkmail” credit card loom)

    Tutorial and Photos by Christie Sommers 
    pic1
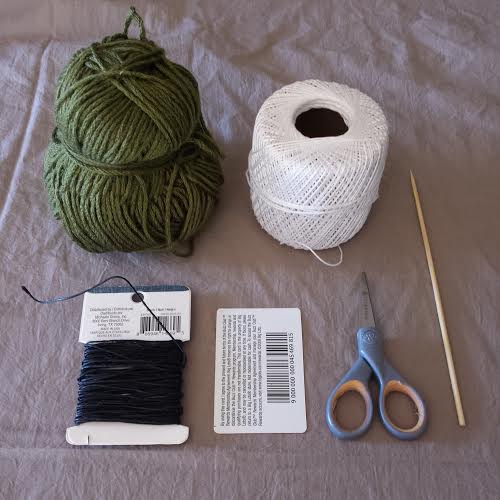
    You will need:
    picnumero1
    *An old card of the un-needed variety… pre-approved credit cards, price club cards, your old West Coast Video card… Just make sure it’s nice and firm, no flimsy paper ones.
    *A variety of string/yarn/twine. In this tutorial I am using a thin cotton cord for my warp (I’ll explain soon). For my weft I am using waxed cotton cord in black, thin gauge yarn in green, and more of the white cotton cord I used for the warp.
    *scissors
    *quilting needle (not shown)
    *ruler
    *pencil
    *toothpick, wooden skewer, or short section of brass tubing
    pic2
    Chances are, the card you are using is 2″ x 3.5″. Turn your card sideways so that the 2″ side is at the top and the bottom. Start by marking every 1/4″ across the top and bottom (see pic).  After all of your marks are made, come back with your scissors and make a small cut in each pencil marking. Cut about 1/4″ into the card each time trying to be consistent.
    You will now begin to lay down your weft. The weft is the base that you will be weaving in and out of. I started in the top left corner bringing the thin cotton cord through the first cut from back to front. Bring the string down to the first cut in the bottom left corner, wrapping around the back and coming back up through the 2nd cut on the bottom left corner (see pics).
    pic3 pic4 pic5
    Continue this motion wrapping back and forth until you get to the end. You will have a tail hanging from your starting and end points. Make sure these tails are at least twice as long as your needle.
    Now you are ready to start weaving!
    I threaded my quilting needle with the black cord and wove under one, over one from left to right. When you come back for your return pass make sure you do the opposite of what you did on the previous pass. If you went under the warp on the last pass, go over the next time. It sounds more confusing than it really is… see pic.
    pic6
    pic8
    Continue for as long as you’d like before changing colors.
    pic9
    To change colors/yarn simply trim your previous weft (black cord) leaving a tail that is at least twice as long as your needle. Begin weaving the next color through starting on the opposite side of the previous weft’s “tail”.
    pic10
    Continue weaving and changing color/yarn as desired until you simply cannot fit any more rows. You can use your needle to push each row up to the top so they fit snugly together.
    You’re probably wondering what to do with all of those little tails hanging out of the sides of your weaving. Some people leave them as a deliberate design choice. For this weaving, I am tucking these little tails in for a nice finished edge.
    To tuck: starting at the top left, thread the first tail onto your needle. Tie the tail to the first string of warp and slide the needle down through the loops of the weft carefully trimming the tail and letting it slide back slightly into the loops so that it is hidden.
    pic11 pic12
    Once all of your tails are tucked in, you can stop here or add fringe if you like.
    For the fringe: Because this is such a small weaving, I am going with a very simple fringe. Cut seven 4″ pieces of the green yarn.
    Thread the first one onto your needle and run the needle through the bottom left warp loop.
    pic13 pic14
    Line up the ends of the 4″ piece of yarn and tie it into a knot, sliding the knot snugly up against the bottom of the weaving before tightening.
    Repeat across the remaining white warp loops with the remaining 4″ yarn pieces.
    Do a final trim across the bottom of your fringe.
    Finish your weaving by lining up a 8″ piece of black string with your toothpick/skewer/tubing and thread it through the top warp loops. Tie a knot in your black string & you can easily hang it on a nail. Heck, you can even use a longer string and make it into a necklace… go nuts.
    You’re finished!
    Once you get the hang of the simple act of weaving one over, one under…. take to the internet or your local library and research some new techniques!
    *Disclaimer: I am not a trained weaver. I am self taught. Most people start with the fringe first and work their way up.  Starting at the top works for me… so that is how this tutorial goes;)
    Enjoy!

    —————————————————————————————————————————————

    Christie Sommers is the designer and maker behind West Oak Design. She handcrafts small batch and one of a kind goods for home, women, and kids in her Wyndmoor, Pa studio.www.westoakdesign.com

  • Christie’s Paint Chip Wall Art DIY

    Photos and Tutorial by Christie Sommers

    Photo 6

    You will need:

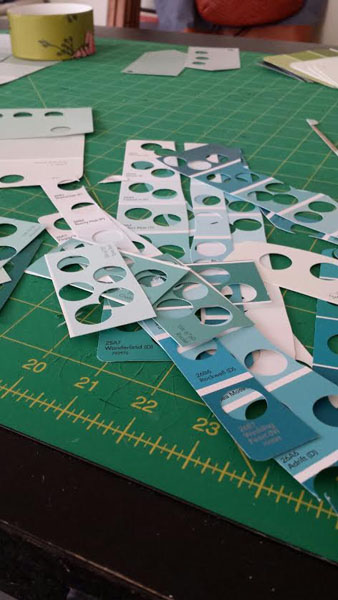
    *paint samples from your local hardware/paint store
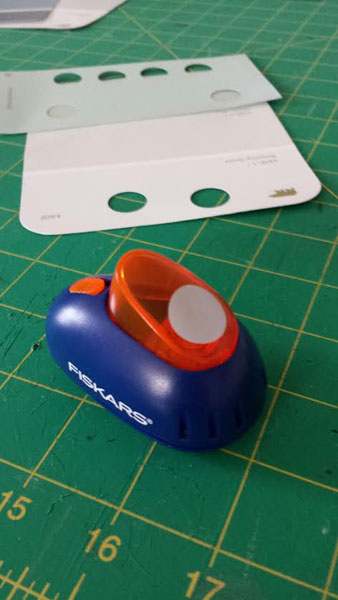
    *a circle punch (found in the scrap booking section of your nearest craft store). I used a 5/8” punch.
    *a glue stick (I prefer Elmer’s Craft Bond)
    *a sheet of card stock (this is what you will glue your circles to)
    *ruler
    *pencil
    *a picture frame if you would like to display your finished project

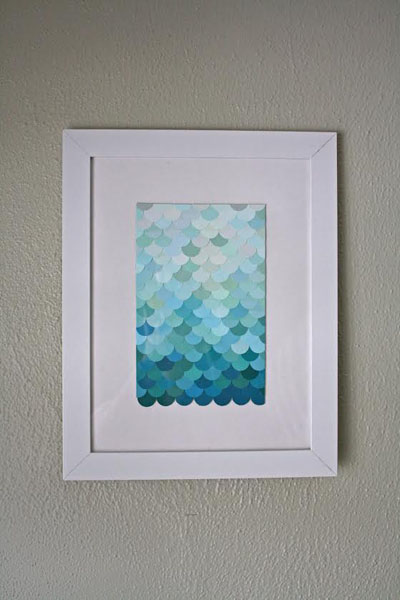
    Start off by punching out your circles.  For my 4-1/2” x 7” collage I used 161 circles. Arrange your circles by color in 3 piles: lightest colors, mid range, and darkest.

    Photo 1 - Copy Photo 2 - Copy

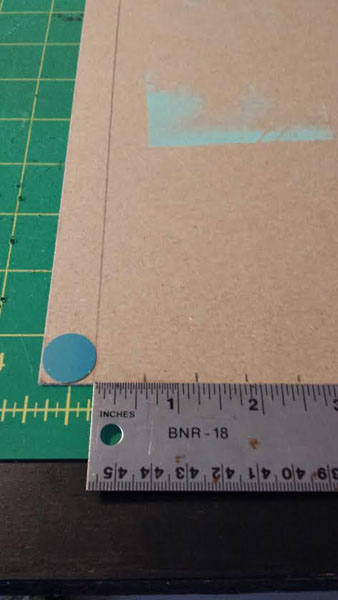
    Take your piece of card stock. You are going to draft out a grid so you can line up your circles nice and straight. Because my circles are 5/8”, I went up one side of the card stock marking every 5/8″.  Repeat on the other side of the card stock and you now have the start & finish point of each line.

    Photo 3 - Copy

    Once your lines are drawn, start at the bottom of your card stock and glue a random mix of your darkest circles across the first line.

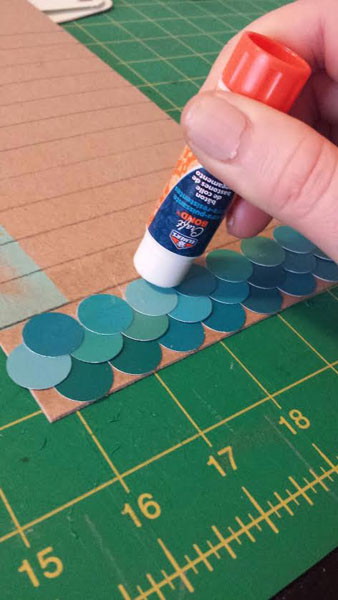
    The next row will be placed between your pencil lines. Place the first circle of row 2 between the first two circles in row 1 (see pic). Every other row is staggered giving you a fish scale pattern.

    Photo 4 - Copy

    Continue gluing rows, going from dark to light, until you reach the end of your desired finished project.

    Photo 5

    If you want straight edges, you will need to do some trimming. I trimmed off the two sides and top of mine. The bottom of my collage will give you an idea of what it will look like if you decide not to trim the edges.

    Let the glue dry for at least 10-15 minutes before trimming.

    To trim, I used a straight edge ruler, an X-acto knife and my cutting mat. If you don’t have a cutting mat/x-acto… you can take a ruler and line it up along the edge you want to trim, draw a pencil line marking where you will cut, and simply trim with scissors along your pencil line.

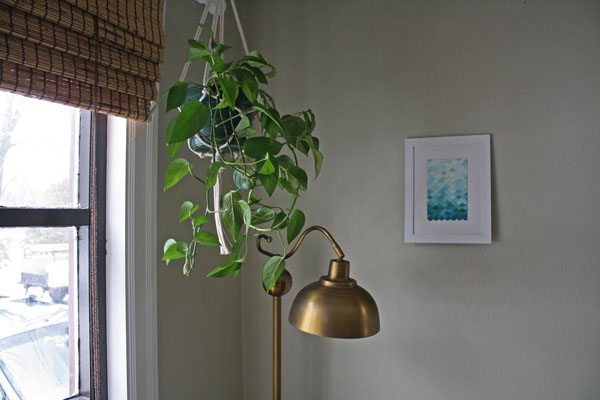
    Frame & enjoy!

    Photo 7 - Copy

    ———————————————————————————————————————————————

    Christie Sommers is the designer and maker behind West Oak Design. She handcrafts small batch and one of a kind goods for home, women, and kids in her Wyndmoor, Pa studio.www.westoakdesign.com
  • Bonnie’s Two Piece Tote Bag

    Photos + Tutorial by Bonnie Kaye Whitfield

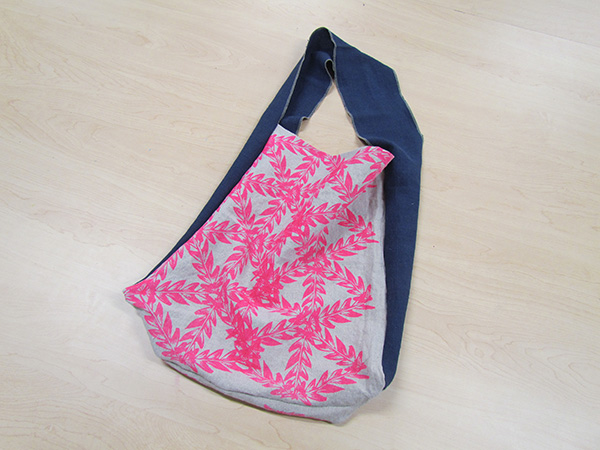
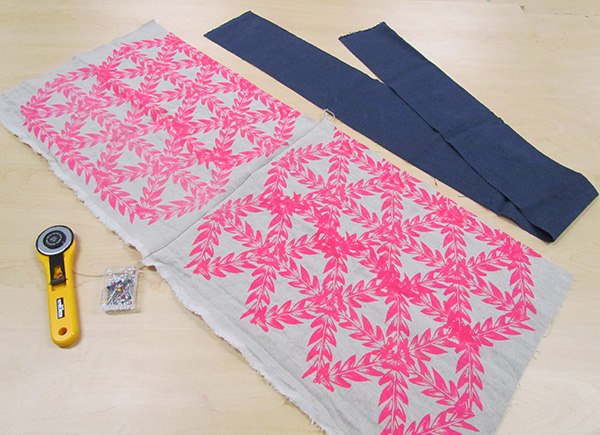
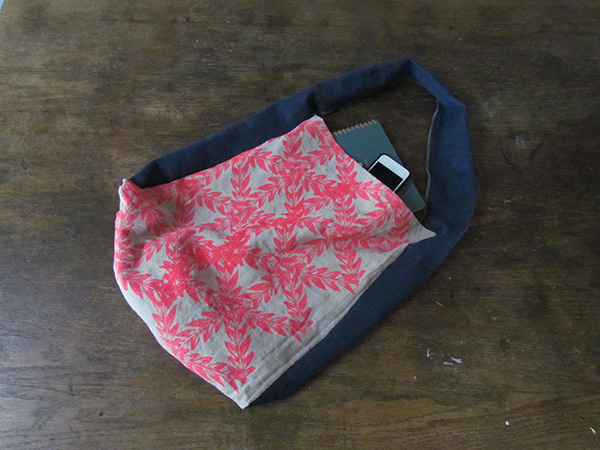
    You are not going to believe how quick and easy this tote bag is to make. I first discovered this tote bag design after getting one with a purchase from a major retailer. It is simply constructed of two pieces of fabric. Brilliant.

    Blog_4_Pic_11

    You will need:
    |
    ❖ 2 rectangular pieces of fabric

    ❖ scissors or rotary cutter to customize fabric sizes

    ❖ pins

    ❖ serger and/or sewing machine

    ❖ iron (optional)

    Blog_4_Pic_1

    Your two pieces of fabric will determine your overall shape and size of the tote. One piece will serve as the body of the tote and should be wider and shorter. The second piece of fabric will serve as the sides and the strap of the tote and should be thinner (depends on the depth you wish your tote to have) and much longer. For the body of my tote, I’m using some scrap fabric from my studio and you can see that I sewed them together in order to have a large enough piece – so feel free to hinge pieces of fabric together if needed.

    Blog_4_Pic_2

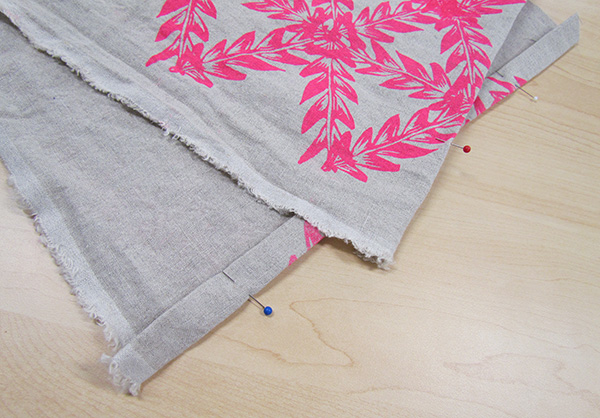
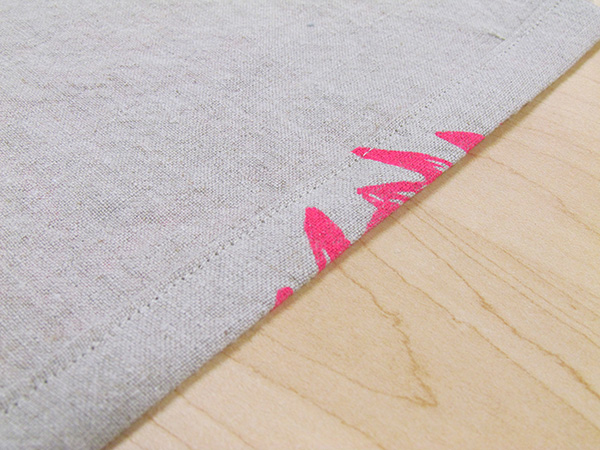
    Take the two short ends of your fabric piece that will serve as the body of the tote. Iron and pin a 1⁄2” hem and sew. This will create a more finished look for the top edges of your tote.

    Blog_4_Pic_3

    Grab a bunch of pins and your two pieces of fabric and take a seat. Fold the body of the tote, so that the nice sides are facing each other on the inside. You’ll be pinning your tote together from the inside.

    Blog_4_Pic_4 Blog_4_Pic_5

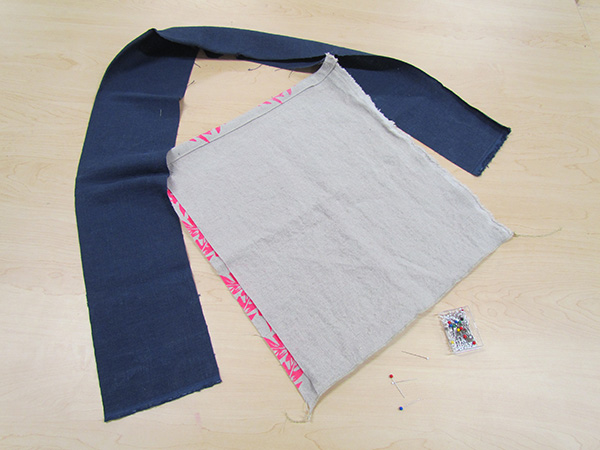
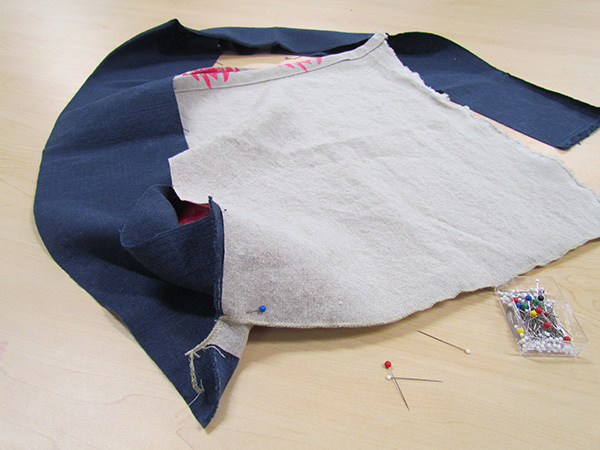
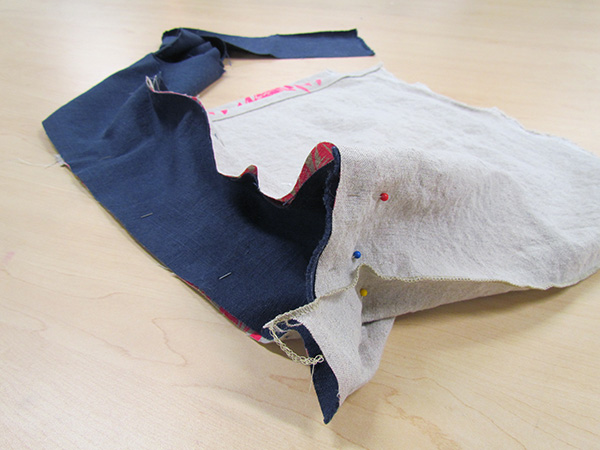
    Start by pinning the long piece of fabric to the bottom of the body piece, matching the center/bottoms. Keep pinning as you go around the corner edge of the long piece of fabric. Stop when you get to the top edge of the tote. Repeat on the other side of the tote, starting at the bottom/center of the bag again.

    Blog_4_Pic_7 Blog_4_Pic_6

    Once the two pieces have been completely pinned together, you are ready to sew. You should also be able to get a pretty good idea of the overall size and shape of your tote at this point.

    Blog_4_Pic_8

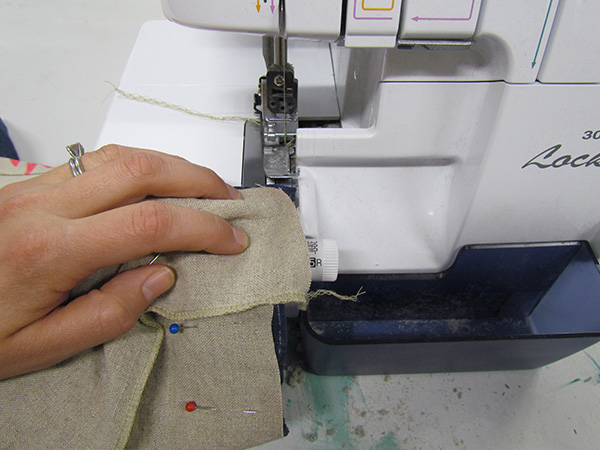
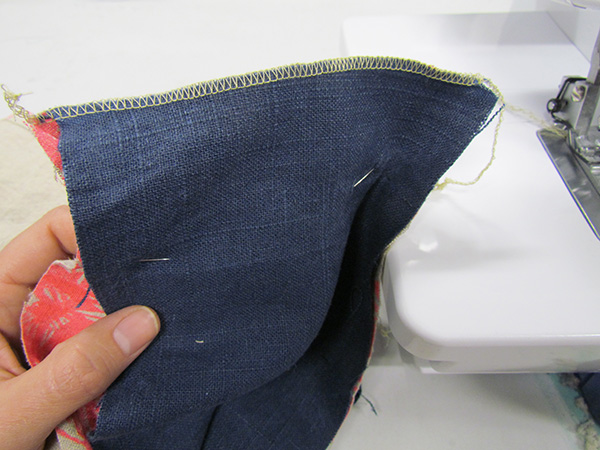
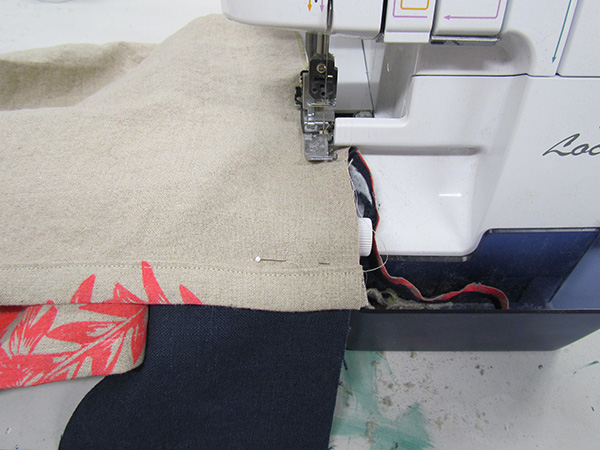
    I’m using a serger, but you can also simply use a sewing machine. First, begin by sewing the two bottom edges of the two sides. The length of the stitch will depend on the width of your strap.

    Blog_4_Pic_9

    Next, you’ll do two long stitches and that’s it! Begin at one end of the tote and sew over the strap, until you get to the other side of the bag. Repeat on the other side.

    Blog_4_Pic_10

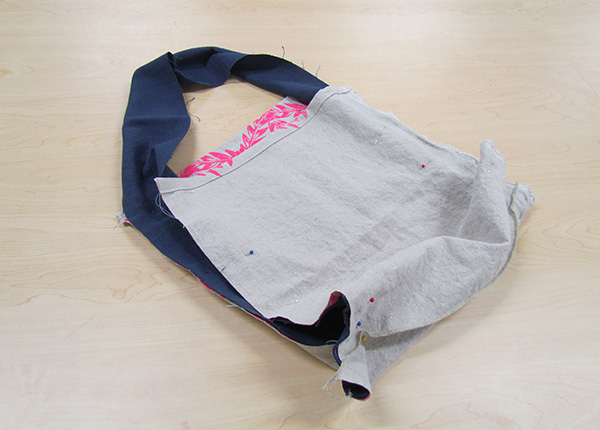
    Turn the bag inside out and you’ll now have a splendid new tote, perfect for all your toting needs.

    Blog_4_Pic_12

    ———————————————————————————————————-

    Bonnie Kaye Whitfield designs and screen prints home textiles + paper goods under the name, Bonnie Kaye Studio. Products are created to inspire memories at home and around the table.  A donation is made with every purchase to help feed hungry Americans. www.BonnieKayeStudio.com

  • An Interview with Amber Zaraza of Phea Jean

    First time ASCB booth mates Jamie Williams of Dop Dop Designs and Amber Zaraza of Phea Jean interview each other and find out what is in store for the upcoming bazaar! This first post features Jamie’s interview with Amber of Dop Dop Designs.  Enjoy!

    How did you find sewing and what influenced you to turn your skill into a business?  I began sewing around the age of 12. I found my mothers old Kenmore sewing machine and an assortment of my grandmother’s notions and thought I could make things. I didn’t have any fabric so I cut up clothing that I got at the thrift store.  Of course I had no idea what I was doing but managed to make a very simple cross body handbag out of an old blue and white houndstooth polyester suit. I took a crystal clasp off of one of my mothers sweaters to use as a closure and wore that bag for years. I was immediately hooked! I took sewing classes in high school where I was able to hone in on my skills and really learn proper techniques. I went to college for fashion design and during that time made handbags for myself, and then friends, and soon after strangers were asking me where and how to order. So in 2005, phea jean was born, sort of by accident, but once the ball started rolling I just went with it and I love it! It’s still funny to think that I originally set out to be a bridal designer!

     Where did the name phea jean come from?  Settling on a business name seemed daunting at first- what name would I always want to be associated with and never be tired of?!  phea jean, of course, had to be it…phea (Phyllis) and Jean are my two grandmothers, both wonderful and strong women in different ways and both very dear to me.

    Describe your personal style and how that translates into phea jean.
    I love vintage clothing…dresses, coats, hats, etc. The fabric really draws me in, as I find the bright colors and bold patterns hard to resist. I use primarily vintage fabric because I find it so intriguing, I, too, sometimes find inspiration in vintage styles. For example, one of my hat patterns is loosely based on the cloche style made popular in the 1920’s. I also just really like unique, funky pieces. I like when unexpected fabrics are used for traditional silhouettes. I love mixing fabrics and patterns which I do in my designs. In my personal style, I pretty much go for it- wearing and mixing things that other people wouldn’t think to, but somehow (most of the time) ends up working. I never take fashion too seriously, but I want to look good. I want people to look good (great!) in my designs but I also want them to have a good time with the pieces and mix and match them together.

    What inspires your work?
    I am inspired by all the vintage fabric patterns and textures. I “treasure hunt” in attics, basements, estate sales, thrift stores, etc for fabric and I never know what I will bring home, so I have to let each piece speak to me and inspire me as it comes. I’m even often inspired by buttons and will sometimes start with the buttons and design around them. Everything I make is one of a kind and even though I have patterns in place, I do very little planning when it comes to the production aspect of sewing. My process consists of looking around my studio and seeing what catches my eye at the moment.
    My clothing designs are definitely inspired by women, of all shapes and sizes. I really try to accommodate different body types and design pieces that will fit a variety of sizes. I want anyone to come to my booth and be able to find something flattering and leave feeling confident.

    In a literal sense, I am inspired to make things that I want or need for everyday life. My head is cold, therefore I should make hats. I need a specific size/shape handbag so I’ll make it.

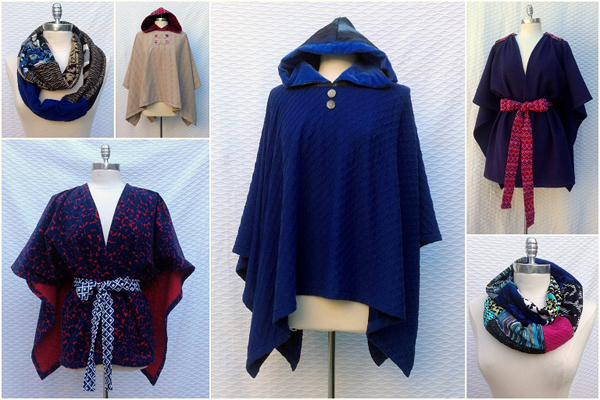
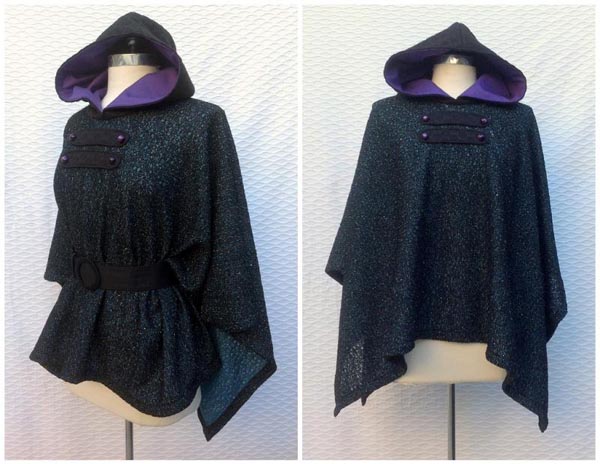
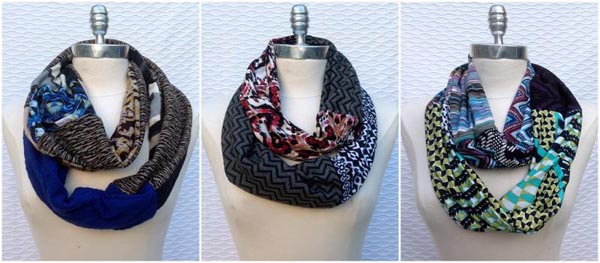
    What items will you be bringing to the bazaar? phea jean will be bringing things to keep you warm:  Plenty of hats and scarves of course. I’ll also have my unique wrap tops and ponchos for stylish winter clothing options.

    What item is perfect for gift giving?  The scarves are a great gift and an easy way to spruce up any outfit. At $35-$45 you really can’t go wrong.

    What other artists at the bazaar are you excited to check out?  Considering the shows are our only chance to do our holiday shopping I am excited to see and support all the other vendors!  First thing, I’ll be hitting up my booth mate dop dop designs for a housewarming gift. I’m also a huge fan of miss millie and will be dropping hints to my partner on which of her latest work I need to have. I’m interested to see the coffee drip cones from Melissa Weiss Pottery and the jewelry by Maureen Duffy.

  • An Interview with Jamie Williams of Dop Dop Designs

    First time ASCB booth mates Jamie Williams of Dop Dop Designs and Amber Zaraza of Phea Jean interview each other and find out what is in store for the upcoming bazaar! This first post features Amber’s interview with Jamie of Dop Dop Designs.  Enjoy!


    How and when did dop dop designs develop into a business?
    Where does the name dop dop come from?

    The name dop dop comes from my youngest son, Kiefer.  When Kiefer was nearly 1, he didn’t say many words, but he sure loved flip flops. Having difficulty speaking, he would always call them dop dop’s.  As time went on, he would say dop dop whenever he was happy.  So, eventually, dop dop came to mean “all things good”.   My design focus started with an emphasis on aprons due to Kiefer’s acid reflux and my need to protect my clothing during feedings. There were a ton of cute burp cloths and baby coverage, but nothing for me.  So, I started designing aprons that were durable, easy to care for and pretty without being over the top. Therefore, I felt it only right to immortalize Kiefer’s role (and sweetness) in the development of my brand,  In July 2011, dop dop designs became a legitimate business.  Three years later, here I am expanding my products and hoping to transform your kitchens.

    Describe the dop dop style.
    My style is fresh, and clean but with an element of whimsy. Specializing in kitchen accessories,  I like to merge utility and practicality with a dash of happiness and turn the things that we need into the things that we want.  dop dop designs is all about versatility, quality, easy care, and pops of color.  I put the extra care into production so that you don’t have to.


    What inspires your work?
    As for inspiration,  I am totally inspired to create a comforting haven at the dinner table where my family and yours can reconvene at the end of each day.  Life is full of fast paced activities, dinner  shouldn’t be one of them.  Even when my children are getting mac n’ cheese for dinner,  I love how they feel like it’s the most special thing ever! Simply using a cloth napkin and a place mat transforms the everyday into an occasion.   Many expected and unexpected events can become inspiration.   Inspirational things (for me):  sounds and smells of the ocean, walks in the woods, running water in the shower, blooming flowers,  80’s/90’s industrial music (oddly enough),  old photo albums, and canning.

    What items will you be bringing to the bazaar?

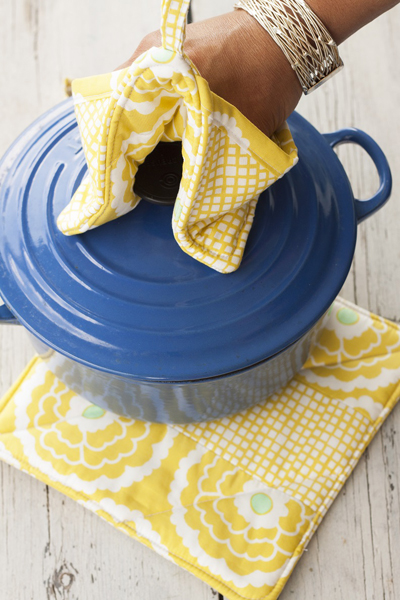
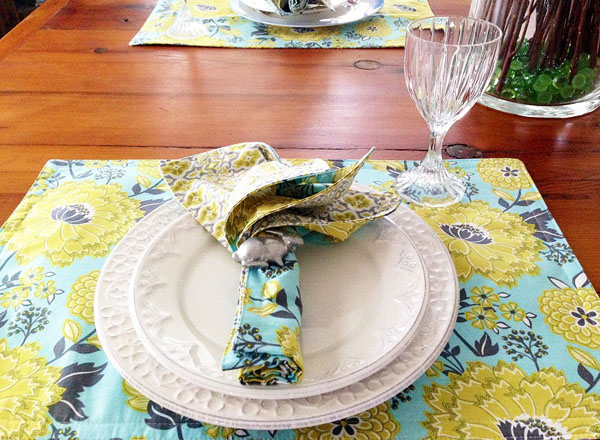
    dop dop designs will be bringing a slew of items to the ASCB November 8th and 9th.  As always, full and half aprons in fantastic fabrics will be available,  potholders (deluxe and mini grabbers),  reversible placemats, double-sided deluxe napkins, linen napkins,  reversible table runners, and market tote bags made of vintage tablecloths~ perfect for any excursion.   All items are made of 100% premium cotton and handmade in Chester Springs, PA.


    What dop dop item is perfect for gift giving?
    All of my items are the perfect gift for anyone who has recently moved into a new home or apartment, an avid cook, anyone who has recently remodeled their kitchen, or someone who loves to create intimate dining spaces.  dop dop designs’ potholder gift sets are the perfect hostess gift,  placemats and napkins are the perfect gift for the new homeowner, and a fantastic one of a kind market tote would please anyone with a heart!

    What other artists at the bazaar are you excited to check out?
    I am so excited to be a part of the ASCB this fall, not only as an artist/maker, but as a shopper!   I’m a big pottery fan and love giving pottery as gifts….so, I’m looking forward to Little Flower designs for those needs.  As a sewer, can’t wait to see Group Hug Quilts!!!  Big quilt fan and love their work!  For my nieces, I am sure to be hitting up Dahling accessories.  AND, of course, I am looking forward to Phea Jean.  Nobody works vintage fabric like Amber.  Can’t wait!

  • Guest Post: “Power of Three” by Forge & Finish

    The women behind Forge & Finish jewelry collective invite you into their Philadelphia studio to catch a glimpse of their creative process through these fun short films.

    You can find their work at Booth #20 at our upcoming Fall Art Star Craft Bazaar on November 8th + 9th! Look out for more Guest Posts by participating vendors in the days leading up to the show.  Enjoy!
    Demure de Rigueur’s Little Shaker Necklace from Fo Sho & Tell on Vimeo.

    Lace Army’s Fortune Cookie Necklace from Fo Sho & Tell on Vimeo.

    Bombita Designs Raw Diamond Ring from Fo Sho & Tell on Vimeo.

  • Get a Free Ride to the Bazaar with UBER!

    ARRIVE TO OUR ART STAR CRAFT BAZAAR IN STYLE WITH 

    We’re excited to announce we’ve partnered with Uber to offer all guests who are new to Uber a complimentary ride up to $20 using the promo code ARTSTAR 
    Uber is an iPhone/Android app that lets you tag your location and summon a professional driver to your side within minutes. Once in the car, the driver will take you wherever you need to go. The fare is billed to your card, with no need to tip, so you don’t have to worry about handling cash.
     Just click the promo code below and sign up! You’ll be riding in style in no time at all.

     PROMO CODE: ARTSTAR

    HOW TO UBER 
    Order a car
    Use the iPhone or Android app, or visit http://m.uber.com to request a ride 
    Your Driver Comes to You
    Sit back and relax. We’ll text you when your Uber arrives.
    Hop in & Hop out

The owner of this website has made a commitment to accessibility and inclusion, please report any problems that you encounter using the contact form on this website. This site uses the WP ADA Compliance Check plugin to enhance accessibility.