Tag: artstarphilly

  • Bonnie’s Two Piece Tote Bag

    Photos + Tutorial by Bonnie Kaye Whitfield

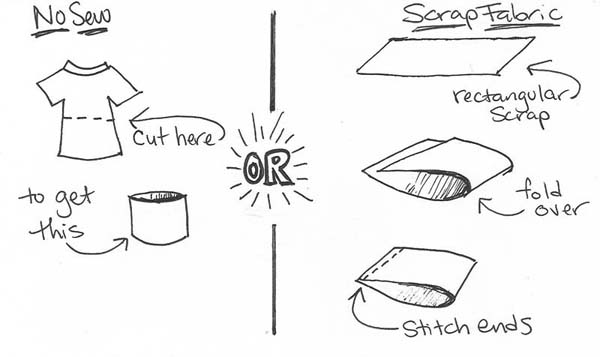
    You are not going to believe how quick and easy this tote bag is to make. I first discovered this tote bag design after getting one with a purchase from a major retailer. It is simply constructed of two pieces of fabric. Brilliant.
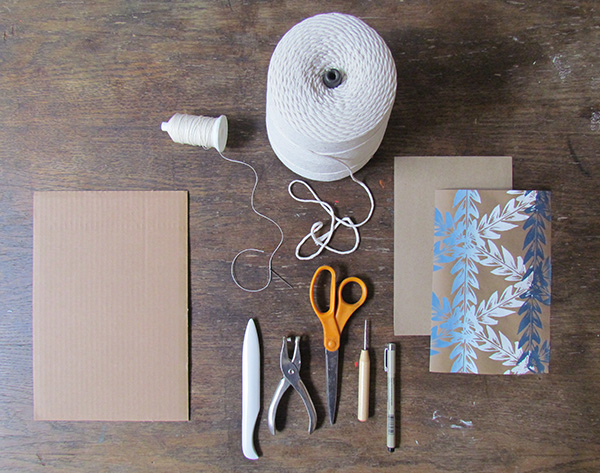
    Blog_4_Pic_11

    You will need:
    |
    ❖ 2 rectangular pieces of fabric

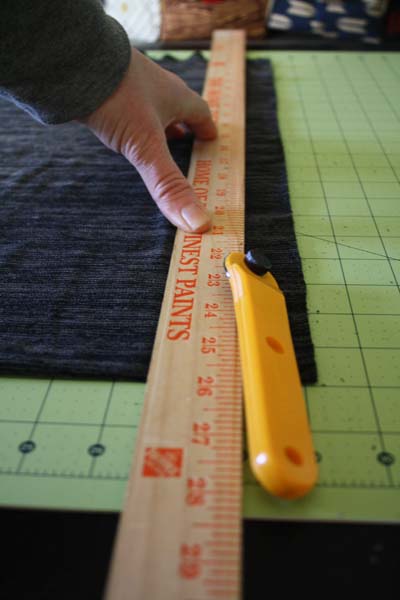
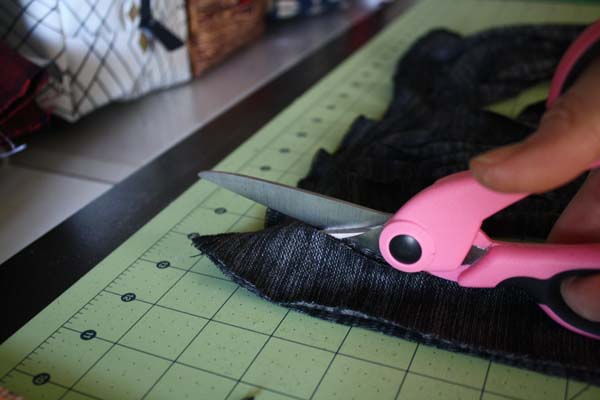
    ❖ scissors or rotary cutter to customize fabric sizes

    ❖ pins

    ❖ serger and/or sewing machine

    ❖ iron (optional)

    Blog_4_Pic_1

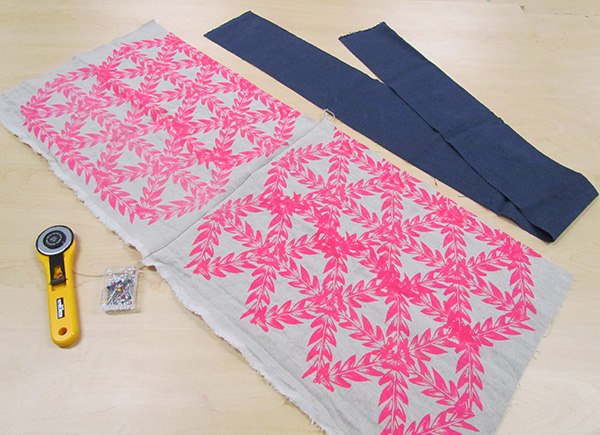
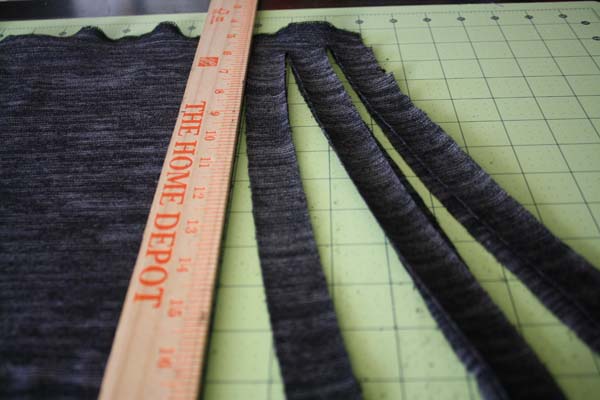
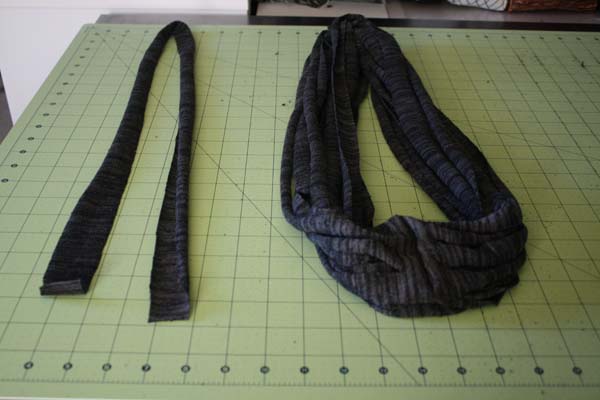
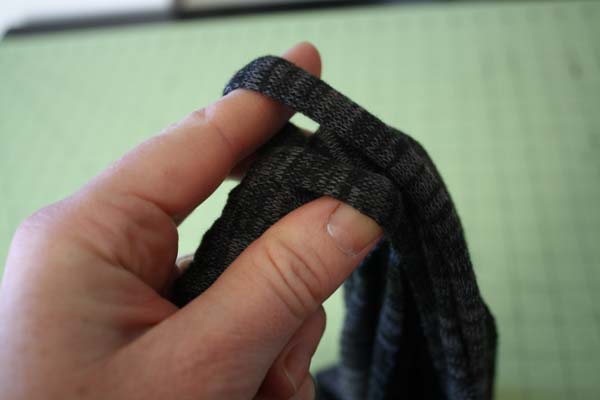
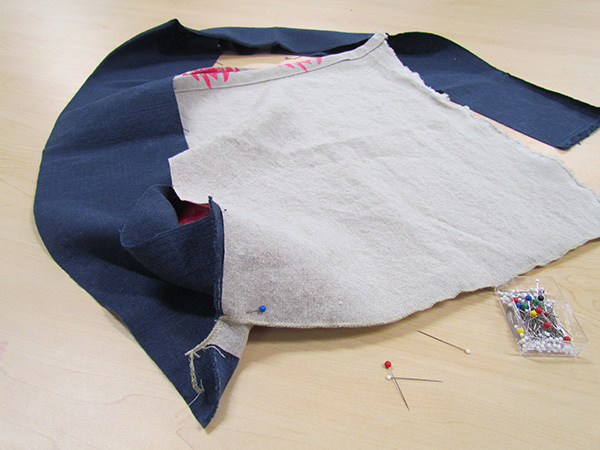
    Your two pieces of fabric will determine your overall shape and size of the tote. One piece will serve as the body of the tote and should be wider and shorter. The second piece of fabric will serve as the sides and the strap of the tote and should be thinner (depends on the depth you wish your tote to have) and much longer. For the body of my tote, I’m using some scrap fabric from my studio and you can see that I sewed them together in order to have a large enough piece – so feel free to hinge pieces of fabric together if needed.

    Blog_4_Pic_2

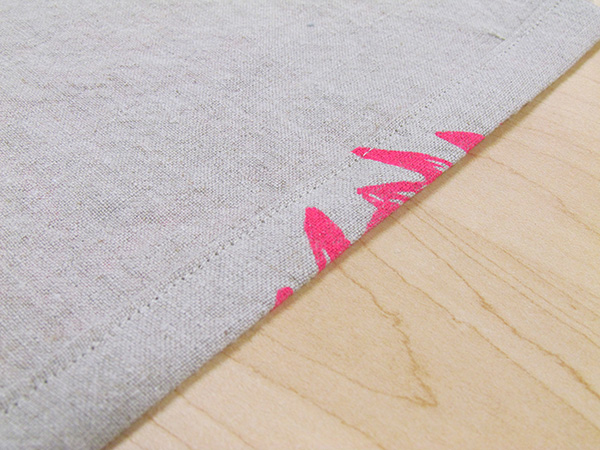
    Take the two short ends of your fabric piece that will serve as the body of the tote. Iron and pin a 1⁄2” hem and sew. This will create a more finished look for the top edges of your tote.

    Blog_4_Pic_3

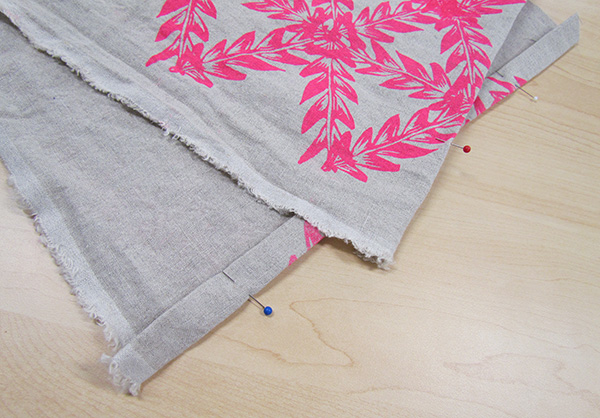
    Grab a bunch of pins and your two pieces of fabric and take a seat. Fold the body of the tote, so that the nice sides are facing each other on the inside. You’ll be pinning your tote together from the inside.

    Blog_4_Pic_4 Blog_4_Pic_5

    Start by pinning the long piece of fabric to the bottom of the body piece, matching the center/bottoms. Keep pinning as you go around the corner edge of the long piece of fabric. Stop when you get to the top edge of the tote. Repeat on the other side of the tote, starting at the bottom/center of the bag again.

    Blog_4_Pic_7 Blog_4_Pic_6

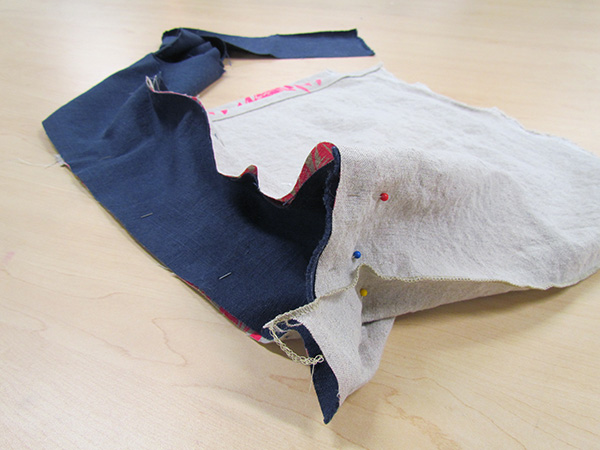
    Once the two pieces have been completely pinned together, you are ready to sew. You should also be able to get a pretty good idea of the overall size and shape of your tote at this point.

    Blog_4_Pic_8

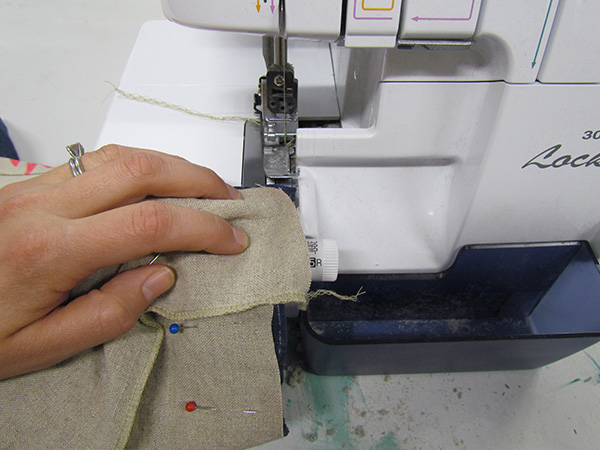
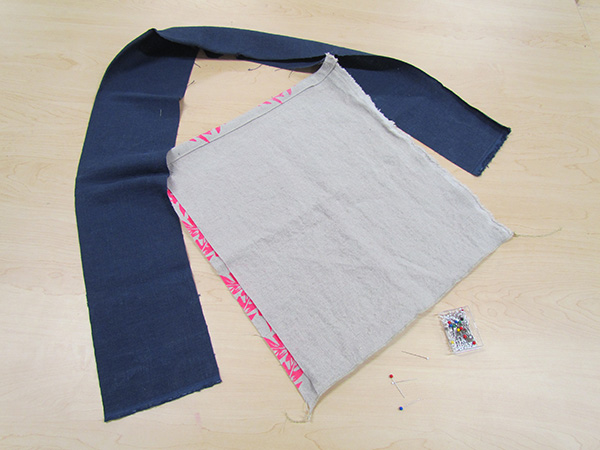
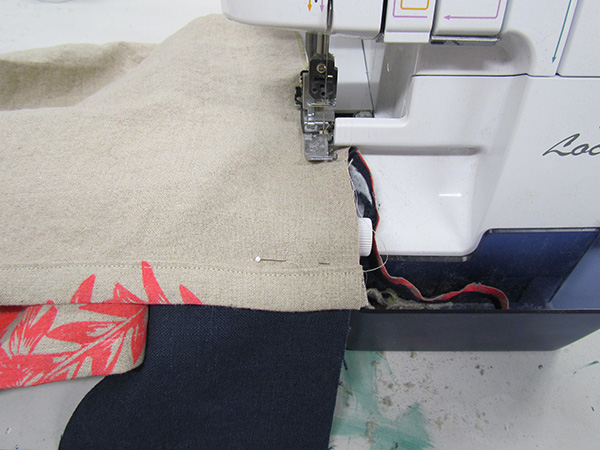
    I’m using a serger, but you can also simply use a sewing machine. First, begin by sewing the two bottom edges of the two sides. The length of the stitch will depend on the width of your strap.

    Blog_4_Pic_9

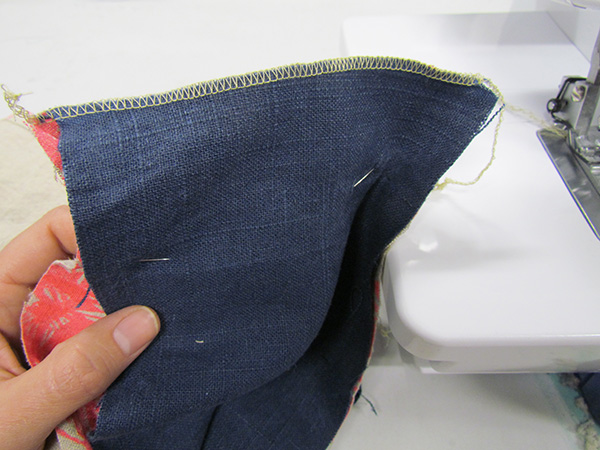
    Next, you’ll do two long stitches and that’s it! Begin at one end of the tote and sew over the strap, until you get to the other side of the bag. Repeat on the other side.

    Blog_4_Pic_10

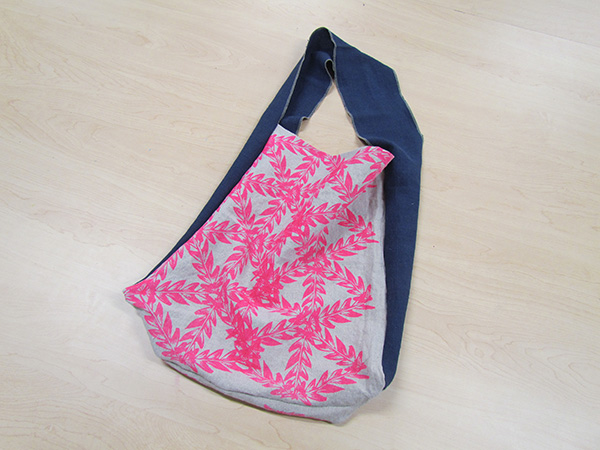
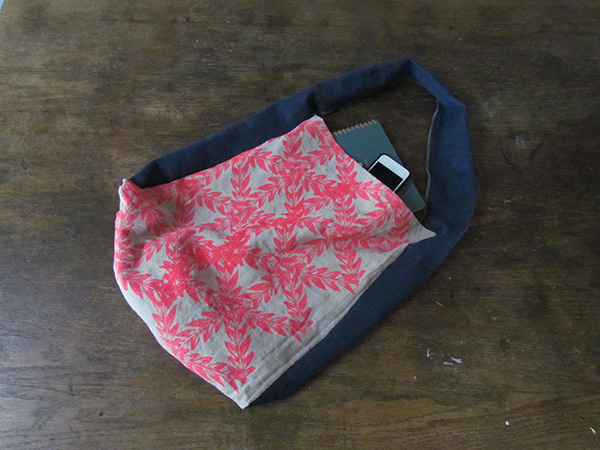
    Turn the bag inside out and you’ll now have a splendid new tote, perfect for all your toting needs.

    Blog_4_Pic_12

    ———————————————————————————————————-

    Bonnie Kaye Whitfield designs and screen prints home textiles + paper goods under the name, Bonnie Kaye Studio. Products are created to inspire memories at home and around the table.  A donation is made with every purchase to help feed hungry Americans. www.BonnieKayeStudio.com

  • Christie’s Hand Stitched Bowl Tutorial

    Photos + Tutorial by Christie Sommers

    Photo 1
    You will need:
    -cotton clothesline
    -quilting needle (you can use a regular sewing needle with a thimble but a larger quilting needle is best for passing through the thick clothesline)
    -embroidery thread, yarn, or string in color of your choice
    -scissors

    Photo 9
    Thread the needle with colored string of choice and tie a knot at the end.

    Use as much thread as you can manage. No more than 3′ should suffice. You can tie more thread on when you run out.

    Start by coiling the clothesline between two fingers as shown.

    Photo 10
    Insert the needle into the center of the coil passing through the layers of rope and exit as shown.

    Photo 11 Photo 12
    We will be using a blanket stitch for this project. Wrap your working thread behind the needle from right to left.

    Photo 13
    Bring the thread back over the needle from left to right and pull the needle through.

    Photo 2
    Repeat going around in a circle, entering in the center, until you reach the first stitch.

    If you want a bowl with a wide flat base, you can continue the flat blanket stitch going around a few more times until the base is as wide as you like.

    Photo 3
    At this point you will be rounding up to give your bowl a curved shape.

    To achieve this, you will be inserting the needle straight through the clothesline from front to back rather than from the center out. See pic.

    Photo 4
    Continue with the blanket stitch inserting the needle through the clothesline from front to back until your bowl is as large as you like.

    You will most likely run out of stitching thread as you are working. To add more, tie a new 3′ length of thread to the tail of the previous working thread. Place the ends together as shown and tie in a knot.

    Photo 5Photo 6
    For the next few stitches, Insert the needle Between the coils instead of through the rope until your knot is hidden.

    Photo 7
    Once you pass the knot, continue stitching through the rope until you reach the desired bowl size.

    Tie off your working thread and then snip the clothesline, You’re done!

    As you can see from the next photo, the placement of your stitches will determine the design of your bowl. For the black bowl, I spaced my stitches out and staggered with each layer, essentially placing new stitches between the stitches on the previous level. For the red bowl, each new stitch was placed right next to the previous level’s stitch.  Play around with stitch placement to see what you can come up with.

    Photo 8
    Enjoy!

    —————————————————————————————————————

    Christie Sommers is the designer and maker behind West Oak Design. She handcrafts small batch and one of a kind goods for home, women, and kids in her Wyndmoor, Pa studio.www.westoakdesign.com


  • Affordable Art for your Walls

    I don’t know about you, but I am ready for spring!  I am sick of spending so much time indoors……Unfortunately, I think we have a few more weeks of cold and blah.  Since I’ve been inside so much, I’ve been dreaming about redecorating my own space and hanging some new prints.  Here are some of my favorites from the shop that are sure to bring some pops of color and happiness to your walls and (hopefully) a temporary cure for the winter blues.  Most are motivational and remind me of sunny days to come, others just put a smile on my face.

    Root Print
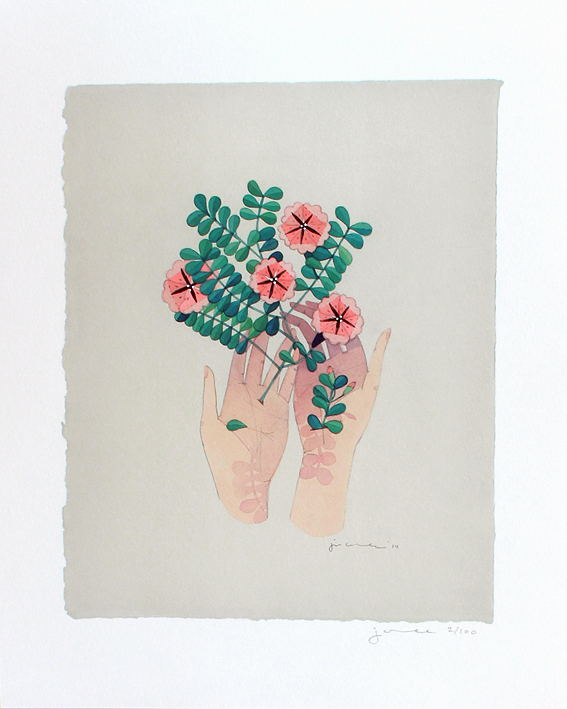
This print is of an original piece titled “Root” from Jen Corace’s solo exhibition at Art Star.  It is an archival pigment print on Hahnemuhle 100% cotton rag paper.  We use Silicon Fine Art Printing here in Philadelphia, so it is extremely high quality.  It is a signed, limited edition of 100 and is $40.  Buy it Here.

    Amy Rice Grow Where You Are Planted
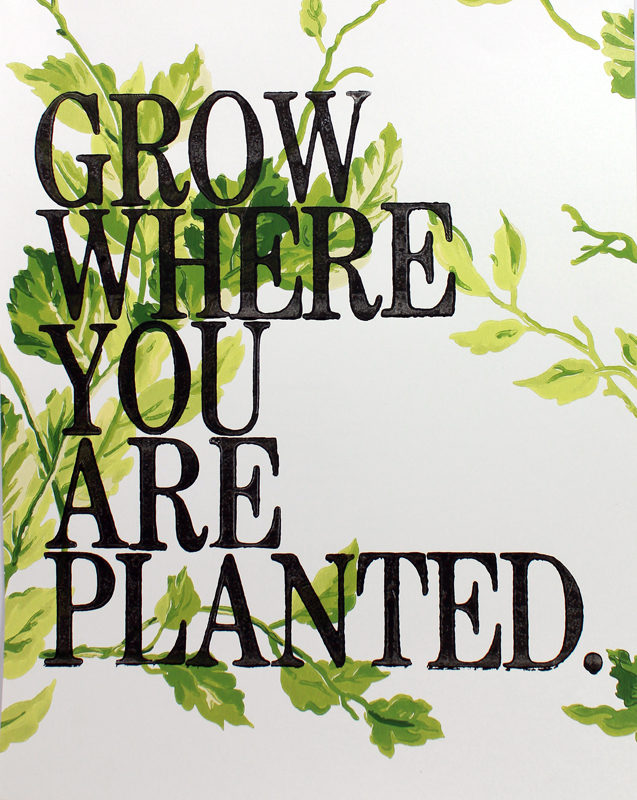
You’ll see there is a theme here.  I have plants and nature on my brain.  This print is by Minneapolis based artist, Amy Rice.  Amy is a prolific artists whose work we’ve carried since we opened in 2004.  She is one of our absolute favorites!  Luckily for my wallet, Amy offers a line of affordable art prints like this one.  She enjoys painting/printing on antique letters, journal entries, maps and even high end wallpaper, like this one.  This is a hand set and hand pulled letterpress print.  I just love it!  $40 Buy it here.

    Keep Going Print
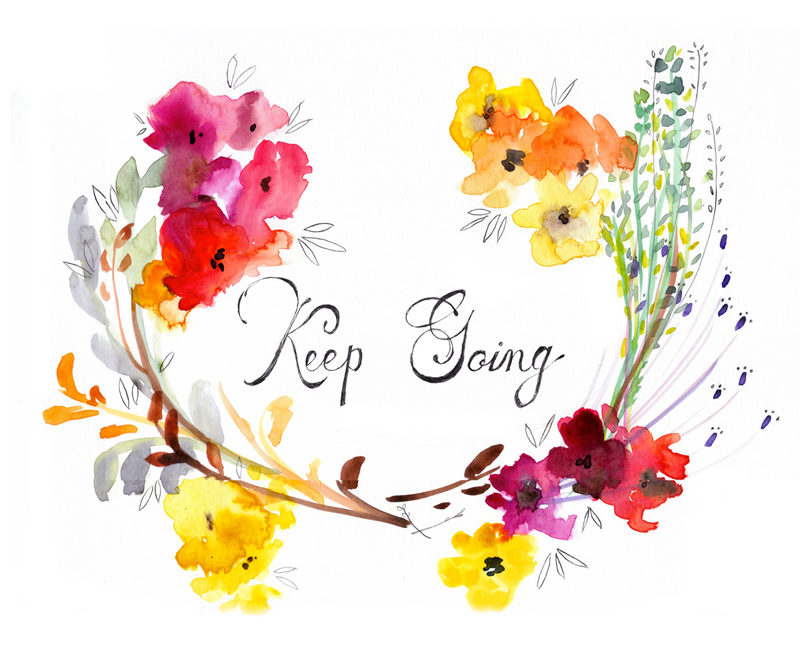
Another floral piece with a motivational phrase.  I need it this time of year!  I love Mai Autumn’s delicate watercolors, they are so beautiful!  This one will also add a nice pop of color to any room!  This piece is available in both 8×10 and 11×14, which are both standard frame sizes.  Printed  with archival inks on Canon Pro Luster Pape and $20/$35, depending on which size you choose.  Buy it here.

    Yardsale Press Keep it Together
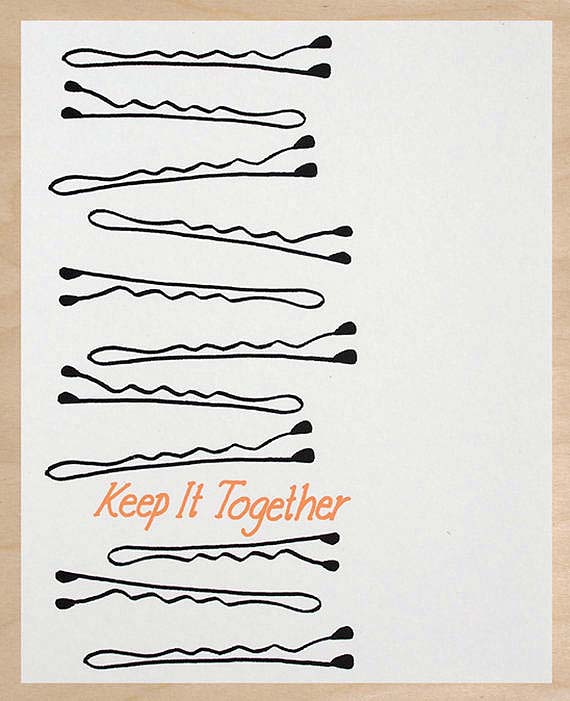
A daily reminder – ha!  Plus, it makes me laugh a little b/c there are seriously bobby pins all over my house.  In the oddest places too!  For this reason, I think they are the bane of my husband’s existence.  Just kidding.  This is a screenprint by Bryan Sculthorpe of Yardsale Press, who I fondly refer to as “talls” because he is a giant and I am a midget. Just $15 – buy it here.

    Paper Sparrow Adventure Awaits
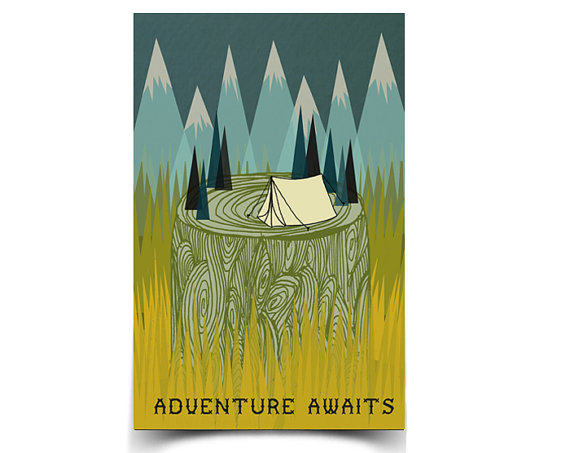
My husband and I have already begun planning our camping trips!  This reminds me that in a few months we’ll be sleeping under the stars.  I. cannot. wait.  This is an 11×17″ poster illustrated by Andrea Lauren of Paper Sparrow and it is printed with vegetable + soy based inks.  $18. Buy it here.

    Reflecting Pool of Shame
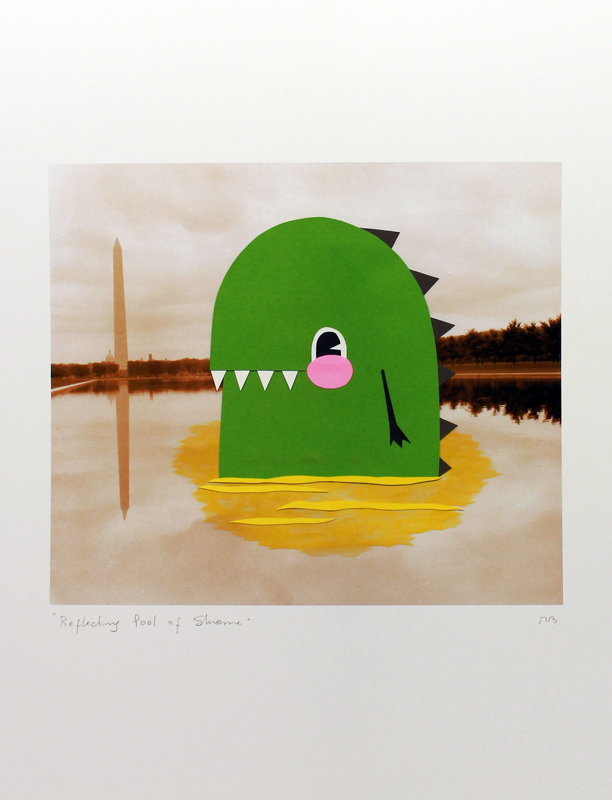
And finally, this gem.  Because I love art with a sense of humor most of all.  It is titled “Reflecting Pool of Shame”.  It is a reproduction of an original painting on top of a photograph by Mauro Biaocco of Naughty + Nice.  It was printed using archival ink and paper.  Don’t lie, you’ve been there!  $20 Buy it here.

    I hope you enjoyed looking at my favorite Art Star prints and maybe you are inspired to pick out your own.  What are your favorites? Shop our online collection here. Or stop on by – there is WAY more in the actual store.

  • Bonnie’s Inspirational Wall Hanging

    Photos + Tutorial by Bonnie Kaye Whitfield

    Bonnie_Blog3_Pic9

    Sometimes everyone needs a little pick-me-up, especially in the studio or office, where it’s easy to get overwhelmed with projects and deadlines.  These simple inspirational wall hangings combine the magic of masking fluid and watercolor to create your own, personalized message that will keep your chin up and head high.

    You will need:

    • white or cream cardstock or smooth watercolor paper
    • pencil
    • art masking fluid
    • old, thin brush (one that you don’t mind tossing in the trash after use)
    • watercolor
    • watercolor brushes
    • container of water
    • wooden dowel (optional)
    • heavy duty tape or hot glue gun (optional)
    • rope or twine (optional)

    Bonnie_Blog3_Pic1

    As you gather your materials, make sure you have thick, smooth paper to work with; any paper that is “soft” or textured will not work well with the masking fluid.  Also, note that the last three materials are optional and needed only if you want to hang your message as pictured.  Otherwise, you could simply cut your wall hanging to size for a frame or pin directly onto your wall.

    Bonnie_Blog3_Pic2

    If you want to hang using a dowel rod, you’ll first want to cut your paper so that the width of the paper is about 2” shorter than your dowel rod.   Next, go ahead and fold down the top edge of the wall hanging (approx, 2”).  This will serve as your loop for inserting your dowel rod.  Wait to tape down the flap until the very end.

    Bonnie_Blog3_Pic3

    Flip your wall hanging over, so that you are now working on the front side of the paper. Decide your message, font, and layout, and lightly sketch out the words on your paper using a pencil.

    Bonnie_Blog3_Pic4

    Next, grab your old brush.  Working quickly, apply the masking fluid over your penciled-in letters.  The masking fluid is basically liquid rubber.  It will be blocking, or masking, the watercolor.  It does dry fairly quickly, so you’ll want to work quickly and then immediately clean your brush after using the masking fluid, otherwise, you might have to throw away your brush.

    Let the masking fluid letters dry thoroughly.  It should dry darker, and you can test if it’s dry just by gently touching it.

    Bonnie_Blog3_Pic5

    Once the masking fluid has dried, you can add watercolor to your wall hanging.  In order for the letters to show up, you’ll need to apply watercolor on top of and around all the letters.

    Bonnie_Blog3_Pic6

    Now for the hardest part … waiting!  The watercolor and paper must dry completely before peeling off the masking fluid.  Trust me, I have learned this lesson the hard way.  If it’s not dry, the paper will start to pull off with the masking fluid.  When you think it’s dry, you can begin to rub/pull the masking fluid off gently.  When all the dried letters are removed, you can erase any pencil lines showing.

    Bonnie_Blog3_Pic7

    Lastly, flip the hanging over and tape down the flap.  Insert the dowel rod.  Cut your rope or twine to desired length and tie to the ends of the rod.

    Bonnie_Blog3_Pic8

    Hang in a visible area, get back to work, and stay inspired.

    Bonnie_Blog3_Pic10

    —————————————————————————————————————-

    Bonnie Kaye Whitfield designs and screen prints home textiles + paper goods under the name, Bonnie Kaye Studio.  Products are created to inspire memories at home and around the table.  A donation is made with every purchase to help feed hungry Americans.

    www.BonnieKayeStudio.com


  • Christie’s Herbal Conditioning Rinse Tutorial

    Tutorial + Photos by Christie Sommers of West Oak Design

    Here is a miracle rinse to tame the driest of winter hair. Don’t be afraid of the vinegar… I promise you won’t smell it in your hair after your shower. The acidity of apple cider vinegar smooths the hair cuticle and leaves the frizziest hair looking shiny and healthy and feeling incredibly soft.  Try this herbal rinse as a treat for yourself.. or your valentine.

    You will need:

    -3 cups of filtered water (separated)
    -1/2 cup of apple cider vinegar
    -A few sprigs of rosemary (dry or fresh)
    -2 teaspoons of lavender..use more or less to your liking.
    You can add just about any herbs you like according to your scent preferences. I added chamomile. This recipe is very flexible
    -5-10 drops of essential oil of your choice (I used rosemary & lavender)

    Image 1

    *Boil 2 cups of filtered water

    *Remove from heat and add your herbs. I use rosemary for its clarifying properties, lavender for its relaxing scent, and chamomile which adds subtle golden highlights. Note: try hibiscus for red highlights

    Image 2

    *Let steep for at least 45 minutes. The longer the better. Sometimes I’ll let it sit covered all day.
    *Allow herbal tea to cool completely.
    *Pour tea through a fine mesh sieve to remove herbs.  A tea ball infuser works well too.

    Image 3

    *Add 5-10 drops of essential oil to…
    * 1/2 cup of apple cider vinegar

    Image 4

    *Add 1 cup filtered water to the filtered “tea”, then add the vinegar/oil mixture

    Image 5
    *Recipe yields 3 cups.
    *I fill a spray bottle for the shower and pour the remainder into a mason jar for later.
    *I wash my hair every other day and use this rinse every time.

    After 2 or 3 uses you should begin to see a huge improvement in the softness and shine of your hair.

    Enjoy!

    _____________________________________________________________

    Christie Sommers is the designer and maker behind West Oak Design. She handcrafts small batch and one of a kind goods for home, women, and kids in her Wyndmoor, Pa studio.www.westoakdesign.com

  • Genevieve Geer’s Le Puppet Regime Opens Friday!


    Enjoy this fun trailer for Genevieve Geer of Le Puppet Regime’s solo exhibition at Art Star. The opening reception will be this Friday the 13th from 6-8pm and will include snacks, light refreshments, Cut and Paste Photobooth and first dibs on this incredible work! And find out who is really pulling the strings 😉

    Learn more about Genevieve and her work here.

  • Our Valentine’s Day Gift Guide!

    Looking for a unique gift for your special someone on Valentine’s Day?  Look no further. We’ve put together a list of handcrafted goodies that will make your girl or guy’s day!

    Laure George Notecard
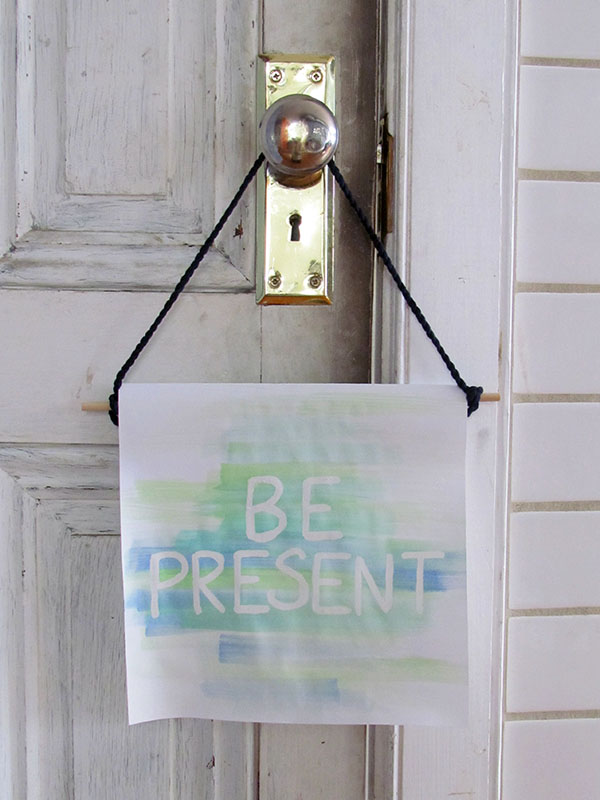
First, start with the card! We’ve got a huge selection of hilariously adorable ones by Laura Berger. $4.50 each

    Angle Devil Kasie StrohmDoes your lady have a devilish side? How about this
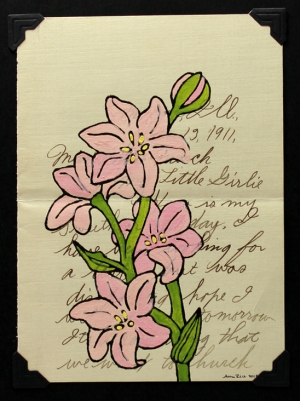
 Angel/ Devil Ring by Kasie Strohm. Handcrafted from sterling silver with a gold fill halo. $32, various sizes.

    Amy Rice LilliumThis piece by Amy Rice is a hand painted Gocco print of a lillium on correspondance from 1911, how romantic! $60

    Zangerle
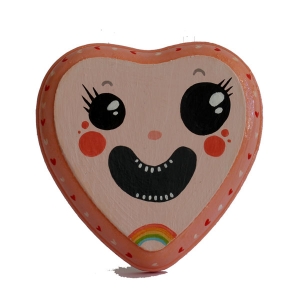
Looking for something a little less serious? How about this wood heart handpainted with acrylic by The Maple Ridge.  Features a saw tooth hook on the back for easy hanging. This art piece is also extremely affordable, at just $40!

    heart broochSpeaking of hearts, we love these anatomically correct ones by Julie Moon. Made from sculpted porcelain, painted gold luster and decals, these brooches can be pinned to your sweetheart’s coat and kept close to his/her own heart!  $50 each

    Fox Love PendantYour lady is a total fox and so are you! So pick up this Fox Love Pendant by Audrey Laine Collection. Hand cut from sheet brass and hung from an 18″ sterling silver chain. $65

    Fluffy Co Buckle
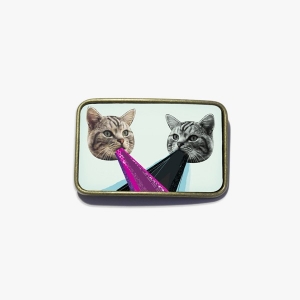
Your boyfriend (like us sadly) spends far too much time watching cat videos on the internet. I think he needs this belt buckle featuring cats barfing rainbows. Though, who doesn’t need one of these. $24.

    Cock Tee Cock Tee. That’s all you need to know. Get it for your man. $28

    His and Hers
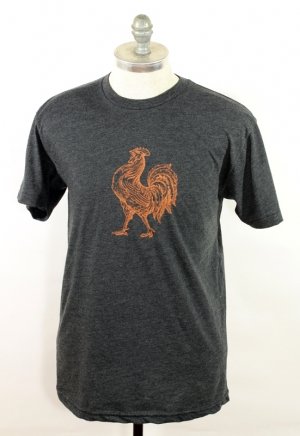
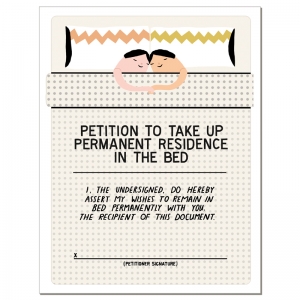
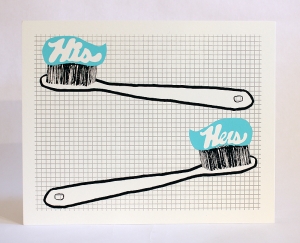
You just moved in together! Pick up this screen print by Yardsale Press and hang it in your new bathroom, cuz its official! (Also available are Hers + Hers and His + His. I don’t have them online yet but they are available in store. If you’d like to purchase one of those online, just email us) $15

    Bonnie Kaye PaperOur regulars know that we will gift wrap your purchases for free, happily! However, if you are weird like me and LOVE to gift wrap, pick up this gorgeous screen printed paper by Bonnie Kaye Studios and Do It Yourself!  Or let us do it for you!  $6 per roll.

    Those are just a few great Valentine’s Day gifts ideas, we’ve got tons more.  Come on by and we’ll help you pick something special out. xo – Megan


  • Bonnie’s Insta-Notebook Tutorial

    Photos + Tutorial by Bonnie Kaye Whitfield

    If you’re like me, you can never have too many notebooks.  Small notebooks are especially helpful for on-the-go notetaking or making quick grocery lists.  Here’s a quick Japanese-stab binding technique that will get you jotting inside in lickety split.

    Bonnie_Blog2_Pic8

    You will need:

    • decorative cover paper (I’m using my screen-printed wrapping sheets, available for sale at Art Star)
    • filler paper for the inside (I’m using kraft paper sheets, but simple copy paper is fine, just nothing too thick)
    • bonefolder (optional)
    • needle
    • thread, ideally for bookbinding
    • awl, a tool used for piercing holes (could probably also use an ice pick or ceramic needle tool)
    • piece of cardboard
    • scissors
    • pen or pencil to mark holes

    Bonnie_Blog2_Pic1

    Once you’ve gathered your materials, you’ll need to cut your papers to the size that you want the notebook.  I cut mine to 6×9”, with the filler paper cut ⅛ shorter on both sides so that they don’t poke outside of the cover once folded.  If you cut your paper to 6×9”, you’ll end up with a 6×4.5” notebook.

    Bonnie_Blog2_Pic2

    Fold both your cover and filler sheets of paper in half.  Use a bonefolder if you have one to firmly crease the fold.  You can also just use the back of your fingernail or another smooth, blunt tool.  Next, you’ll mark three dots for your holes along the spine/folded edge of the book.  Mark the holes in a line at least a ½ an inch from the spine and tops and bottoms of the book.

    Bonnie_Blog2_Pic3

    Using your awl, you’ll next pierce the holes, prior to sewing.  This is going to make sewing a lot easier.  I like to use a piece of cardboard or old magazine underneath the book while making the holes.  You can also use a small hole punch.  Next, measure your thread at least 3 to 4 times the length of your spine and cut.  Thread the needle, but do not make any knots.

    Bonnie_Blog2_Pic4

    This Japanese stab-binding stitch might look complicated at first, but trust me, it’s quite easy!  You really flow through the stitches starting at the top of the book and working your way down.

    1. Start sewing from the backside of the book, in the top hole.
    2. Leave about a 2” tail of thread and hold it with your thumb.  You’ll be able to let go after the next stitch or two.  (The only knot you make for this book is done at the very end.)
    3. Thread over and around the top of the book and back through the top hole from the back.
    4. Thread over and around the side of the book and back through the top hole from the back of the book.
    5. Thread down to the second hole.  The needle will now be on the backside of the book.
    6. Thread over and around the side of the book, going through the second hole again from the front.  Your needle will then still be on the backside of the book.

    Bonnie_Blog2_Pic5
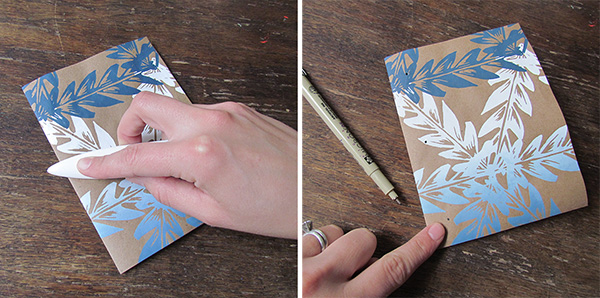
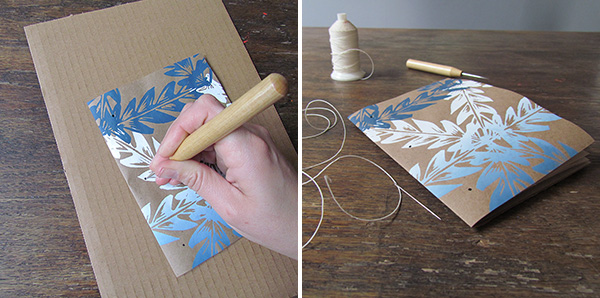
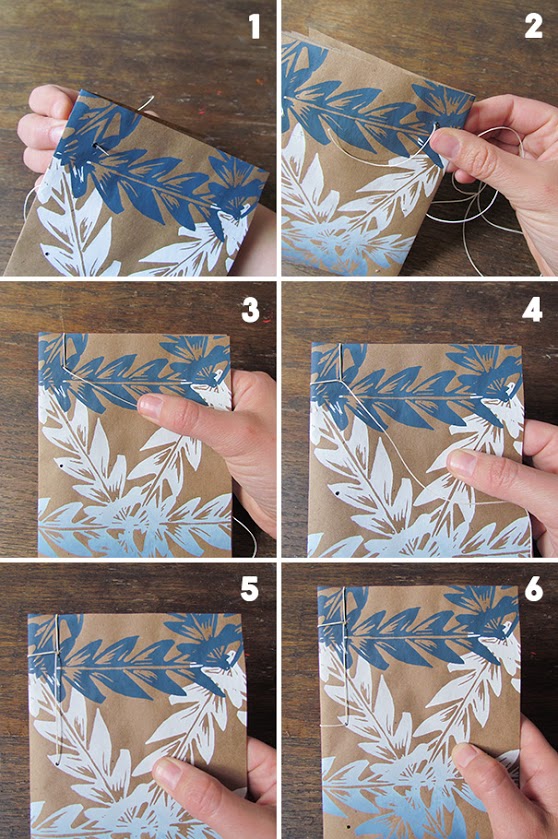
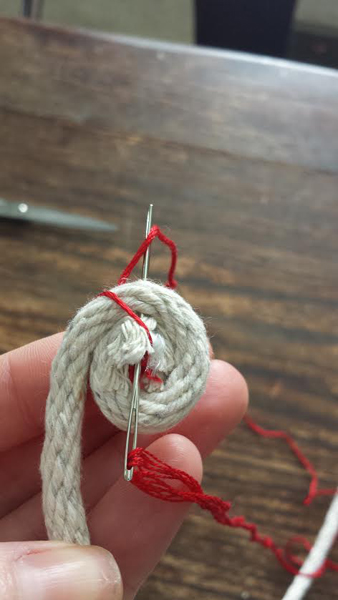
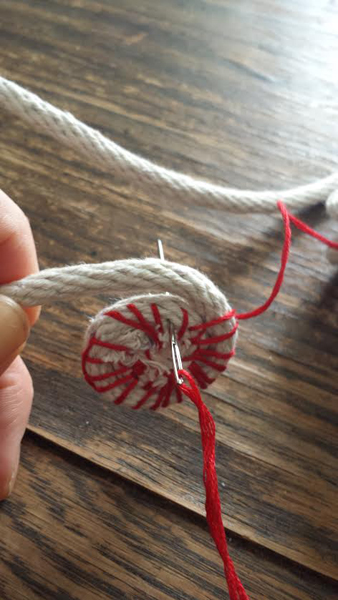
7.  From the back, you’ll thread through the third hole at the bottom.  You’ll now be                         back on the frontside of the book.

    8. Thread over and around the bottom edge of the book, going back through the                                 bottom hole from the backside.

    9.  Thread over and around the side edge of the book, going back through the bottom                       hole from the backside.

    10.  Thread back up to the middle hole.  Your needle and thread will now be on the                              backside of the book.

    11.  Flip your book over.  It should look like this.

    12.  Lastly, remove the needle and tie the two loose ends together.  Cut threads, leaving                    about an ½” tail.  Voila!

    Bonnie_Blog2_Pic7

    Once you’ve tied your knot, you may want to crease or score the inside pages at the binding so that the book opens more fully.  Up to you.  Also, variations include making your holes larger and sewing with a thicker thread-like material, such as cord (pictured with the pink notebook), ribbon or yarn.

    You now have a notebook that you can take and use anywhere.

    _____________________________________________________________

    Bonnie Kaye Whitfield designs and screen prints home textiles + paper goods under the name, Bonnie Kaye Studio.    www.BonnieKayeStudio.com

  • Art Star Craft Bazaar + Grid Magazine Partnership

    We’re excited to announce that Art Star Craft Bazaar is partnering with Grid Magazine, and fellow craft fair entrepreneurs Go West!, and Crafty Balboa to produce a unique media partnership designed to further our shared goal of building a thriving craft community in Philadelphia.

    Grid, a free, award winning publication dedicated to promoting sustainability, is publishing a special 16 page section insert all about Art Star Craft Bazaar, Go West! and Crafty Balboa. 30k copies of the issue will hit newsstands, coffee houses, and other retail outlets across the SE region by late March.  In addition, Grid will be set up at each of our events distributing copies as well.

    Last year, Grid created an insert promoting Go West Craft Fest! and it was a huge success.  We are so excited that they chose to also include us this year!  Go here to see a sample of their insert last year to get an idea of what this year’s will look like.

    This is a highly targeted opportunity to promote your local business.Your ads will not only be seen by thousands of Grid’s devoted readers, they will play a big part in helping us collectively promote our community-building events. A double win!

    If you place your ad by February 13th, you will receive an early bird discount of 10% off.  Final ad deadline is March 6th.  If you are interested in placing an ad, please contact us.  We’ll send you all the sizes and rates!


  • Christie’s Spaghetti Scarf Tutorial

    cowl shotby Christie Sommers of West Oak Design

    This is a nice little project to use up scrap jersey knit fabric or an old t-shirt.

    You will need:
    *scissors OR (a rotary cutter, straight edge, & cutting mat)

    *A “tube” of jersey knit fabric. For a no sew version you can cut the tube from a t-shirt. To use a scrap of jersey knit fabric, cut a rectangular strip roughly 16″ x 42″ and sew the two short ends together to form a tube (folded and sewn it will measure 16″ x 21″)

    01

    Take your tube and cut into 1″ strips taking special care to leave 1″ uncut at the top.

    02 (1)

    03

    When you get to the last strip, cut all the way through. This strip will become the wrap to hide the seam or uncut section at the neck.

    04

    05

    Gather the scarf and hold at the seam/uncut section.

    06

    Tie the last strip to the seam/uncut section and wrap around until it is covered.

    07

    When you have wrapped all the way to the end of the seam/uncut section, lift the last loop and tie the end of the wrapping strip to it. Snip the remaining strip leaving about an inch.  Tuck the leftover inch under the wrapped section.

    08

    09

    10

    Now the fun part….

    Hold the wrapped section and pull each individual strip as far as you can.  You may need to sit on the floor and place the wrapped section under your foot as you pull and stretch each strip which forces the jersey knit fabric to close in on itself, hiding seams and leaving neat strands.

    11

    You’re done! Wear it long or loop it around for a nice looking cowl.

    ______________________________________________________________
    Christie Sommers is the designer and maker behind West Oak Design. She handcrafts small batch and one of a kind goods for home, women, and kids in her Wyndmoor, Pa studio. www.westoakdesign.com

The owner of this website has made a commitment to accessibility and inclusion, please report any problems that you encounter using the contact form on this website. This site uses the WP ADA Compliance Check plugin to enhance accessibility.