Tag: handmade

  • Meet New ASCB Vendor, Julia Walther!

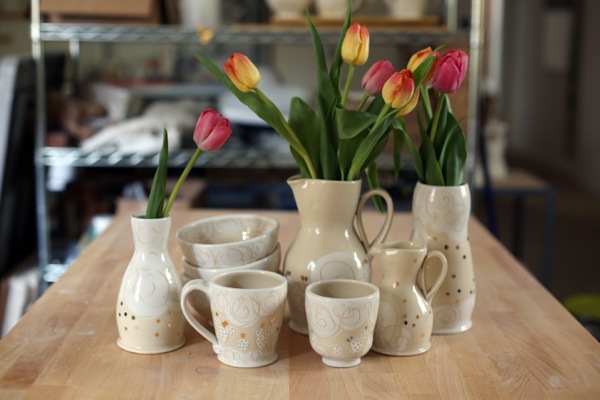
    Well hello there! I’m Julia Walther and I make pottery in Washington, DC.

    Image 1

    My journey with pottery began nearly six years ago during my senior year of college when my ceramics professor told us that clay can do anything, you just have to ask it at the right time. That mix of constraints and possibilities is a large part of why I’m so in love with ceramics.

    Image 2

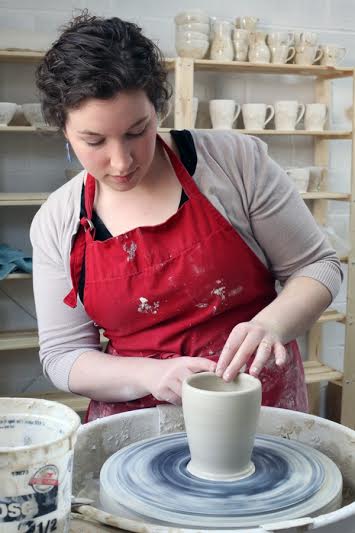
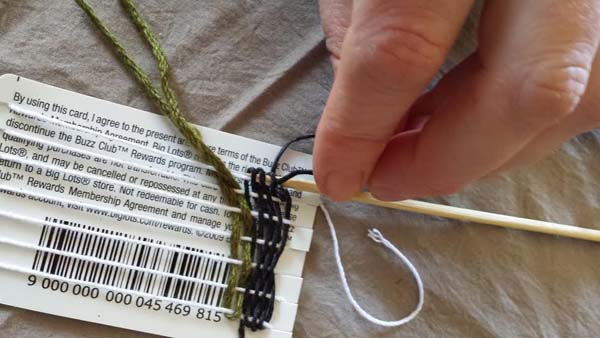
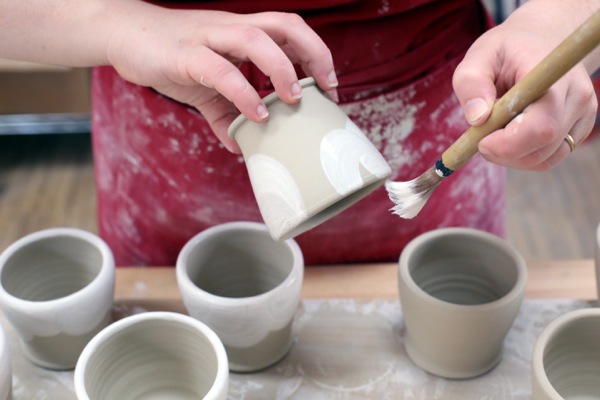
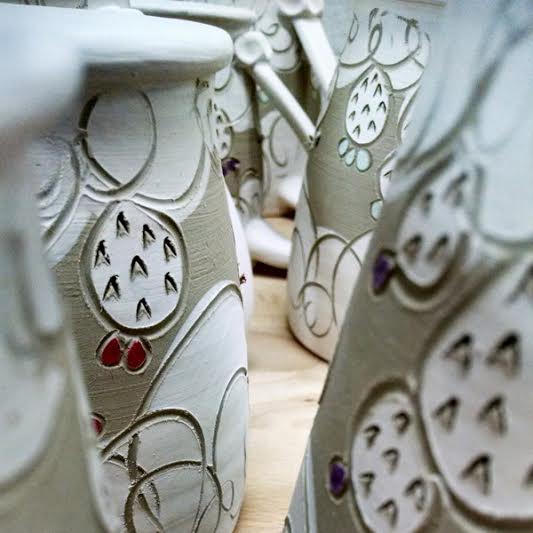
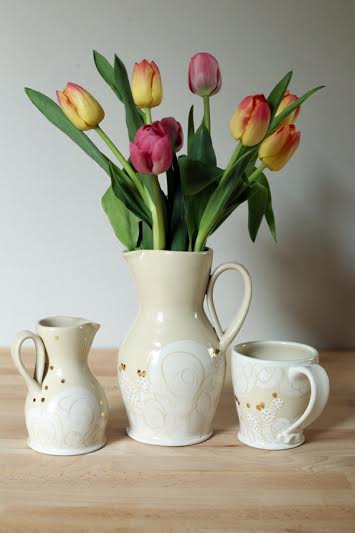
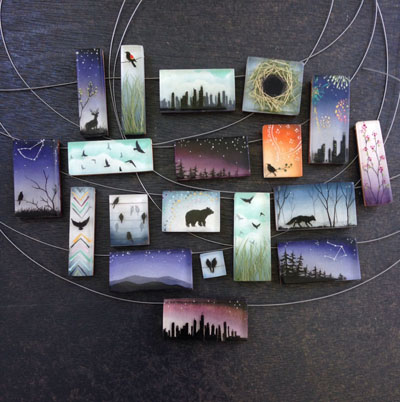
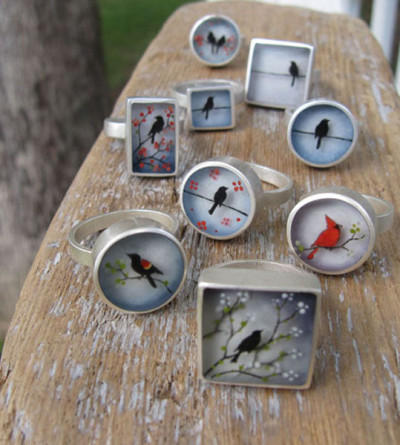
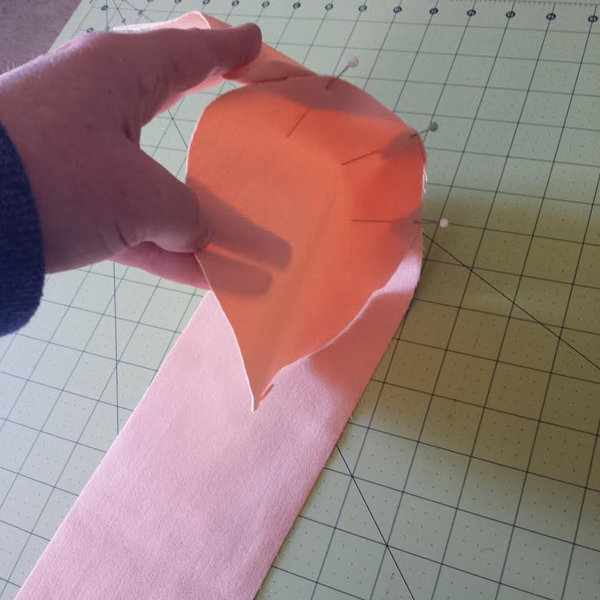
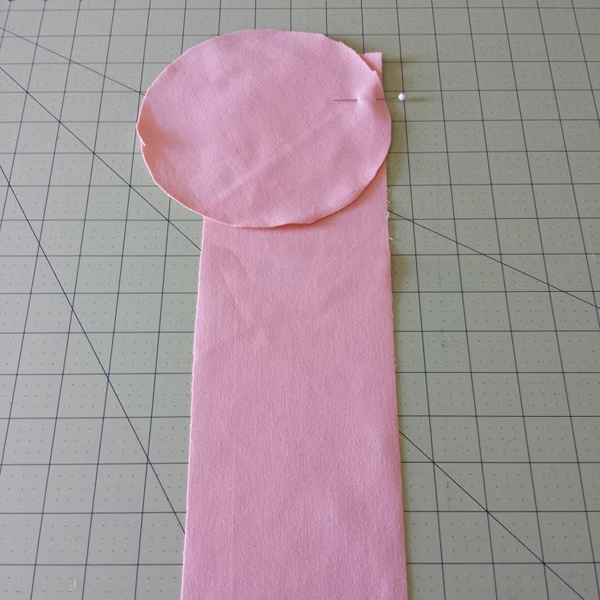
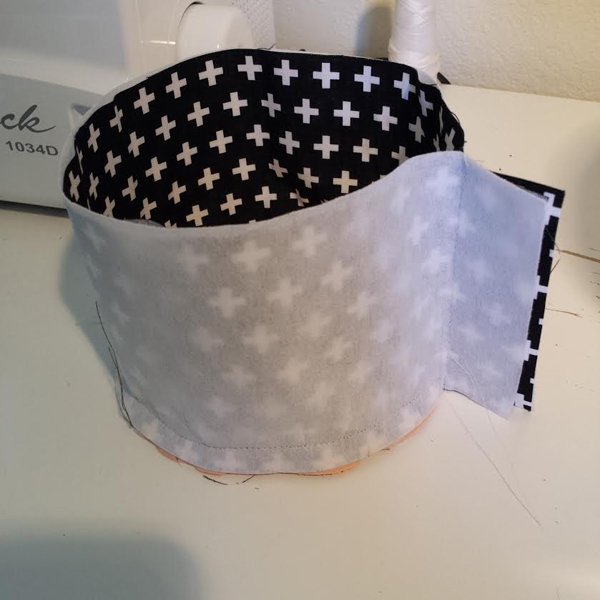
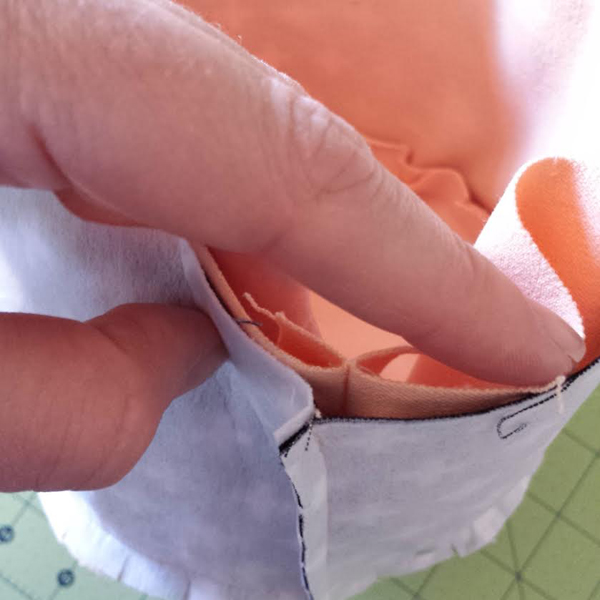
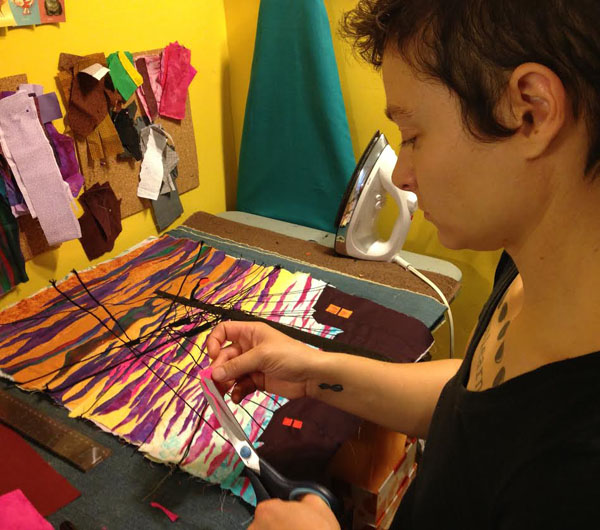
    I throw almost all of my work on the wheel using a porcelaneous stoneware that’s a beautiful creamy color when fired. I then spend most of my time decorating those pieces with slips and colored underglazes and carving back through the layers to reveal the bare clay underneath. In the midst of those decorative choices, I’m constantly surprised by threads of ideas that can lead my work down completely new paths.

    Image 3 Image 4 Image 5

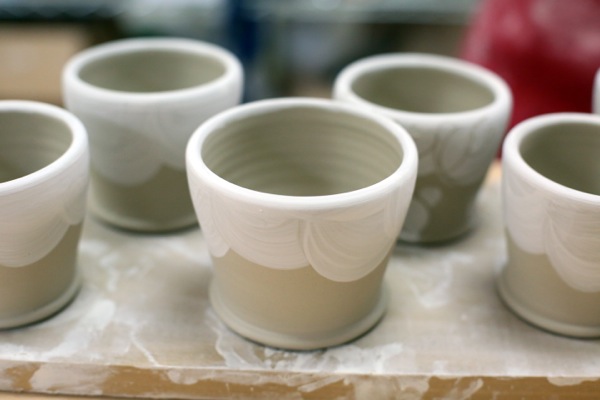
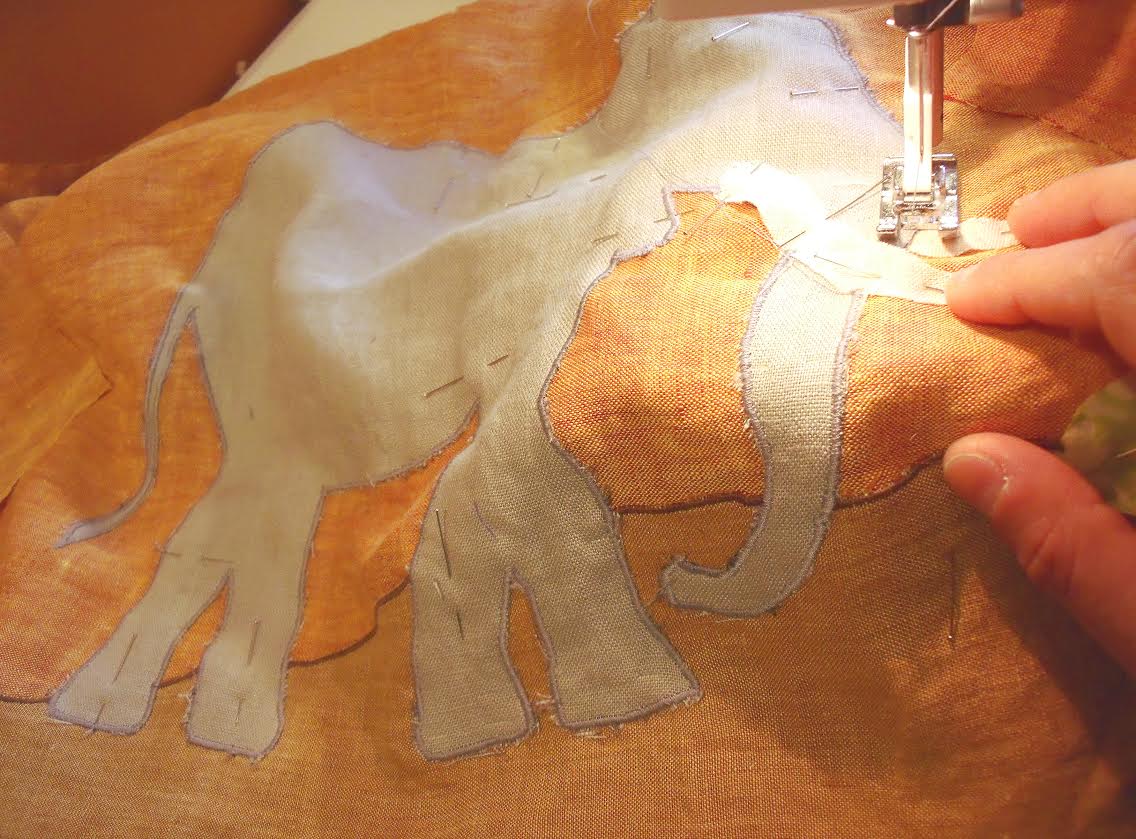
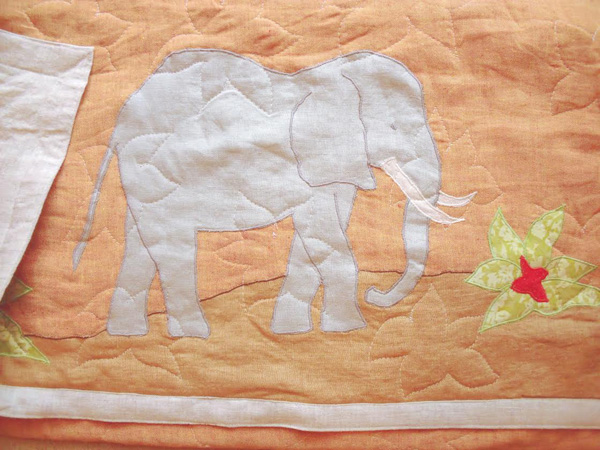
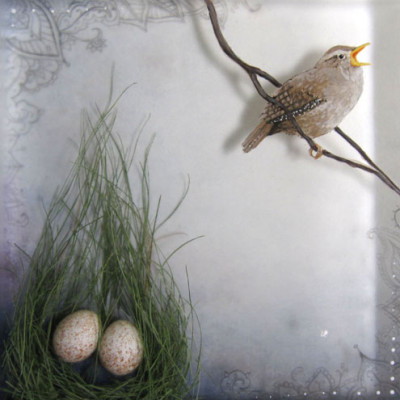
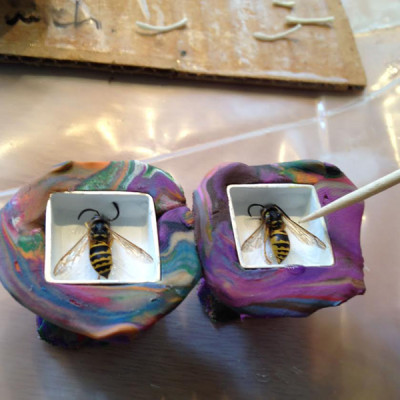
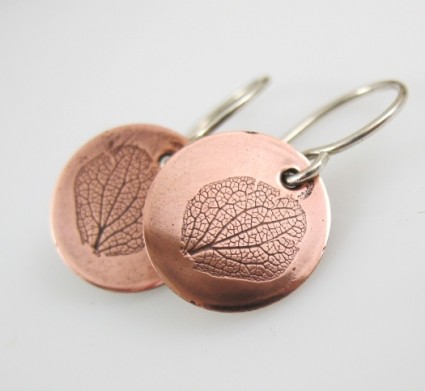
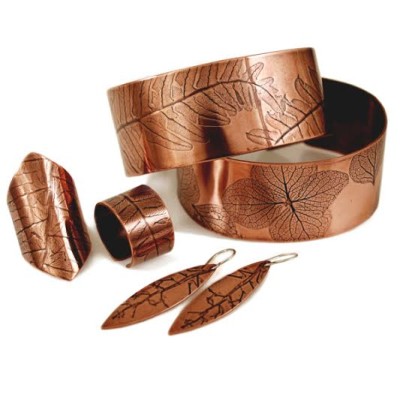
    The cacti decorations have come out of my appreciation of papercutting, and other folk crafts that use abstracted shapes to convey stories and show evidence of the human hand. I also really enjoy carving out the spikes!

    Image 6

    After the glaze firing, I’ll choose a few pieces to which I’ll apply metallic luster accents and do another firing specifically for that. So your pot may have had a trial by fire three times before it ends up in your hands.

    Image 7

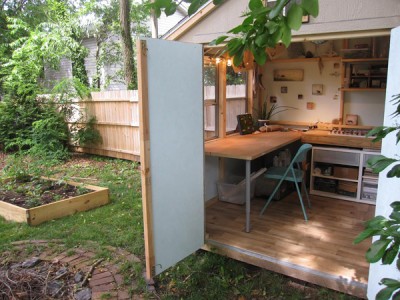
    I work alongside about twenty artists working at Red Dirt Studio, a repurposed firehouse just outside Washington, DC. I love the community we’ve established through weekly seminar meetings and by sharing the building. It’s easy to accidentally isolate yourself as an artist, so I’m glad to have this flow of interesting people around my studio space.

    Image 8
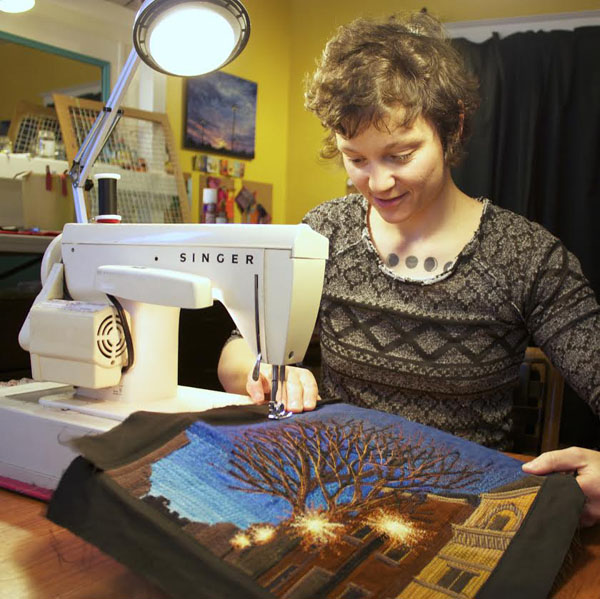
    At the same time, this is also the first instance in my career where I’ve had freedom to call nearly all the shots. I want to spend the precious time I have in the studio actually making work and taking care of my body to prevent injuries from overwork. In the last year, that has meant switching to a commercially produced pre-mixed clay, and changing the firing temperature of my work so I can use electric kilns, which tend to be more compatible with an urban environment. Additionally, for the past three years I’ve been throwing standing up, which will hopefully prevent future back issues related to sitting and leaning forward (the worst possible position for your back!).

    Image 9
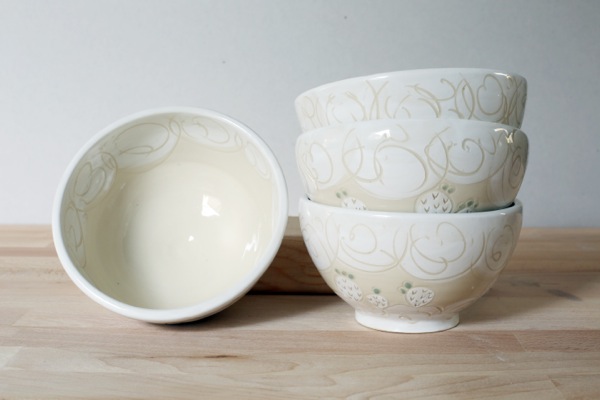
    Pots are special because they can be both a sculpture and a canvas. I’ve found a lot of joy in scribbling on the surfaces of my pots, freezing the movement of a hand in time. I’m excited about creating those juicy points of interest that ask you to turn the pot in your hands to soak up the details while you eat your meal or admire your flowers or engage with the piece in any other way. The last step of making pottery is getting it into the hands of the user, and that’s where a new adventure begins.

    This will be my first year at the Art Star Craft Bazaar, and I’m so looking forward to the show! I’d love it if you stopped on by Booth #59 and said hello.

  • Meet ASCB Vendor Sammi Nguyen of Group Hug Quilts

    I’m Sammi Nguyen, the hands and brains of a little operation called Group Hug Quilts. My working process is not always the most photogenic, what with piles of fabric scraps towering ever higher around me and loose threads always getting caught in my hair and stuck to my socks, but I’ve cleaned up my act for a few photos to show you how I make a baby quilt.

    Image1 Sketch
    For my baby quilts, I most often take my inspiration from animals. I sketch critters in my sketchbook, until I alight on one in just the right attitude for the quilt of the moment. (The rest of this post shows me making an elephant quilt, but this cat sketch was nicer than the elephant sketch.)

    Image 2 Fabric
    My studio is filled with overflowing shelves of fabric, which I source from all four corners of the earth, but especially from New York’s fabric district, which is a short trip by subway from where I live and work in Greenpoint, Brooklyn. Fabrics are an additional source of inspiration, whether they are solid or patterned, new or vintage. I work almost exclusively with natural fibers like linen, silk, denim, and cotton, with the exception of the occasional too-intriguing-to-pass-up piece of vintage polyester.

    Choose Fabric 2
    After I have chosen a charming member of the animal kingdom, I comb through my fabrics until I settle on a basic color scheme and textures. For this elephant quilt, I chose a muted orange linen for the quilt top and an oatmeal linen for the back and border, feeling that they suggested a dusty savannah environment that would be a suitable home for a leathery pachyderm.

    Cutting
    The subtlety of an animal’s shape makes a huge difference to the finished piece, and it often takes a while to get the drawing of the quilt’s subject just right, even if it is a fairly simple silhouette. From the finished drawing, I make pattern pieces out of tracing paper and trace and cut each piece individually, which leads to a lot of subtle variation from quilt to quilt.

    Arranging
    While I usually start with a picture in my head and a small thumbnail sketch on paper, each piece really takes shape directly in fabric. This allows me to experiment with the composition of the quilt top and see things closer to how they will look in finished form. During this part of the process, there is a lot of cutting, arranging, pinning, adding bits that don’t work to the scrap bin, resizing, shifting, and more cutting, rearranging, and pinning. It always creates a glorious mess on my studio floor.

    Sammi Sewing
    Once the composition of the quilt top is finalized, it’s time to sew all the pieces together. I still do all of my sewing on the Viking sewing machine my parents so generously gave to their wannabe fashion designer daughter on her twelfth birthday. This machine is a workhorse, and hasn’t let me down yet, despite all the weird, bulky piles of fabric I send under its needle.

    Sewing
    For all of my pictorial pieces, I use a satin stitch, a heavy back and forth stitch that traps and sews down the raw edges of each piece of fabric and adds an important design element in the form of colored outlines. When I first started sewing this way, my work was painfully slow and pretty clunky, with lots of missed stitches and bunched fabrics, but after many years of practice, my stitch work has gotten finer and finer. The technique allows me to forego traditional piecing and applique styles for a more spontaneous collage-like approach to image-making.

    Finished
    When a quilt top is finished, I sandwich it with cotton batting and a solid piece of fabric for backing. To join all three layers together, I quilt freehand on my industrial quilting machine, which lets me move fabric freely underneath the needle, kind of like drawing but in reverse. Being a free-spirited lady, I don’t draw my quilting patterns beforehand; I choose a simple motif, like a flower or a star, and just start sewing, creating a satisfying but not too uniform quilted texture. After quilting, I finish the edges, trim off extra threads, and hand-stitch my initials in the corner.

    Baby on Quilt
    I know you can’t see the finished quilt very well in this picture, but you can see my beautiful baby nephew enjoying it, and I figured including it in this post wouldn’t hurt my chances of luring you to come see me at Booth #17 at the Bazaar.

  • Meet ASCB Vendor Faryn Davis of Fernworks

    Faryn

    Hello my name is Faryn and my little biz is called Fernworks. I grew up on a farm in western North Carolina and I spent many afternoons there collecting little odds and ends that I found on our land like bird nests, feathers, interesting clumps of dirt, moss, leaves, bones, fur, twigs, bugs, and other tiny things. I continue that tradition of collecting and gathering in my paintings and line of resin jewelry today.

    Group

    My mixed media paintings and jewelry combine hand painted scenes and found natural ephemera into layers of polished resin. Each piece is painted with toothpicks and tiny brushes, embedded in multiple layers of resin, then cut and polished into delicate, dreamlike 3-D landscapes populated by plants, birds, bears, foxes and other woodland creatures.

    bird nest Rings

    My studio is a modified 8’x8’ garden hut in our backyard. This is where I paint, pour resin, and store all my many boxes and jars of found objects.

    studio 2

    Here are a few pics of me making some new resin rings. I embed little found objects or tiny hand painted scenes into silver settings and then layer resin on top. I then polish and sand each piece by hand on my tabletop sander. (A really dusty, messy process.)

    Bees in progress
    Pouring

    You can find me and my creations at galleries, shops, and craft shows all over the US. I’m always on the go. I recently returned to live in Asheville, NC with my husband and 5 year old son after an 8 year hiatus in the Pacific Northwest.

    Feather Necklace Ring
    This is my first time showing at the Art Star Craft Bazaar and I’m so excited! I’ll have tons of new necklaces, earrings, rings, cufflinks, little paintings and more! Please come say hi at booth #30.

  • Meet ASCB Vendors: Tigerlillyshop and Dreadnought Workshop

    Hi, we are Allison and Brett, the artists behind Tigerlillyshop and Dreadnought Workshop.

    maple_double_2_500_0
    Double Maple Seed Necklace by Tigerlillyshop

    We met in college at MICA, he was a painting major and I was a sculpture major. We have always been studio artists. After our early careers in mural painting and upholstery, we decided to narrow our scope and put all of our efforts into a creative business. Most of our jewelry skills are self taught. With our creative talents and drive, we thought we could make a sustainable handmade life as studio artists in Baltimore City.

    Tigerlily 2
    Dreadnought Workshop Money Clips

    So here we are 10 years after starting my Etsy shop! Our lines have evolved and changed with our interests but have always remained true to our hand. I started out with custom plastic rings, developed the kimono button jewelry, then the botanical metalwork and later Brett launched the men’s accessory line, it debuted in 2010. Shoppers can still see us at select regional retail shows, but mostly we make our living wholesaling our men’s and women’s jewelry. You can find us in the studio every day filling orders and shipping all over the country. We are a growing business and hope to be for a long time.

    Hydrangea Earrings
    Hydrangea Petal Earrings by Tigerlillyshop

    My sister Maria Fomich and I developed the Tigerlillyshop Botanical line together. Since 2009 she has been part of this crazy train ride making her own metalwork and helping spread the word about our family business. Last year she opened a beautiful retail brick & mortar in New Orleans to showcase her own handmade art jewelry. In her Adorn & Conquer Gallery you will find our Tigerlillyshop & Dreadnought lines, and a curated selection of only the best handmade gifts. We are proud to be living the handmade life, advocating for and supporting artists in our larger indie family out there!

    Tigerlily

    About Tigerlillyshop’s Botanical Collection: Allison collects nature specimen to press into metal for one of a kind jewelry. She also creates a cast jewelry collection of her best finds: acorns, twigs, maple seeds, etc.

    Tigerlily 3
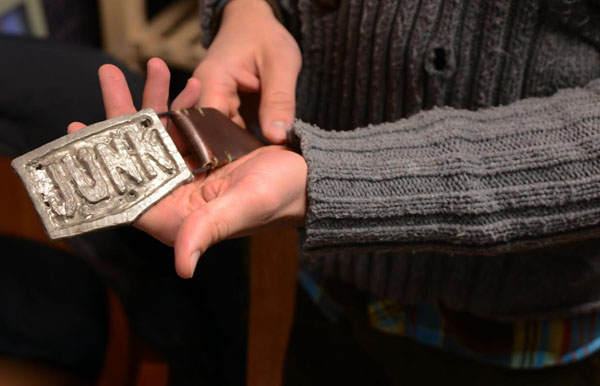
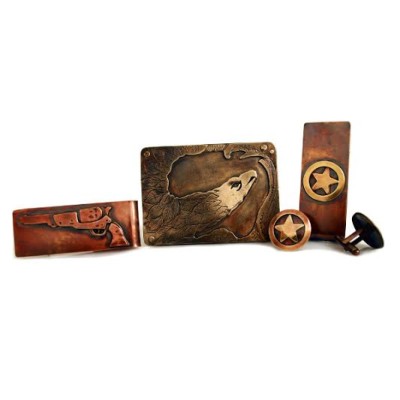
About Dreadnought Workshop: Brett is inspired by the city, American history, and the things he experiences living in an urban setting. Brett’s new line of belt buckles, tie clips, and cufflinks are made using various metal fabricating and casting techniques which he has learned through studio exploration.
    ———————————————————————————————————-
    Thanks to Allison + Brett for sharing their story with us today! Please visit them at the Art Star Craft Bazaar on May 9th + 10th in booth #104 at Penn’s Landing Great Plaza. You can also find them here: Website, Twitter, and Facebook.

  • Make This: Fabric Storage Bins

    by Christie Sommers 

    16
    I have way too many “things” in little piles all over my workspace. It was time to do a little organizing so I made some storage bins and bowls in various sizes to store loose buttons, bobbins and more. They have really brightened up the place so I’d like to share them with you:)

    You will need:

    -a pencil compass
    -scrap paper
    -fabric (one outer and one liner)
    -fusible interfacing (you want something very rigid, I recommend Pellon Decor Bond Fusible)
    -an iron/ironing board
    -a sewing machine
    -scissors
    -ruler

    You will need to draft up a little pattern for this one. I made a bin that was 6.5″ in diameter and 4.5″ high. To figure out how long to cut your rectangular pieces you will need to break out the calculator… or your brain. To find the circumference of your base, multiply the diameter by 3.14. The circumference will be the length of your rectangular sides.
    In my case: 6.5″ diameter x 3.14= 20.14 ….
    Use this calculation to make your bin in any size.

    OR….

    You can just use my dimensions and make the same sized bin.

    Cut:
    (3) rectangles: 21″ long by 5″ high (1) liner, (1) outer, (1) interfacing
    (3) circles with 3.25″ radius (1) liner, (1) outer, (1) interfacing

    1 2 3 4 5

    You will iron on the interfacing to the backside of the outer fabric.
    Take the shiny adhesive side of the interfacing and line it up to the back of your outer fabric.
    Iron on holding firmly for 6 seconds to establish a good bond.
    Do the same for the circular outer fabric.

    6

    Now you will sew the side wall (rectangular piece) to the base (circular) for both the liner and the outer fabric.

    Pin as shown.

    8 7

    Straight stitch the liner wall to the liner base

    9

    Do the same for the outer wall and base making sure to place the fabric “right” sides together, right side being the printed side that you want to see on the outside when the bin is done.

    9.1

    Line up your two ends of the rectangular piece and stitch up the side wall. Trim

    10

    You should have two pieces now (liner and outer) that look like this….

    11

    Cut into the seam allowance around the base so that the basket sits evenly when assembled. Take care to not cut into your stitching.

    12

    Turn the liner inside out and fit (right sides together) into the outer piece.

    13

    Line up your seams and pin all the way around

    14 15

    Sew all the way around leaving a small section about 1.5″ unsewn. You will turn the whole bin right side out through this hole.

    When you turn it right side out, use your iron to get all of your seams looking nice and clean.
    I liked how it looked with a little of the liner as a trim at the top.

    Top stitch all the way around and be sure to carefully seal the opening with your top stitch.

    Toss in some sewing notions, or whatever bits you need to wrangle and enjoy!

    16 17

    ——————————————————————————————————————————————-
    Christie Sommers is the designer and maker behind West Oak Design. She handcrafts small batch and one of a kind goods for home, women, and kids in her Wyndmoor, Pa studio.www.westoakdesign.com
  • Meet New ASCB Vendor Daniel Knoll and His Company, My Audio Tree


    My Audio Tree Logo
    80% of the worlds forests are already gone. Audio Tree is trying to change that by planting a tree for every product sold. “Play One! Plant One!”

    My Audio Tree Portrait
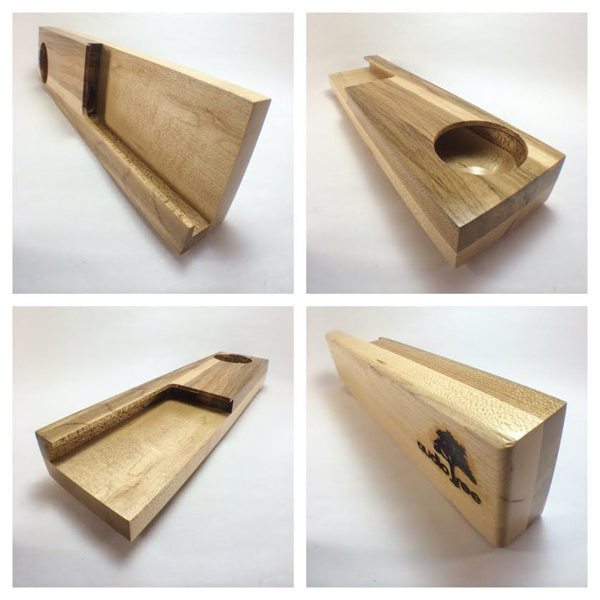
Audio Tree founder Daniel Knoll creates handmade wood products for smartphones and tablets, most notably the signature Iphone acoustic amplifier/docking station. He has over 15 years of woodworking and sound engineering experience which led to the development of Audio Tree LLC.

    My Audio Tree Product1
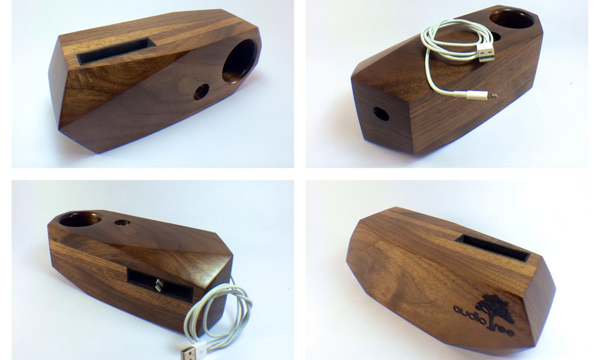
These speakers have been tested in a professional recording studio and proven to double the sound of your phone’s speaker using “passive amplification” meaning there are no electronics involved. Some have been designed to allow you to charge your phone by running your own charger through the speaker.

    My Audio Tree Product Dtl

    Hand selecting exotic woods, and tone-woods, carefully monitoring the moisture content and density are just some of the examples of the attention to detail that is put into every piece.  Daniel uses age-old woodworking techniques along with modern day trade secrets. He has even had to have custom made tools in order to create some of his designs.

    My Audio Tree Product2For the first time Audio Tree will be at the Art Star Craft Bazaar early next month! Stop by the booth (#13)  to see these pieces in person and find out more about Audio Tree and “Play One! Plant One!” You can also visit www.myaudiotree.com if you just can’t wait to see more!


  • Meet New Art Star Craft Bazaar Vendor Jon Wye

    While I write this blog post from my cozy workshop in Washington, DC I sip from a disappointing cup of coffee. Do not use a Keurig coffee maker for anything but coffee. They sell all these fancy coffee packs to use with the machine but they are merely apparatuses to separate you from your money. How the hell am I supposed to get my day started with coffee that a robot would barely analyze as palatable. But I am cheap so I will suffer through the liquefied cardboard.

    My name is Jon Wye and since 2004 I’ve been making a bunch of cool shiz, but mostly known for belts. Many years ago I developed a process for embedding images in leather, which is then turned into belts, guitar straps, camera straps, dog collars, wallets, etc. I also design some t-shirts. The great majority of our production is split between Jeff and myself. The artwork for our goods comes from about 22 artists from all over the world.

    Jeff and I are able to do a lot with so few people because we have continually invested in new processes and equipment over the years, a strategy I had to adopt during the economic downturn, when employing someone new was too risky. Now we have some of the coolest leather working machines out there and I drool over my wishlist of upcoming machines.

    Let’s follow Trolley and take a look at the operation…

    Photo 1
    Ubiquitous branding shot.

    Photo 2
    The first belt buckle I ever made. Hand carved out of wax and cast in plaster. Pewter pellets were dropped into the negative and heated with a blowtorch.

    Photo 3
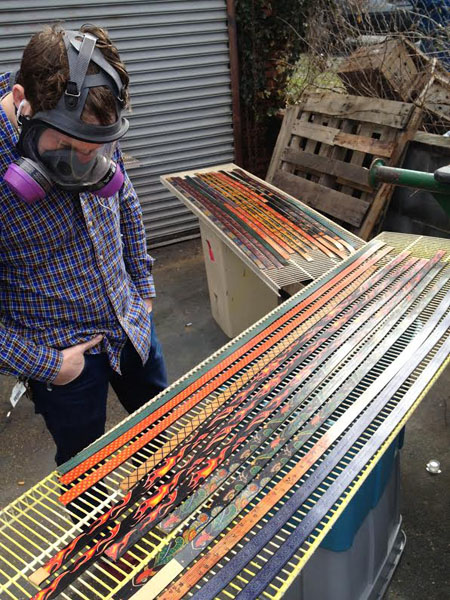
Jeff inspecting the belts after our specially formulated spray coating is added to protect the images in the leather.

    Photo 4

    Inspecting the straps after they are done curing. This one will be a guitar strap.

    Photo 5

    Hand setting some snaps for a belt order.

    Photo 6

    Every online order gets a personal note.

    Photo 7

    Our branded MADE IN THE USA, WASHINGTON DC stamp applied with a 1950’s roller embosser.

    Photo 8

    This is our roller embosser.

    Photo 9

    27 ton clicker press used to punch out of the various shapes for things like guitar straps.

    image 10

    Left: punch press/stamper for making all the holes in the belts perfect every time.
    Right: Leather splitter for thinning down leather. The whole thing is basically one big blade.

    Photo 11
    One of our industrial sewing machines.  I like using the Adlers.

    Photo 13
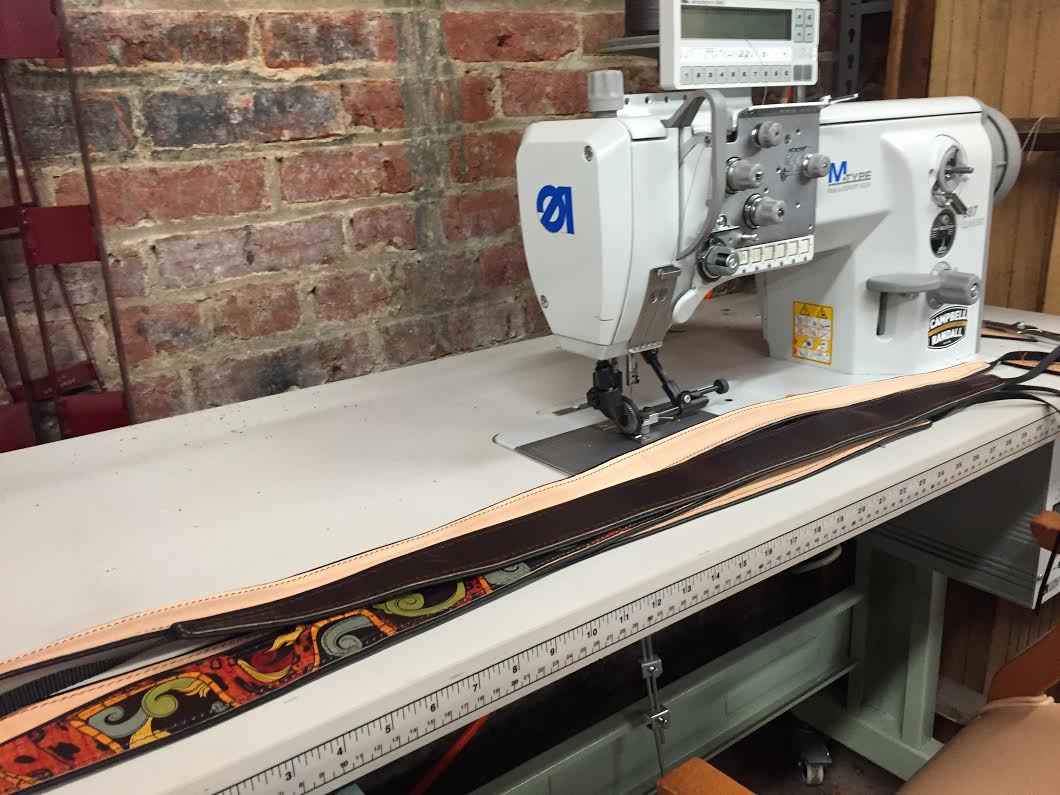
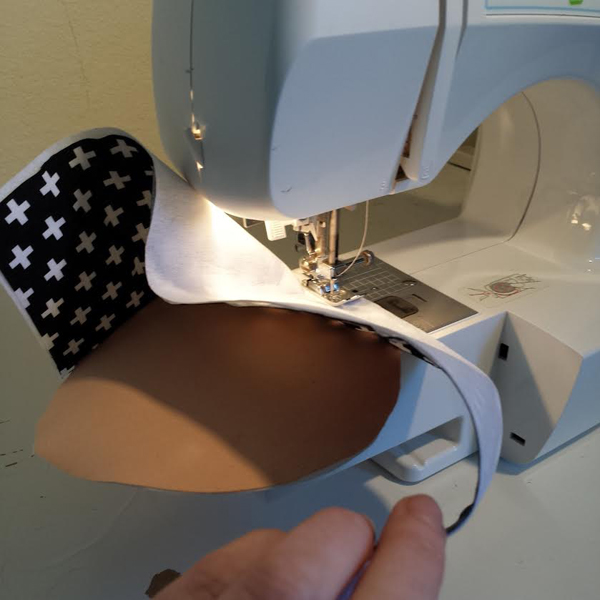
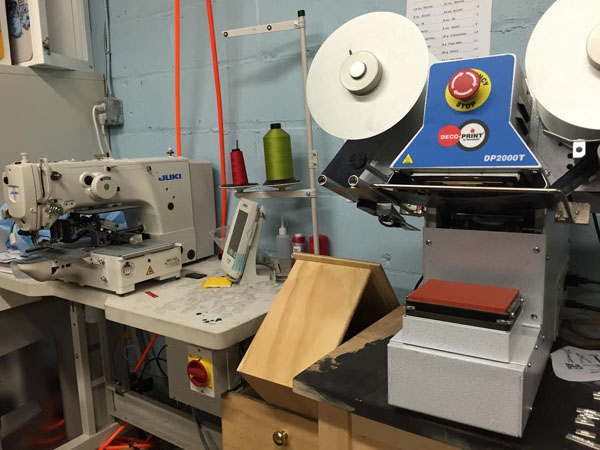
Left: A Juki automatic sewing machine, which helps us put on the tags on all our tees.
    Right: A pneumatic stamping machine for stamping the inside neck of our tees so we can be tag-less. I hate tags in t-shirts.

    Photo 14

    A wide view of our work bench where we prototype and assemble belts for online orders.

    Photo 15

    And this is Scarlett, my girlfriend’s blind dog, who often joins me in the shop. She is not just a little blind, she is totally blind. We have to tie her to the shop couch or she’ll wander around and get scared and poop somewhere. This has happened many times.

    ——————————————————————————————————————-
    Thanks to Jon Wye for giving us a glimpse of his process and studio! Visit him at booth #88 at our upcoming Art Star Craft Bazaar on May 9th + 10th at Penn’s Landing Great Plaza! Visit his website and buy his cool shiz HERE.

  • Meet Art Star Craft Bazaar Vendor Jamie Langhoff of Seeing in Fabric!

    Pic 1

    What, at first, appear to be paintings, are actually sewn fabric art.

    Self-taught artist, Jamie Langhoff, creates vibrant urban scenes with just fabric, thread, scissors, and a 1968 Singer sewing machine. Finished artwork is mounted onto ready-to-hang canvas panels.

    Each scene features many dozens of tiny hand-cut fabric pieces. Creating these scenes requires a slow and careful building of many pieces of fabrics, and many layers. All of the fabrics she uses in her artwork are recycled–scrap, remnants and re-purposed clothing. Many of the fabrics Jamie uses are donated to her by her lovely fans.

    Pic 2

    Threadwork and stitching techniques are central to the realism and painterly aspects of Seeing in Fabric. Eschewing the dazzling digital age of newer sewing machines, Jamie enjoys the reliability and rustic sturdiness of her vintage 1968 Singer.

    Pic 3

    By using a color palette of thread in over 200 different colors, but just 2 basic stitch types–straight stitch and zigzag–Jamie creates a multitude of “shading”, “brushstroke” and “drawing” effects. Her stitching technique involves a free-flowing and rapid style, requiring an extreme amount of concentration and skill, but also trust and confidence in her sewing machine.

    Pic 4

    As a self-taught artist, Jamie constantly pushes herself to experiment with her techniques. Through her artwork she shows the world how to “see in fabric” in order to see the vibrant and strange beauty in our modern urban world.

    Pic 5Jamie will be be traveling from Washington, DC to join us at our 12th Annual Spring Art Star Craft Bazaar at Penn’s Landing Great Plaza on May 9th + 10th.  Make sure to stop by her booth #101 to see these incredible pieces in person.  These photos are so beautiful but the pieces are even better in person.  Visit her Etsy Page for more!

    Pic 6

  • Art Star Pop Up Market at Spruce Street Harbor Park

    Promo 3
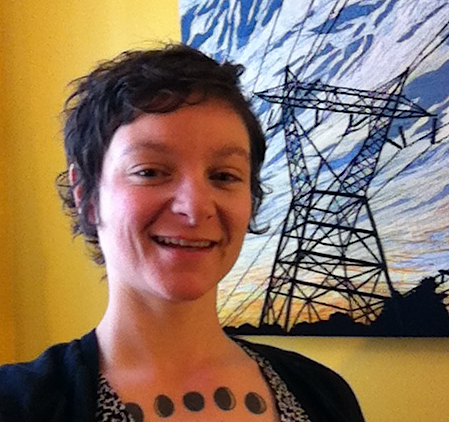
We are excited to announce that our Art Star Pop Up Market will be back at Spruce Street Harbor Park this Summer Season! The Market will take place every Saturday from May 23rd – September 26th from 11-4pm and will feature the work of up to 20 curated art + craft vendors.  Each participating vendor will be set up al fresco style under a tree lined walkway within the popular park.  Shoppers can expect a variety of handmade goods at an affordable price range and the vendor line-up will change each day.

    The Spruce Harbor Park is located along the Delaware River between Lombard and Walnut Streets.  The park features a pop up restaurant and bar, a boardwalk, games, live music, family friendly activities and the most popular attraction – HAMMOCKS!  Apparently, the SSHP hammocks were THE PLACE to take a selfie in Philadelphia last summer!

    Promo 2
    Bonnie Kaye Studio staged a picnic at last year’s market and displayed all her goods on butchers paper. http://www.bonniekayestudio.com/

    APPLY TO BE A VENDOR!
    We are now accepting submissions for the first few weeks of our  Art Star Pop Up Market.  Each vendor will receive an 10′ wide x 5′ deep space.  Vendors are required to bring everything else needed for set up and display.  You may bring a tent (though it is not required) but must leave 5′ of  your tent open for customers to walk through.  For this show, we are going for relaxed, beach vibes, so you are welcome to go all out with your display or you could simply just bring a blanket and lay out your goods on the ground! We are charging vendors $35 per space / per day.

    We are now accepting applications for the following dates: May 23rd, May 30th, June 6th. (Look out for another Call for Vendors for all the later dates)

    How To Apply:
    Email us at info@artstarphilly.com with “SSHP Submission” in the subject of the email
    Attach 3-5 digital images of samples of the items you wish to sell
    Include a link to your website or etsy page
    List the date(s) you would like to participate on

    DEADLINE TO APPLY FOR THE ABOVE DATES IS April 30th, midnight.
    You will notified of your acceptance by Friday, May 1st.

    Promo1

  • Christie’s Mini Weaving Tutorial (on a “junkmail” credit card loom)

    Tutorial and Photos by Christie Sommers 
    pic1
    You will need:
    picnumero1
    *An old card of the un-needed variety… pre-approved credit cards, price club cards, your old West Coast Video card… Just make sure it’s nice and firm, no flimsy paper ones.
    *A variety of string/yarn/twine. In this tutorial I am using a thin cotton cord for my warp (I’ll explain soon). For my weft I am using waxed cotton cord in black, thin gauge yarn in green, and more of the white cotton cord I used for the warp.
    *scissors
    *quilting needle (not shown)
    *ruler
    *pencil
    *toothpick, wooden skewer, or short section of brass tubing
    pic2
    Chances are, the card you are using is 2″ x 3.5″. Turn your card sideways so that the 2″ side is at the top and the bottom. Start by marking every 1/4″ across the top and bottom (see pic).  After all of your marks are made, come back with your scissors and make a small cut in each pencil marking. Cut about 1/4″ into the card each time trying to be consistent.
    You will now begin to lay down your weft. The weft is the base that you will be weaving in and out of. I started in the top left corner bringing the thin cotton cord through the first cut from back to front. Bring the string down to the first cut in the bottom left corner, wrapping around the back and coming back up through the 2nd cut on the bottom left corner (see pics).
    pic3 pic4 pic5
    Continue this motion wrapping back and forth until you get to the end. You will have a tail hanging from your starting and end points. Make sure these tails are at least twice as long as your needle.
    Now you are ready to start weaving!
    I threaded my quilting needle with the black cord and wove under one, over one from left to right. When you come back for your return pass make sure you do the opposite of what you did on the previous pass. If you went under the warp on the last pass, go over the next time. It sounds more confusing than it really is… see pic.
    pic6
    pic8
    Continue for as long as you’d like before changing colors.
    pic9
    To change colors/yarn simply trim your previous weft (black cord) leaving a tail that is at least twice as long as your needle. Begin weaving the next color through starting on the opposite side of the previous weft’s “tail”.
    pic10
    Continue weaving and changing color/yarn as desired until you simply cannot fit any more rows. You can use your needle to push each row up to the top so they fit snugly together.
    You’re probably wondering what to do with all of those little tails hanging out of the sides of your weaving. Some people leave them as a deliberate design choice. For this weaving, I am tucking these little tails in for a nice finished edge.
    To tuck: starting at the top left, thread the first tail onto your needle. Tie the tail to the first string of warp and slide the needle down through the loops of the weft carefully trimming the tail and letting it slide back slightly into the loops so that it is hidden.
    pic11 pic12
    Once all of your tails are tucked in, you can stop here or add fringe if you like.
    For the fringe: Because this is such a small weaving, I am going with a very simple fringe. Cut seven 4″ pieces of the green yarn.
    Thread the first one onto your needle and run the needle through the bottom left warp loop.
    pic13 pic14
    Line up the ends of the 4″ piece of yarn and tie it into a knot, sliding the knot snugly up against the bottom of the weaving before tightening.
    Repeat across the remaining white warp loops with the remaining 4″ yarn pieces.
    Do a final trim across the bottom of your fringe.
    Finish your weaving by lining up a 8″ piece of black string with your toothpick/skewer/tubing and thread it through the top warp loops. Tie a knot in your black string & you can easily hang it on a nail. Heck, you can even use a longer string and make it into a necklace… go nuts.
    You’re finished!
    Once you get the hang of the simple act of weaving one over, one under…. take to the internet or your local library and research some new techniques!
    *Disclaimer: I am not a trained weaver. I am self taught. Most people start with the fringe first and work their way up.  Starting at the top works for me… so that is how this tutorial goes;)
    Enjoy!

    —————————————————————————————————————————————

    Christie Sommers is the designer and maker behind West Oak Design. She handcrafts small batch and one of a kind goods for home, women, and kids in her Wyndmoor, Pa studio.www.westoakdesign.com

The owner of this website has made a commitment to accessibility and inclusion, please report any problems that you encounter using the contact form on this website. This site uses the WP ADA Compliance Check plugin to enhance accessibility.