Tag: art star

  • Meet ASCB Vendor Elaine Lai of Tough Luv Clothing

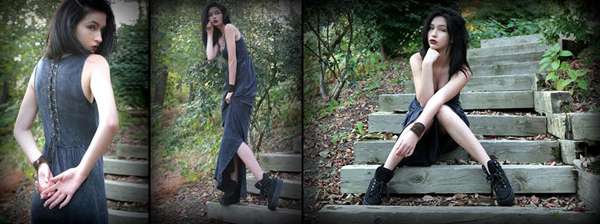
    Tough Luv is a Philadelphia based fashion brand blending rock and roll, loungewear, and contemporary design aesthetic for effortless, edgy style.

    Image 1

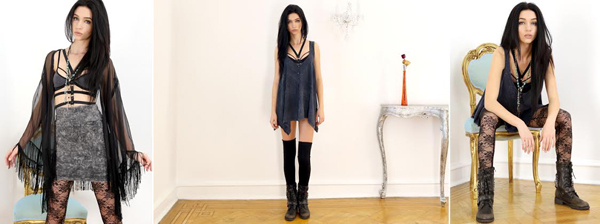
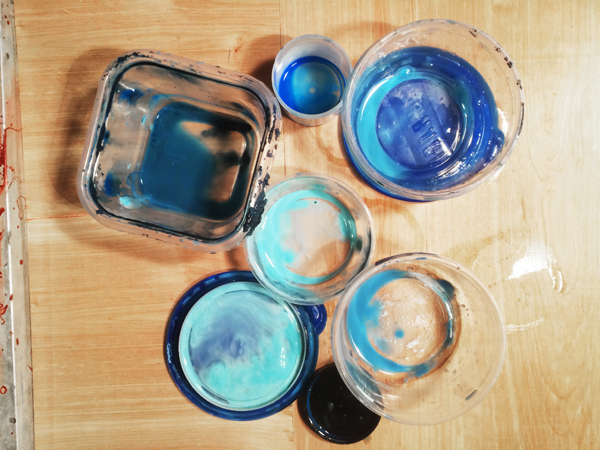
    Tough Luv is the creation of designer Elaine Lai. After working for several well-know fashion brands in Los Angeles, she fell in love with the process of garment dying and the endless possibilities and uniqueness that could be achieved when subjecting finished garments to hand treatments and dyes. Combined with an eye for fine details, and a passion for music and art, the groundwork for the brand was laid.

    Today, Elaine has taken the brand to the next level. With distribution in nationwide, Tough Luv is proudly made in the USA, and is sold in over a hundred boutiques and specialty stores nationwide. Tough Luv transforms staple fabrics like American cotton tee-shirt jersey and fleece into fashion forward designs without sacrificing wearability, comfort, or detailing. Tough Luv seamlessly blends edgy street looks with feminine touches, resulting in a line that is cool, flirty, and fun.

    Image 2

    Who Luvs Tough Luv?

    The Tough Luv muse and mindset is always a large part of Elaine’s vision for the brand. Though not any one specific person, when asked to describe her, Elaine knows exactly who she is. “Her taste is not mainstream. She likes music on the edge and style the same way. She enjoys live bands and gallery openings, fine dining and vintage shopping. She wears boots with her dresses and heels with her favorite tee. She is not trendy. She is successful, headstrong, and unique. She appreciates romantic notions but understands Tough Luv.”

    Our Designer:

    Image 3

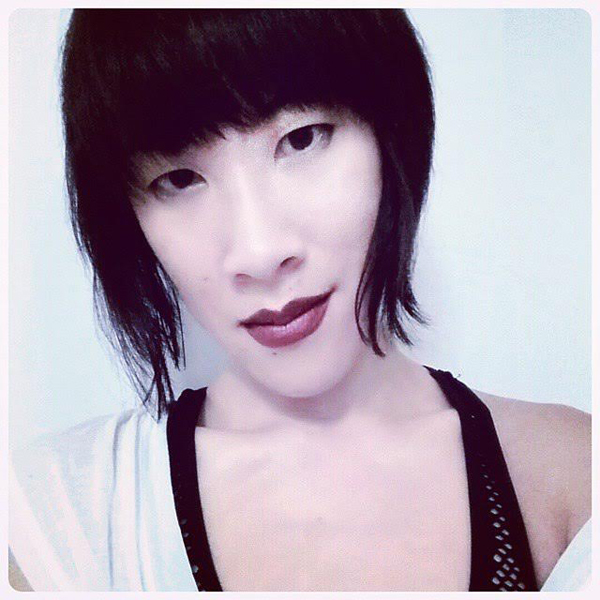
    Designer Elaine comes from a family whose history is a melting pot of culture and inspiration. Her mother immigrated to America from Hong Kong and brought with her a passion for designing and making her own clothes, while her grandmother came to the United States in the 1940’s from Scotland. It is this combination of cultures that defines Elaine as a designer, fusing old world European traditions with the functionality that fast-paced, technology-driven, metropolitan life demands.

    Elaine attended OTIS College of Art and Design in Los Angeles where she studied fashion design but later dropped out. Instead, she received a Certificate of Completion from the famed Central Saint Martins College of Art and Design in London for Experimental Fashion. Since then, Elaine has worked for several well-know fashion brands and has evolved into a well-rounded designer who takes pride, and specializes in American-made fashion, a passion that she applies when designing Tough Luv season after season.
    —————————————————————————————————————
    Visit Tough Luv Clothing Online http://toughluv.com/
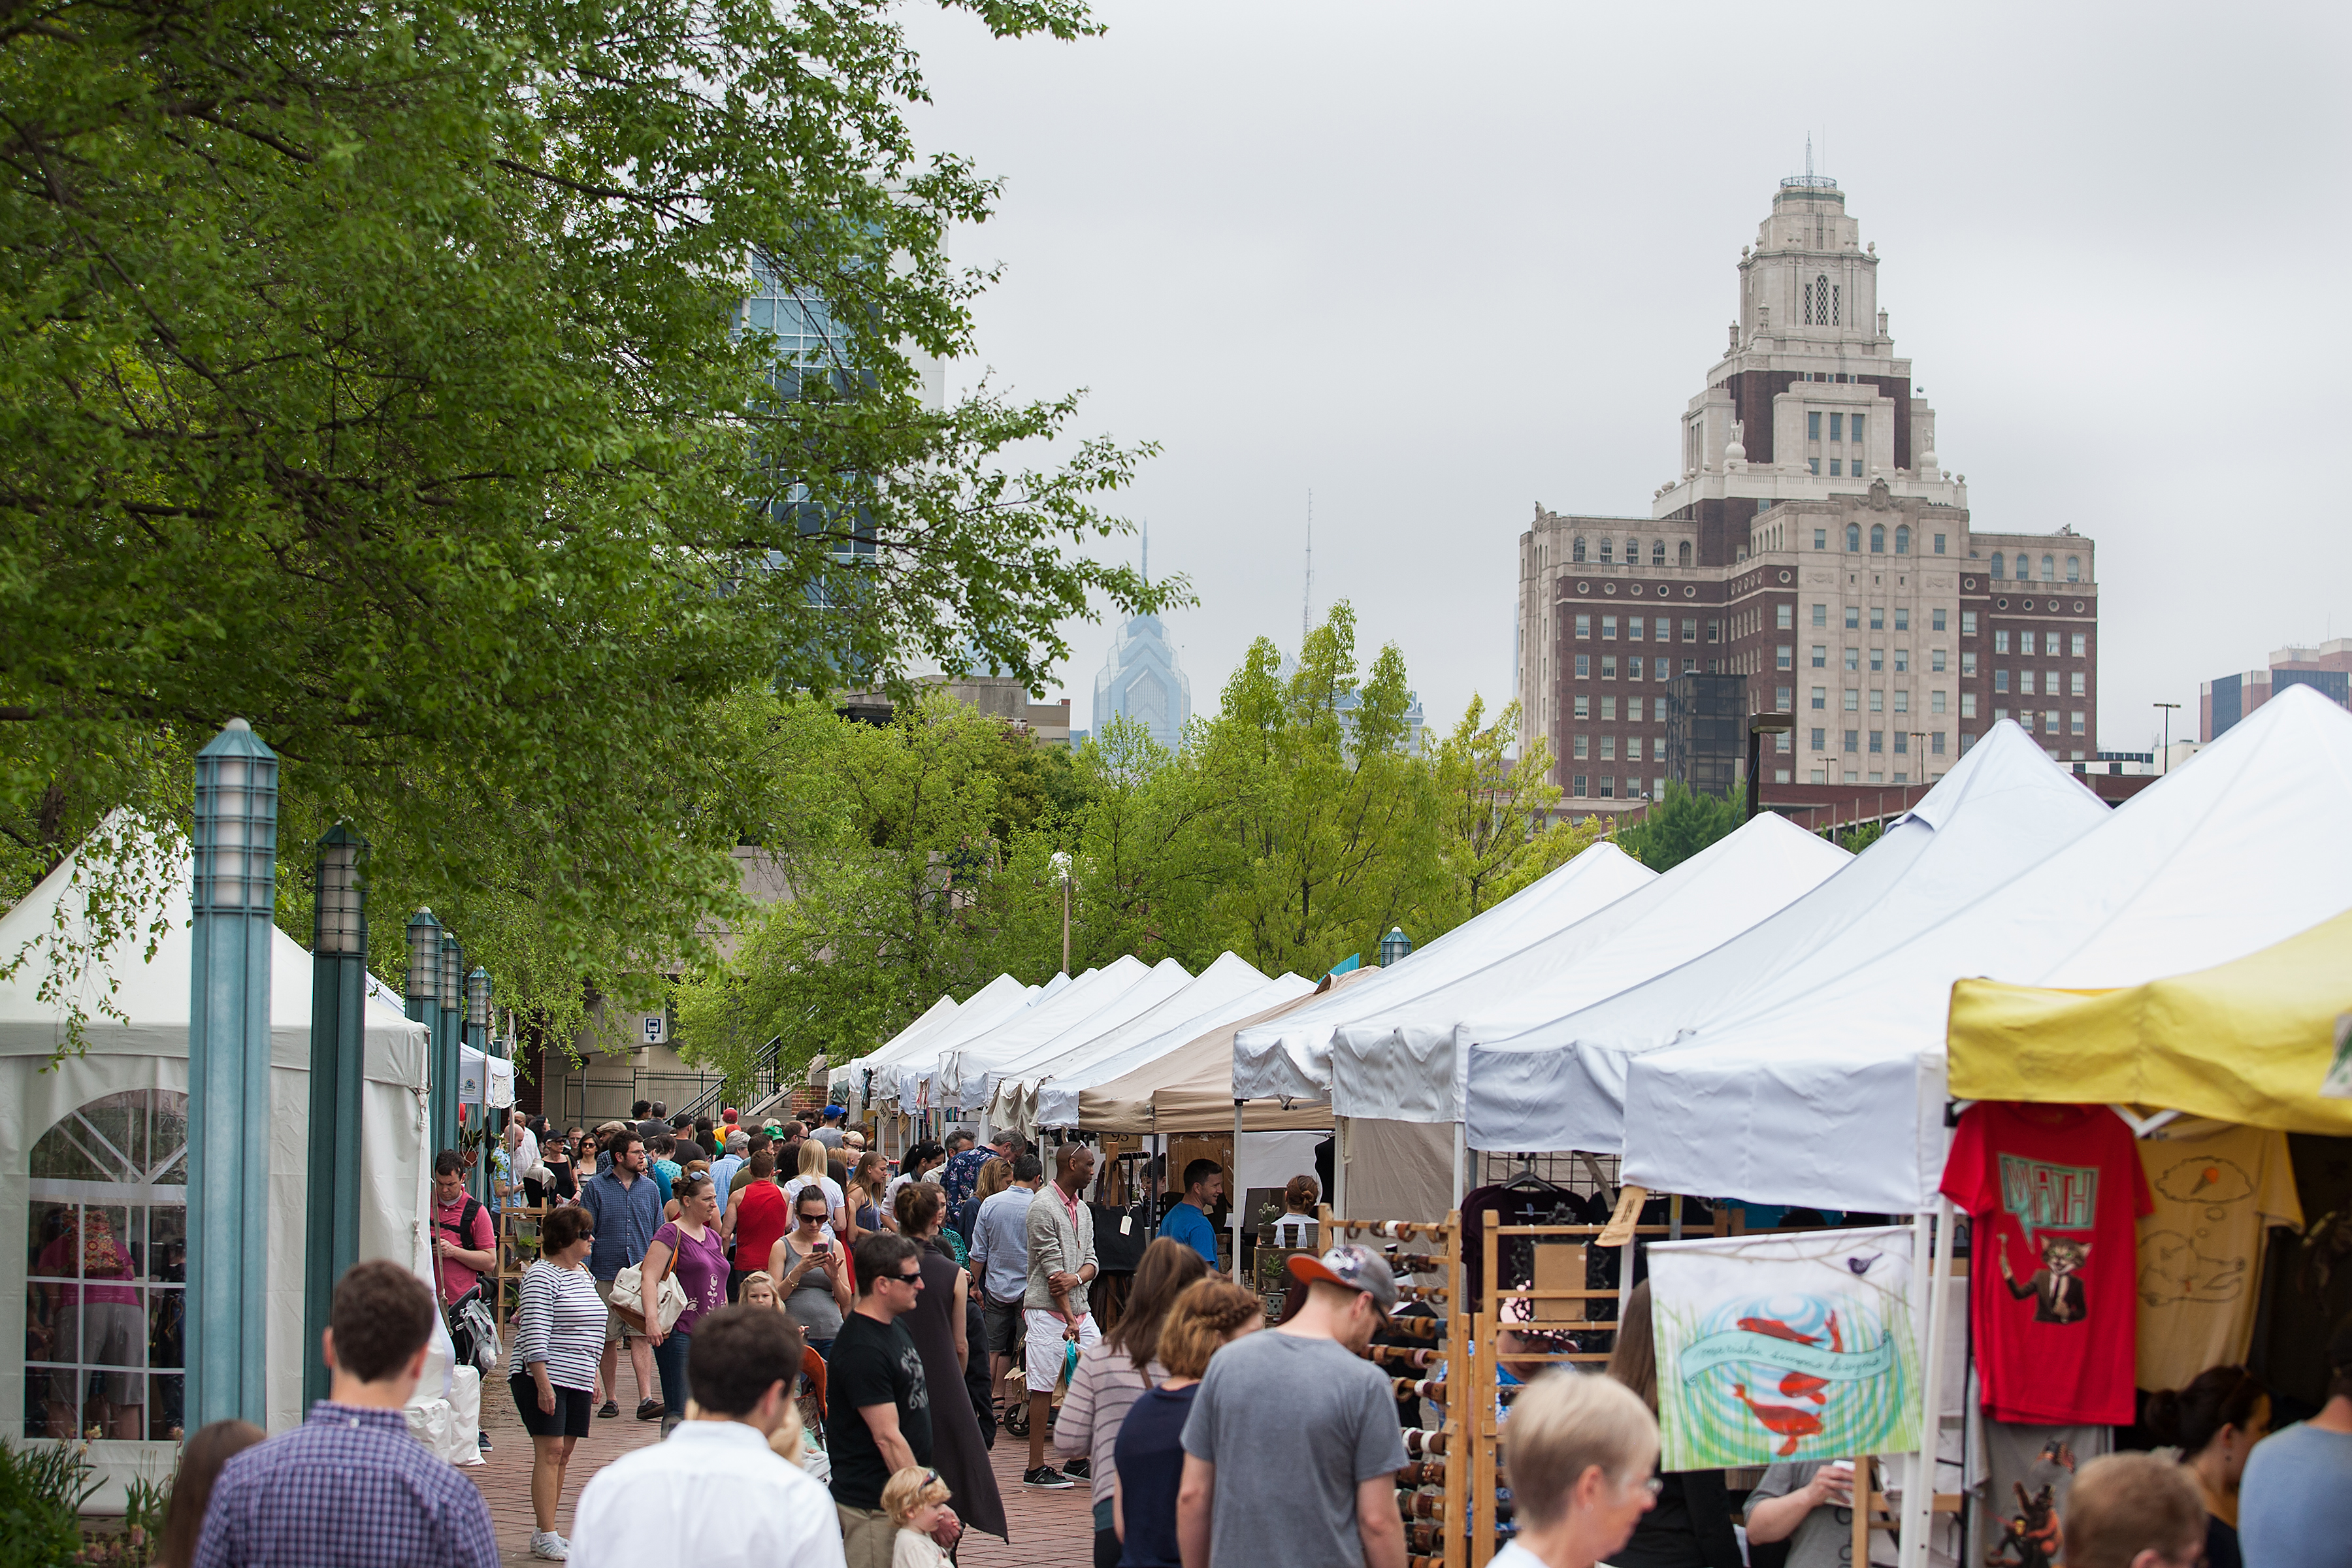
    And at our Upcoming Art Star Craft Bazaar in Asbury Park on July 25th + 26th, as well as our Art Star Pop Up Market at 2nd Street Festival on August 2nd!
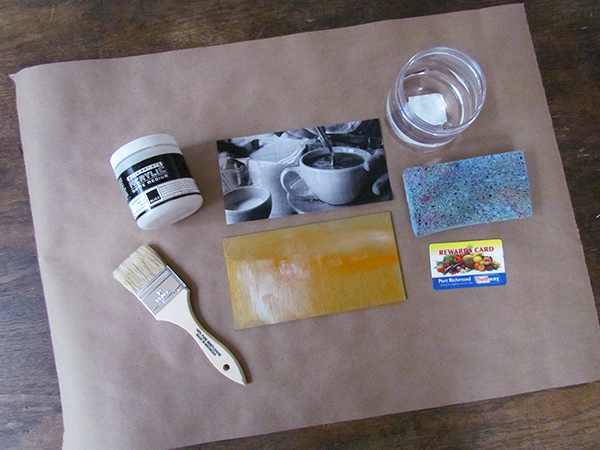
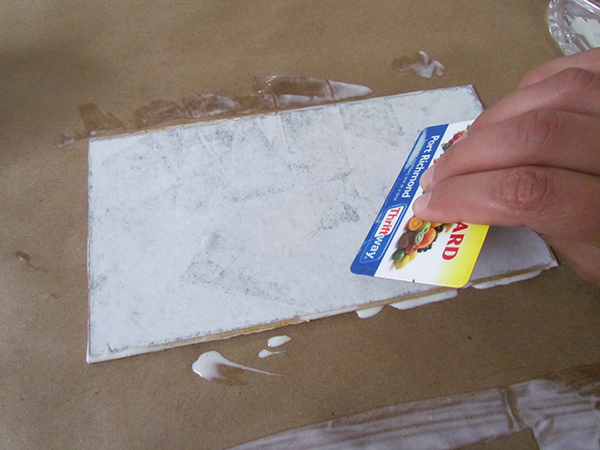
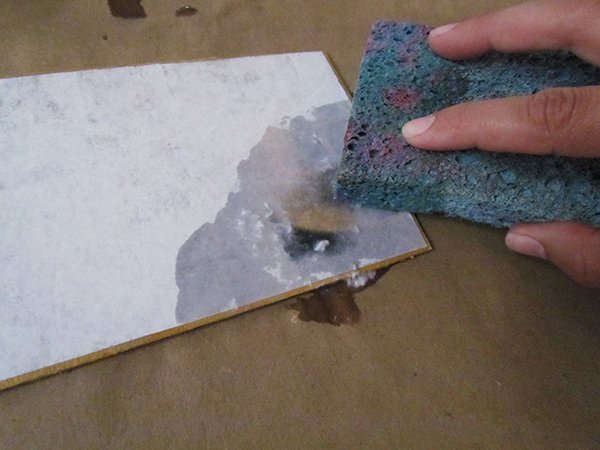
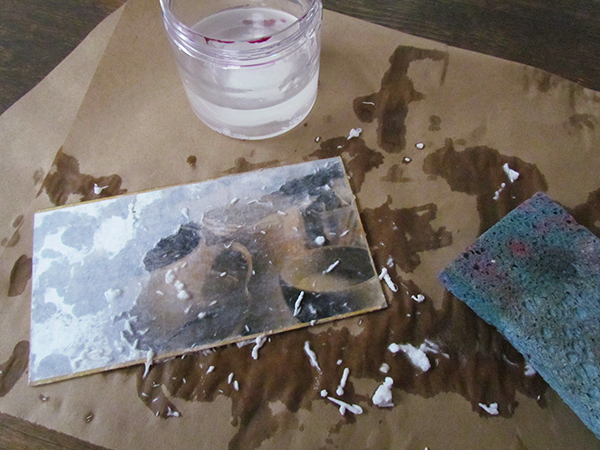
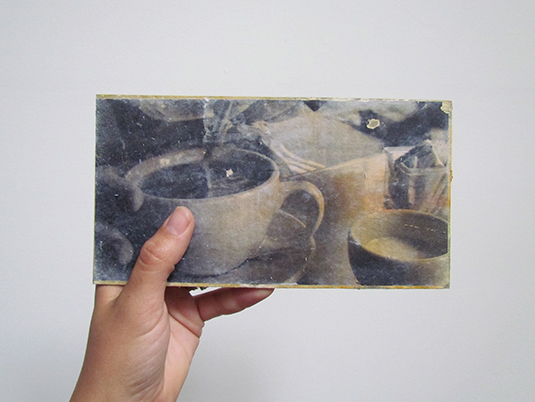
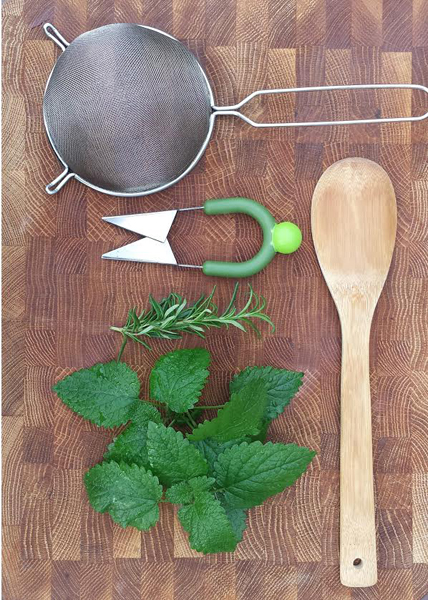
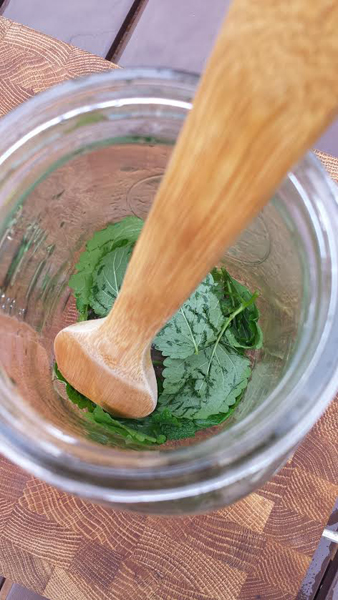
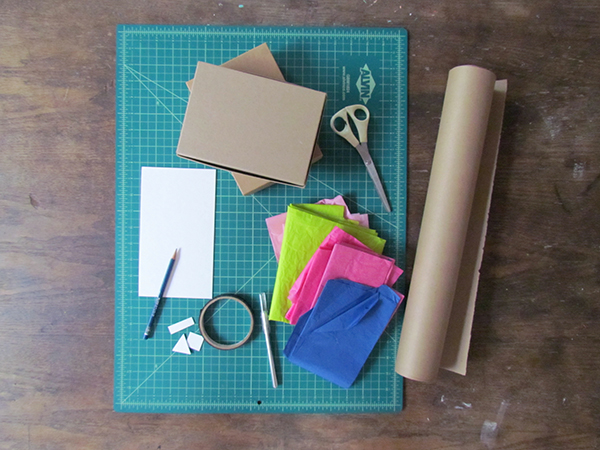
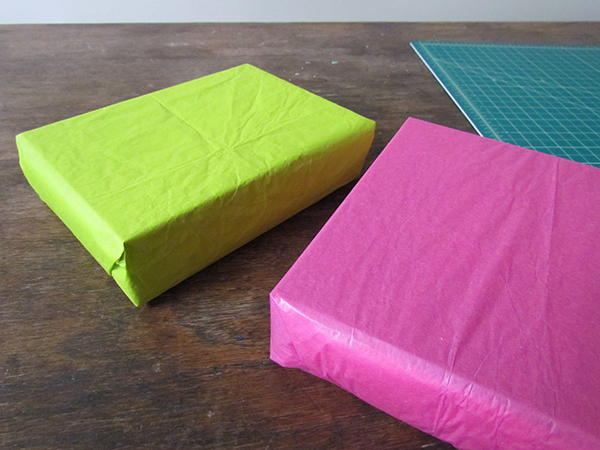
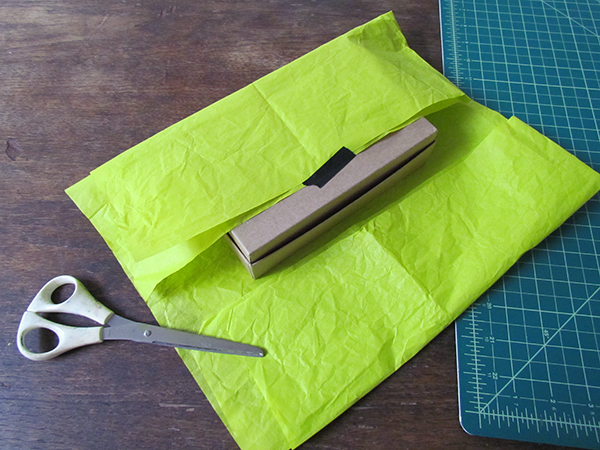
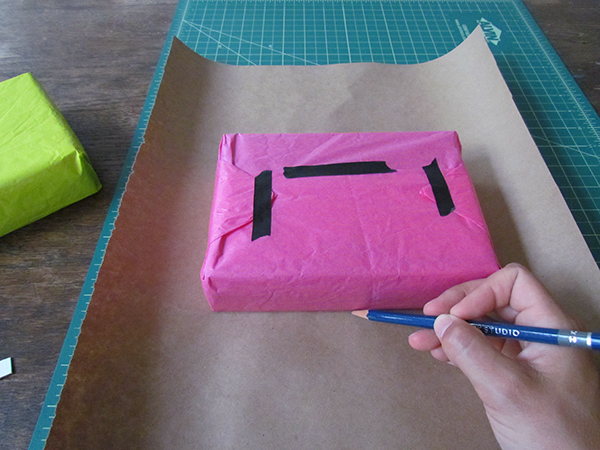
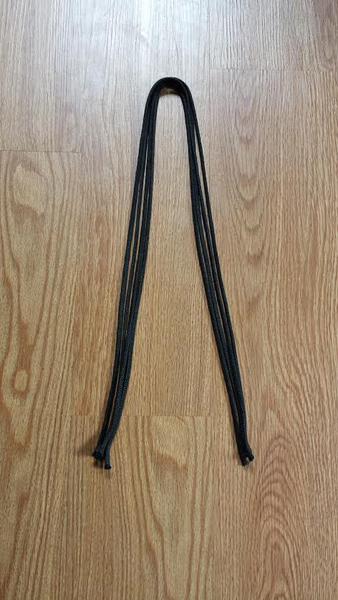
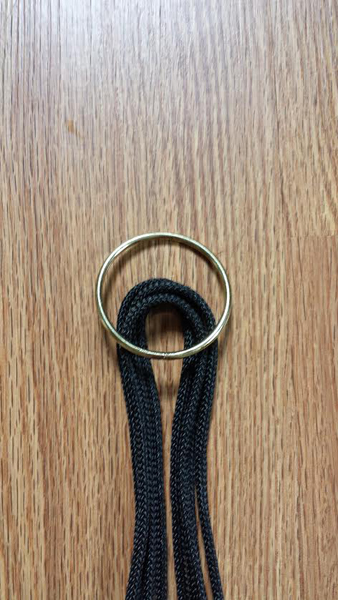
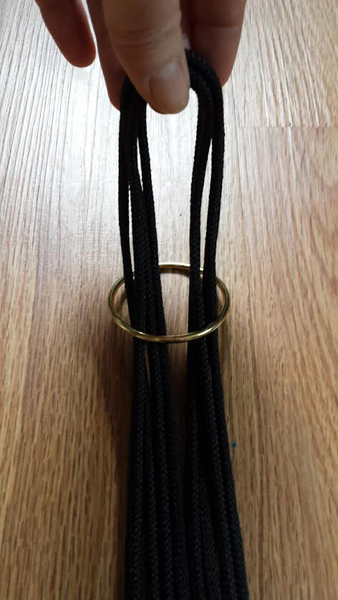
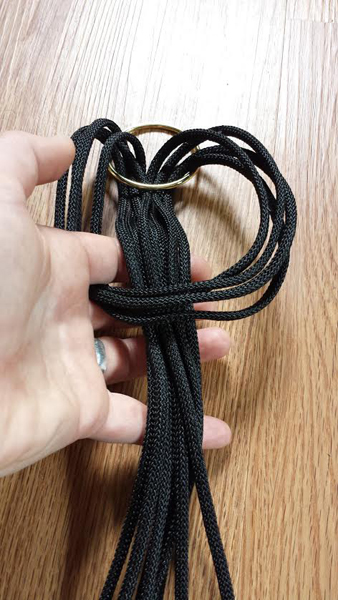
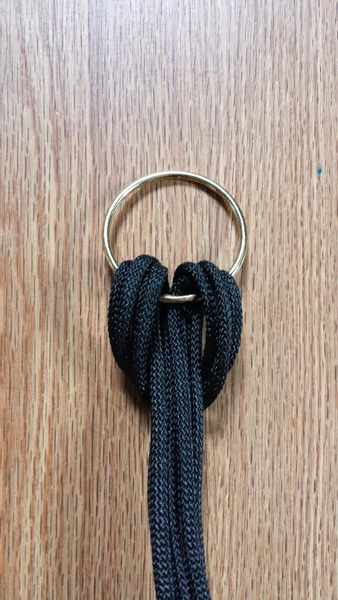
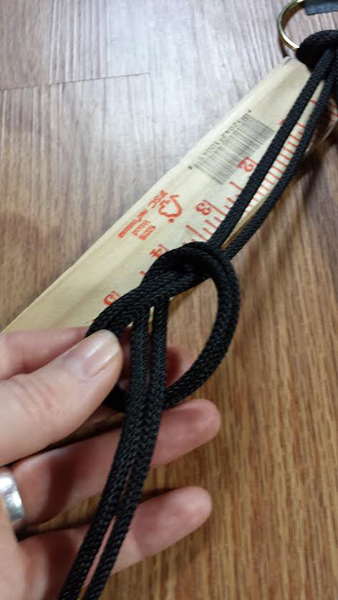
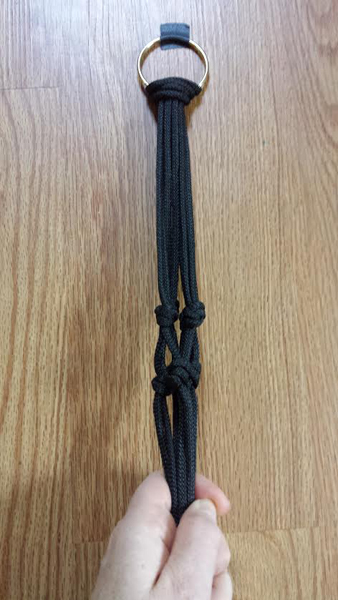
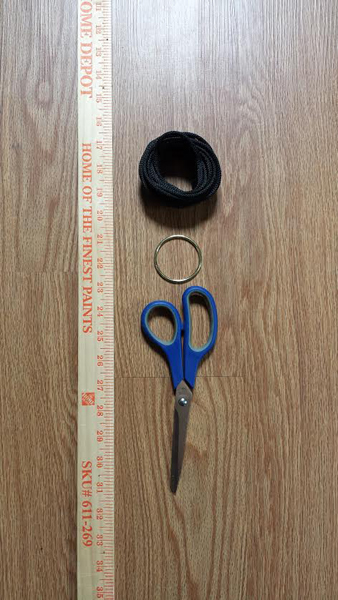
  • Make This: Quick + Easy Matte Medium Transfer

    Photos + Tutorial by Bonnie Kaye Whitfield

    Here’s a quick and simple image transfer for using matte medium and a photocopy of an image. It’s a helpful trick for adding layers of imagery to mix media works of art. On the other hand, it can also be a beautiful way to create a piece for your home or a friend that encapsulates a memory or person.

    Blog_8_Pic_1

    You will need:

    photocopy of image to transfer / copy in reverse if it matters to the image
    thick paper, canvas, or wood to use as background
    matte medium
    foam brush or wide brush
    old plastic card or brayer
    container for water
    sponge (optional)
    hair dryer (optional)

    Blog_8_Pic_3

    Gather your materials. Make a photocopy or laser print of your image that you want to transfer. You need the toner in the paper, so an ink jet print will not work. I recommend starting with a small image the first time you try this process.

    Depending on your design or what you want to make, if you want a background to your image then you’ll want to do that first. Go crazy, if you like, with painting a simple background using paint or ink washes. Let the background dry completely.

    Blog_8_Pic_5 Blog_8_Pic_4

    Cut out the image that you want to transfer, removing any excess paper. Using a foam brush, brush on matte medium on the frontside of the entire image, using a smooth and thick coat. Foam brushes are ideal since they don’t leave many streaks, but any brush can work.

    Blog_8_Pic_6

    Flip the image over onto your background. Use a brayer or old plastic card to smooth out the image and make sure that it has solid contact to the background. Any air bubbles may result in small areas of the image not being transferred. Let dry completely. Feel free to use a hairdryer to speed up the process.

    Blog_8_Pic_8

    Once the image dries (the paper will turn opaque again), grab your water container and sponge. Slowly use a damp sponge (or your finger) and work in a small circular motion to begin to remove the paper backing. This might take a while so put on a good podcast or your favorite Netflix show.

    Blog_8_Pic_7
    Try to work slowly, but if some of the transfer rubs off, it will just add to the rustic quality of the image. You’ll likely need to repeat this process a few times. As the image dries, any fibers that are not rubbed off will continue to cloud the image. Once you get the image to your satisfaction, give the image a top coat of matte medium to seal it.

    Blog_8_Pic_2

    ————————————————————————————————————-
    Bonnie Kaye Whitfield designs and screen prints home textiles + paper goods under the name, Bonnie Kaye Studio. Products are created to inspire memories at home and around the table. A donation is made with every purchase to help feed hungry Americans.

    www.BonnieKayeStudio.com

  • Make This: Cold Brew Infused Water

    Photos and Tutorial by Christie Sommers

    I don’t know about you, but when it’s this hot out I need something refreshing to drink and anything sugary or sweet is just no good. Here’s a little cold brew herbal tea recipe to enjoy all summer long, and you don’t have to heat up your kitchen to make it.

    Photo 1 Photo 2

    You will need:
    *a large pitcher or jar
    *spring or filtered water
    *fine mesh sieve or cheesecloth
    *large wooden spoon
    *clean scissors or herb snips
    *fresh herbs (suggested combos listed below). Anyone can grow fresh herbs, whether you have a garden or sunny window ledge. I highly recommend buying a potted herb plant over the prepackaged cut herbs from your grocery store for the obvious reason that you get more out of a living plant. They are very easy to care for. The more you cut and use them, the healthier and more abundant they will be. Packaged fresh herbs are fine if you’re really not a plant person.

    Start by cleaning your herbs well. Let them soak in a bowl of cold water for a bit and swish them around to remove any soil. Rinse.

    Place herbs in pitcher.

    Photo 3

    Bruise herbs with the wooden spoon to release the oils from the leaves. You basically just smash them with the spoon.

    Photo 4 Photo 5 Photo 6

    *The more herbs you use, the stronger the tea will be. Because we are cold brewing, your tea will be very subtle. If you prefer stronger tea, add a cup of boiling water now and let steep for about 5 minutes before adding your cold water to fill.

    Fill the rest of your container with spring/filtered water and place in your fridge. Let steep overnight. The longer it steeps, the more flavor your water will have.

    Photo 7

    You can filter out the herbs when you pour yourself a glass or just leave ’em in there if you don’t mind snacking on them;)

    Photo 8 Photo 9

    Your tea will keep for about a week in the fridge.
    Enjoy!

    Some herbs/combinations to try:
    Lemon Balm & Rosemary (used for this tutorial)
    Lemon Thyme
    Mint
    Chamomile & Lavender
    Hibiscus & Raspberry Leaf
    Ginger & Basil

    —————————————————————————————————————

    Christie Sommers is the designer and maker behind West Oak Design. She handcrafts small batch and one of a kind goods for home, women, and kids in her Wyndmoor, Pa studio.www.westoakdesign.com

  • Upcoming Exhibition: “Too Close For Comfort” by Marcus Benavides

    artstar_marcus_4x6_front_WEB
    June 27th – August 23rd, 2015
    Opening Reception with the Artists:
    Saturday, June 27th from 6-8pm
    free + open to the public, light refreshments provided

    Art Star is pleased to present an exhibition with Philadelphia based printmaker, Marcus Benavides. The show, titled “Too Close For Comfort”, will include a series of new woodblock prints by Benavides.  The exhibition will be on view from June 27th – August 23rd, 2015.  There will be an opening reception with the artist on Saturday, June 27th from 6-8pm.   The reception is free and open to the public and will include light refreshments.

    The artist states, “Looking at a tree so closely, you fail to see the forest.” In “Too Close For Comfort” Marcus Benavides will line the gallery walls with new woodblock prints that each depict macro views of a small part of a larger piece, which will be revealed to the viewer when they come to the final image within the exhibition. Marcus writes, “Macro views of objects tend to abstract textures and patterns located within. Thus, distracting the viewer from what they are actually looking at. The extreme close-up can then distort your perception of reality. This perhaps can stand as a metaphor for many things; but, for the purposes of this art show, it represents an inability to accurately view the world. It is a hyperbolic, satirical statement about a problem that I, if not society in general, may have.”

    Woodblock printing lends itself to this concept. Marcus writes, “I find that by carving wood, I am physically changing the material. While paint can display imagery or a message on top of a material, woodcarving exposes parts of the naked grain. So, in manner of speaking, this allows the wood itself to speak. The grain of the wood even influences my mark-making as I gouge out sections. This coupled with the parameters of woodcarving tools, provides a distinct pallet of marks to utilize. As I use hundreds of thousands of marks to make up one image, the medium also provides ample room for discovery and unique expression.”

    Marcus Benavides is an artist, printmaker, and small business owner based out of Philadelphia. He holds a Bachelor of Fine Arts degree in Printmaking from Texas A&M University – Corpus Christi and a Master of Fine Arts degree in Printmaking, from the University of Wisconsin. He has displayed his work in multiple national and international art shows, including exhibits in New York, Houston, Chicago, Beijing, and Athens, Greece. He has previously received grants from the Vilas Travel Program, the Arts Access Grant – Overture Center for the Arts, and holds a Purchase Award from the Porter Butts Gallery in Madison, WI. He currently owns and operates the Fishtown based fine art printing press, Red Light Press. It is here that he specializes in pulling limited edition, individual and collaborative, lithographic and woodcut prints.

  • MAKE THIS: 3D Geometric Wrapping Paper

    Photos + Tutorial by Bonnie Kaye Whitfield

    It takes just a few extra minutes to turn your gift into a conversation piece. Here’s a super simple tutorial to create fun 3D Geometric shapes on the top of your package for the next upcoming summer party you attend.

    Blog_7_Pic_12

    You will need:

    box to wrap
    colorful tissue paper
    brown kraft paper
    cardboard or chipboard
    scissors
    exacto knife
    self-healing mat
    tape
    pencil

    Blog_7_Pic_1

    Gather your materials. Grab whatever tissue paper and solid wrapping paper you have on hand.

    Blog_7_Pic_3 Blog_7_Pic_2

    First, wrap your packages in the tissue paper.

    Blog_7_Pic_4

    Put your packages aside and begin to draw and cut out simple geometric shapes out of your cardboard or chipboard. Keep your shapes small, under 1” in any given direction.

    Blog_7_Pic_5

    Next, cut a sheet of your solid wrapping paper, large enough to wrap your package for a second time. Place your package in the middle of the sheet and trace around the edges of the box.

    Blog_7_Pic_6

    Grab your cut out shapes and begin to trace HALF of the shape within the outline of the box. For example, if you cut out a circle, only trace half of the circle. You want to make sure that half or at least one side of your shape stays connected to the wrapping sheet. Play around with patterns and arrangement with your shapes.

    Blog_7_Pic_7 Blog_7_Pic_8

    Using an exacto knife, carefully cut along the lines that you traced.

    Blog_7_Pic_9

    Place your box inside the outline that you originally traced and now wrap your package with the wrapping paper. Flip the box over and carefully fold back all your cut shapes. (Tip: I like to use the blade of my exacto knife to help get under the cut slits. Makes for easier grabbing and folding of the paper.)

    Blog_7_Pic_11 Blog_7_Pic_10

    Now you can go wow all your friends at your next birthday/babyshower/wedding!!

    ——————————————————————-
    Bonnie Kaye Whitfield designs and screen prints home textiles + paper goods under the name, Bonnie Kaye Studio. Products are created to inspire memories at home and around the table. A donation is made with every purchase to help feed hungry Americans.

    www.BonnieKayeStudio.com

  • Make This: Mini Knotted Planter

    Tutorial and Photos by Christie Sommers

    hanging planter

    This mini planter is great for 3″ terracotta pots or even planted votive holders…no candles!!
    It makes a great little handmade gift… quick & easy!

    Photo 2You will need:
    *scissors
    *yard stick or tape measure
    *brass ring (can be purchased at AC Moore in the knitting/macrame section…OR you can just use a key ring.
    *16 feet of rope. I am using parachute cord in this tutorial but hemp, cotton rope, or even twine works well.
    *you will need something to provide resistance as you tie knots. Duct tape, a wall hook, a coat rack. You’ll see what I mean below.

    Start by cutting the rope into 4 pieces, each 4′ long
    Photo 3

    Gather the 4 strands and fold in half.
    Photo 4

    Tie the rope to the ring with a larks head knot.
    Photo 5 Photo 6 Photo 7 photo 8

    Tighten the larks head knot.
    Photo 9

    Tape down your ring. You will need a bit of resistance when you are tying your knots to simulate the weight of the plant. This will help you to line up your knots properly. You can also use a wall hook or even tie it to your shoe… if you are sitting down;)

    Separate the strands into 4 groups of 2 as shown.
    4 strands

    Working from left to right, measure down 6″ and tie your first two strands into a knot that falls 6″ from the larks head knot as shown.
    seperate
    photo 10

    photo 11

    Continue from left to right tying knots 6″ from top as shown.
    photo 12

    Separate again into 4 as shown
    photo 13

    You will now tie together one strand from 1 and one strand from 2
    continue with 2 to 3, and then 3 to 4 (tie this row of knots about 3-4″ below the last row of knots)
    Photo 16

    You will notice that there is one untied strand at the beginning and end (1 and 4)
    Tie these two together with the knot lining up with the last round to complete the circle.
    Photo 17

    Gather all strands again into one hand
    Photo 18

    Tie into one large knot
    Photo 19photo 20

    Pop a 3″ terracotta pot or any small pot/votive holder into your new knotted planter and enjoy!

    PLANTS ONLY! NO FLAMES!
    just had to say it….you never know these days;)

    ——————————————————————————————————————————————-
    Christie Sommers is the designer and maker behind West Oak Design. She handcrafts small batch and one of a kind goods for home, women, and kids in her Wyndmoor, Pa studio.www.westoakdesign.com
  • Upcoming Artist Opportunities

    125
    Genevieve Geer of Le Puppet Regime at our Spring Art Star Craft Bazaar. Photo by Chris Kendig

    Thank you so much to everyone that came out to our 12th Annual Art Star Craft Bazaar on May 9th + 10th. It was one of our busiest years yet – over 15k people came out to buy  handmade this past year! If you did not make it to our show, please visit our vendor line-up page or stop by our store to shop our vendors!

    We have just a few (winks) events coming up! AND many opportunities for Artists and Crafters who are looking to vend.

    Art Star Craft Bazaar at Asbury Park, NJ – July 25th + 26th Details HERE

    Art Star Pop Up Market at Spruce Street Harbor Park. Every Saturday through September 26th from 11-4pm. NOW ACCEPTING APPLICATIONS

    Art Star Pop Up Market at 2nd Street Festival. August 2nd, 12-8pm. NOW ACCEPTING APPLICATIONS 

    You can find info and applications for ALL OF OUR UPCOMING SHOWS now at www.artstarcraftbazaar.com This includes our Pop Up Markets

    AND Please check out all  the beautiful photos taken by Chris Kendig at our May 9th + 10th Bazaar here.

    12th Annual Spring Art Star Craft Bazaar
    12th Annual Spring Art Star Craft Bazaar

    More Artist Opportunities in Philadelphia via some of our friends (all now accepting applications):
    Art Market At Tyler School of Art 
    Bang!Boom!Craft fair
    Art For The Cash Poor HURRY! Only a few spaces left!!


  • Meet New ASCB Vendor Aaron Powers of New Antlers Illustration

    Photo__1409

    Thanks to both of my parents, I was born as someone with a compulsion in his blood to visually describe the world to others. There was always a story to tell in a meticulously rendered portrait or a quick accidental brush stroke resembling something familiar.

    IMG_3916
    Playing to my strengths, I was focused by my teachers and honed by my years at the Rochester Institute of Technology’s illustration department. After college and the requisite years that a twenty-something guy spends in a van playing music with his friends, a series of events pointed me towards a job in New York City that evolved over years into a position at a better known apparel catalog as a head fashion photo retoucher/compositor. Though grateful for the experience over those years, there came a point where I realized I needed to spend the majority of my time creating rather than concealing. Although it was mildly rewarding to have a god-like command over reality through Photoshop, it felt unnatural to be largely defined by covering the tracks of others so that it seemed as if no work needed to be done in the first place.

    Highlight of the Life List – 5 1000px
    Every night I would come home and scrub dried up pixels from my hands and try to squeeze a few minutes of drawing in before sleep takes over and the alarm resets the day. So when the corporate belts started tightening and heads needed to roll, I opted for the fresh air of Central Massachusetts so someone else could have my desk instead of an unemployment check.

    IMG_3926
    It’s been an exciting year since then, from teaching myself the craft of screen printing to publicly displaying my work for the first time. The din of a midtown office has been replaced by the sounds of migrating birds and the echoes of my past professors/peers while considering my compositions.

    A Live Edge Inversion 2 1000px
    In addition to my personal work, there have been the opportunities to produce hand-printed gig posters, music packaging, greeting cards, and entire suites of custom wedding invitations as well as the chance to teach youth printing workshops.

    paper cutter copy
    I find inspiration in old friends and new strangers, and in the varying levels of connections we all have with nature, technology and each other. These prints are a blend of vectors and gestures, flora and fauna, and the coping with (and preparing for) equal parts of both happiness and loss. Even though my back is sore and the hours are long, it’s now ink I’m washing off my hands every night and it still feels like I’m getting away with something. Thank you for taking a moment to visit the Art Star blog and I look forward to meeting passers-by at the New Antlers booth #54 at this weekend’s Art Star Craft Bazaar.

  • Meet New ASCB Vendor sPACYcLOUD!

    spacycloud3
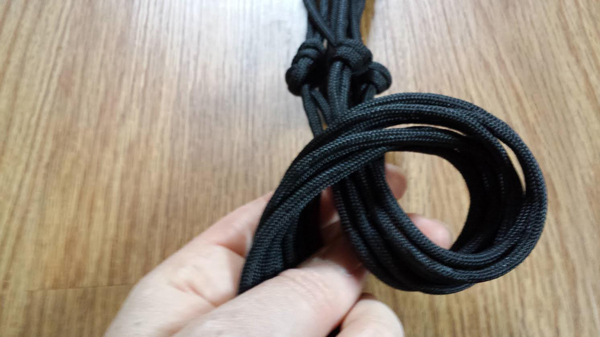
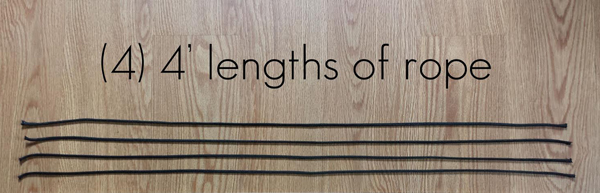
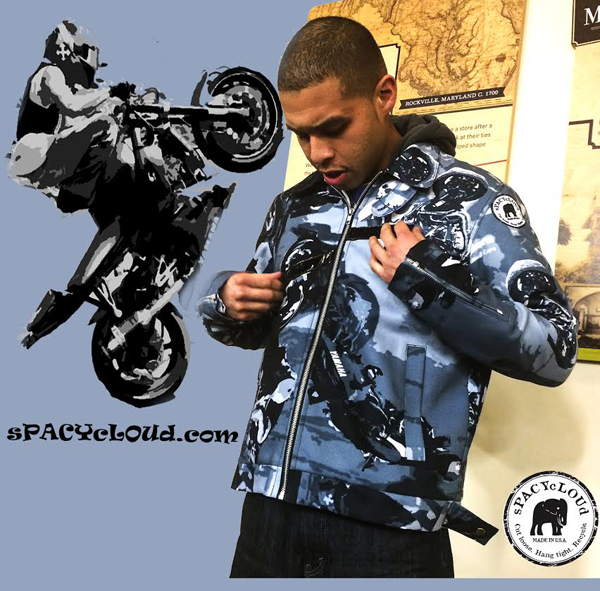
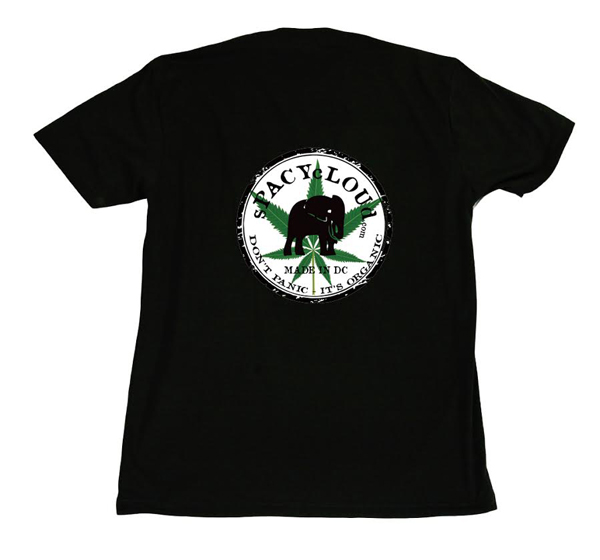
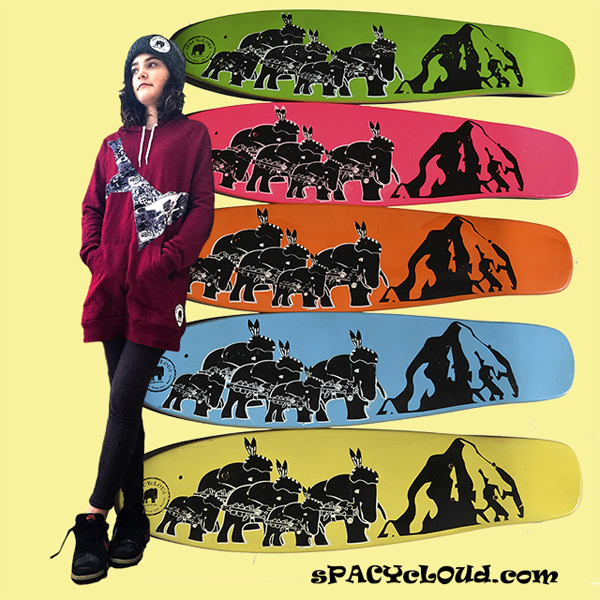
sPACYcLOUd was born in DC, from the mind of designer Tatiana Kolina (AKA Tati) with a focus towards the sui generis spirit that lives in all of us. The ethical core of sPACYcLOUd is built on self expression, love, and positivity. Its visual aesthetic breathes from the world of break dancers, hip hop artists, street artists, skaters, and motorcycle riders. Those whose wardrobe exists in a state of counter-culture, carving through life to the rhythm of their own choosing. sPACYcLOUd reflects political and social currents though clothing, artwork, and attitude.

    spacycloud5

    sPACYcLOUd ‘s jackets are made of custom printed fabric using Tati’s and other artists’ art work. From the choice of commonly overlooked fabrics to the colorfully designed prints displayed on each garment, sPACYcLOUd is a social rebellion of creativity. sPACYcLOUd life and street styles are imbued with movement: biking, skating, evolving, but also creative, rebellious, musical and artistic lifestyles.

    spacycloud2

    Leftover jacket fabrics are used for patches on T-Shirts, string bags, hoodies patches, skirts, and other apparel. No fabric is being wasted. Tati is also using a screen printing technique to design her own collection of skateboards and mini cruisers.

    spacycloud1

    Tati’s journey is a testament to her spirit. Born in the Soviet Union, she was without a mother and father after age 7, she grew up with her grandmother, often times taking care of herself. While a teenager, she joined a number of tusovkas (street groups) to survive. The group which affected her life the most was “farsovshiki.” It was a group of kids, the first wave of black marketers in Soviet Union, who ran around big cities (Moscow, Saint Petersburg, Kiev, Tallinn, etc.) and traded Levi’s jeans, t-shirts, gum, etc. for matreshkas, black caviar, and KGB paraphernalia with American tourists. Doing her best to avoid the attention of undercover militia and the street mafia, Tati spent time in Russian jail several times for possession of foreign currency and talking to foreigners.

    In the Summer of 1990, her life changed dramatically. Meeting an American family in St. Petersburg, she sold them two lacquer boxes with Russian fairy tales depicted on them. Touched, they took her contact information, later sending her an invitation to come to the US. It took some time and convincing before she made one of the biggest decisions of her life.

    In January of 1991, she landed in San Francisco with no money, a tiny backpack, and a present for her new family, a cuckoo clock. More important than the room and board she received was the love and support, that echoes in her spirit to this day. One day Tati was moved to ask her host father, “How can I ever pay back for all you have done for me?” His answer was simple, “You pay back by helping others when you have an opportunity.”

    spacycloud6

    The sPACYcLOUd family has been proud to have organized and participated in a number of events and groups that share a spirit of creativity and alacrity. Always with an eye to the future, sPACYcLOUd moves to involve and inspire the younger generation through surf and snowboarding camps, longboarding rides, internships, and skate events. From celebrating local heroes like Maryland Stunt Rider Alonzo and local DC Skater Angelina to BBoy Atomic Goofball, sPACYcLOUd moves to reflect what’s happening now.

    Tati launched Skate Girls Tribe after being inspired by Skatistan, realizing that skateboarding, and action sports overall, can be used to build communities and help building confidence in girls, free from the limitations society tries to hinder them with.

    —————————————————————————————————————-
    Thank you Tati for sharing your incredible story with us! Shop her collection online here and visit her in booth #50 at this weekend’s Art Star Craft Bazaar at Penn’s Landing Great Plaza!

  • Meet New ASCB Vendor, S. Casey of Desarc by Susan Casey!

    Desarc1
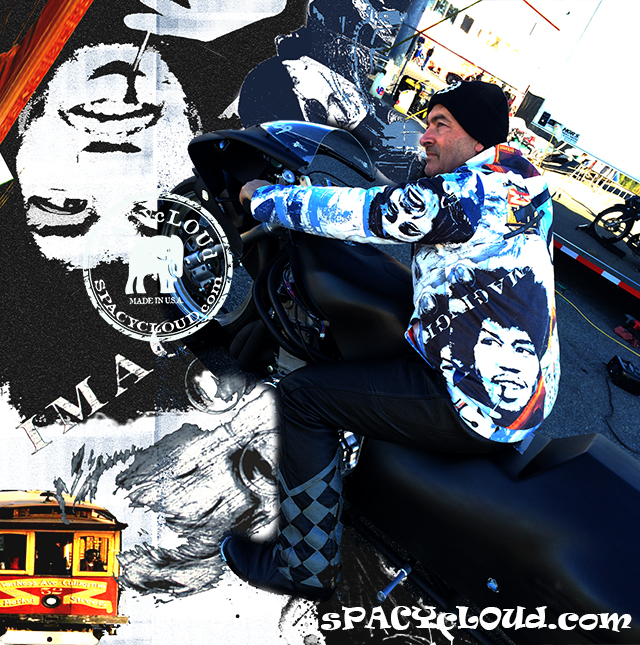
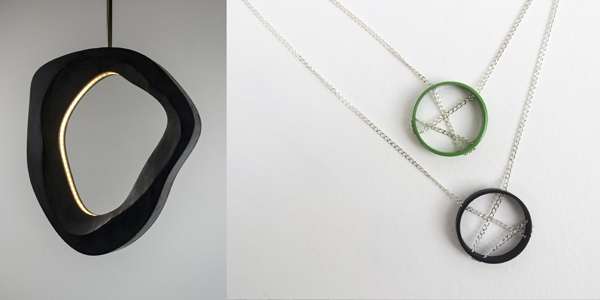
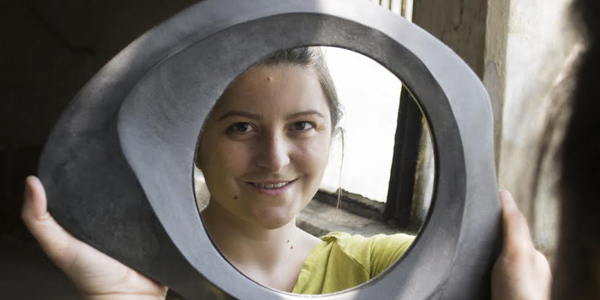
I am so happy to introduce Desarc, and myself to the Art Star Craft Bazaar this year. I’ll be offering jewelry, accent lights, and decorative mirrors for sale. My objective as a designer-maker is to produce useful objects that are attractive, meaningful, and well-made.

    Desarc2
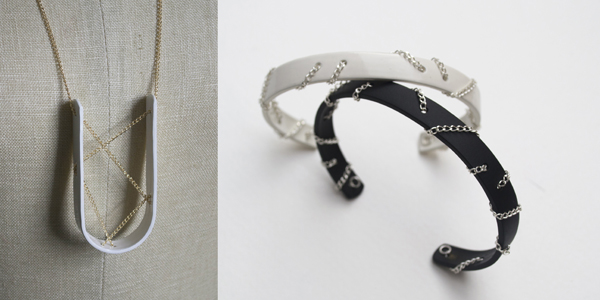
I earned my BFA from the Tyler School of Art in 2010, with a concentration in jewelry and metals. The variety of ways I learned to work metal gave me the flexibility to explore object design and craft in many directions. Making functional objects like jewelry gives me a sense of purpose when making creative decisions. I love how jewelry intrinsically deals with concepts of identity. My current line, Resist, is an expression of personal introspection. The balance between the bold and the delicate elements in the collection celebrates feminine strength in an industrial aesthetic.

    Desarc3
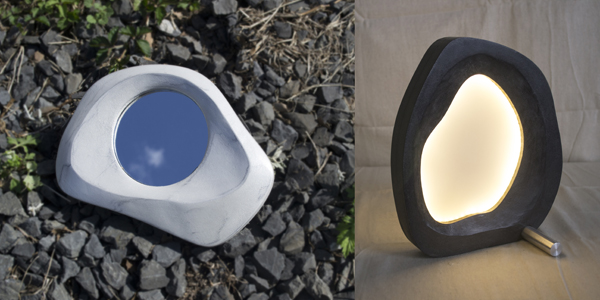
In addition to jewelry, I have fallen in love with making objects for living spaces. I created the Echoes line of light fixtures (and now mirrors!) years after a summer trip to England where I saw Stonehenge and many other ancient artifacts in London’s museums. Being close to the large monuments, watching the shadow play in and off the slabs of rock, and knowing our ancestors were so compelled to respond to their world, made me feel connected with humanity and craftsmanship in a new way. The Echoes collection is my homage to mankind’s commitment to shape our world like a river though rock.

    Desarc4

    I cannot wait to see you all on Saturday and Sunday to show you more of my work, but until then you can see behind the scenes photos of my progress on Instagram @desarcbysc or on my Facebook page Desarc by Susan Casey. I also have other lines and more photos of these collections on my website: desarc.carbonmade.com.

    Come check me out at booth #69!

The owner of this website has made a commitment to accessibility and inclusion, please report any problems that you encounter using the contact form on this website. This site uses the WP ADA Compliance Check plugin to enhance accessibility.