Tag: diy

  • Meet Our Sponsor: Butcher’s Sew Shop

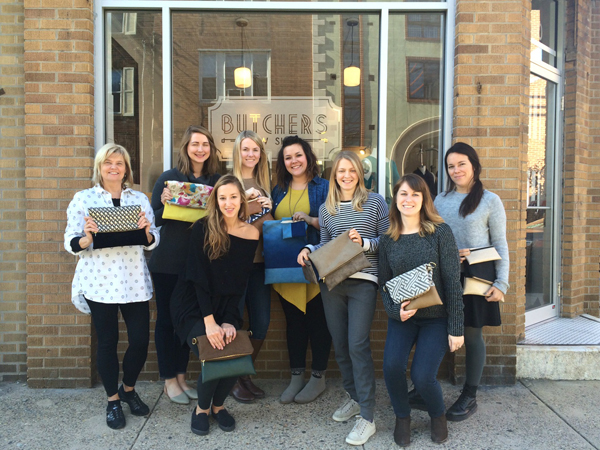
    We are so thrilled to welcome Butcher’s Sew Shop as one our Art Star Craft Bazaar sponsors this year! The ladies behind this sewing studio in the Italian Market are here to tell you all about what they offer. I can’t wait to take a class with them myself. They will be set up at our bazaar, demonstrating sewing techniques and I also hear you can enter a raffle at their booth to win a class. I’m in!! ~ Megan

    —————————————————————————————————————-
    Words and Photos by Amalia Petherbridge and Andrea Brown of Butcher’s Sew Shop.

    Kristine Eng Photography
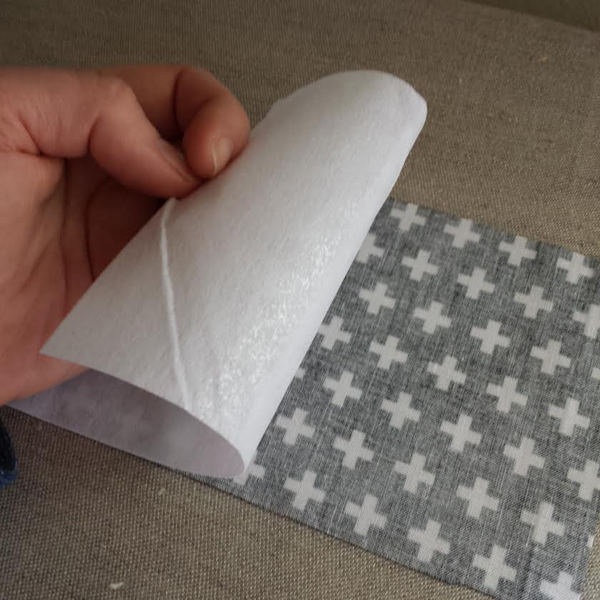
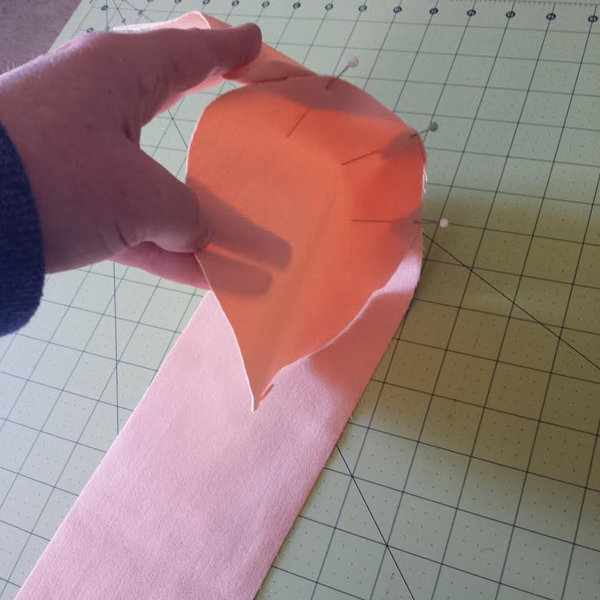
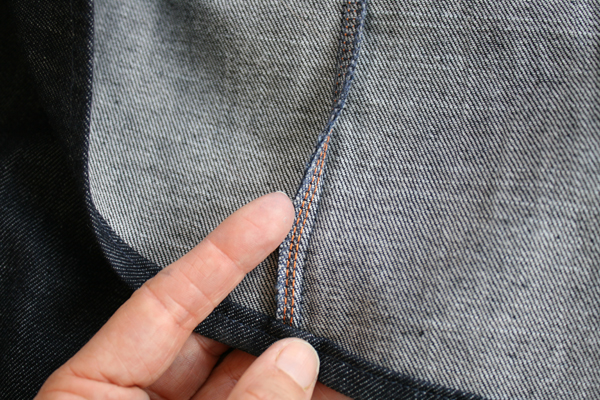
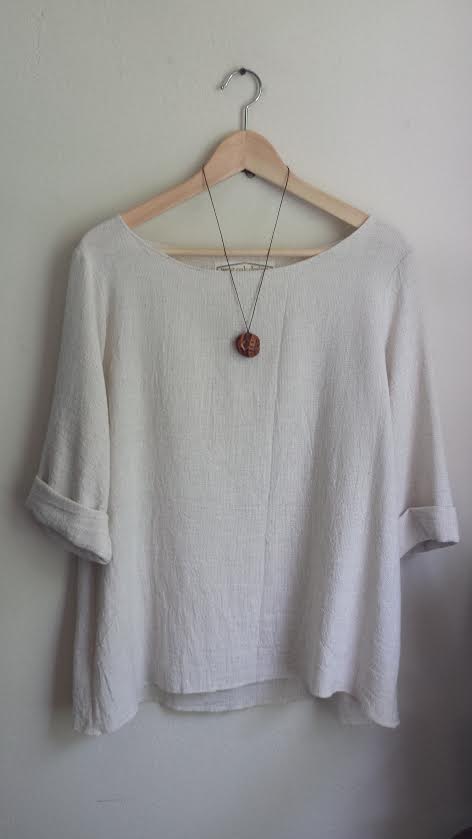
A handmade garment has a story to tell. Each step of the process is its own feat, from sourcing the perfect fabric, to painstakingly laying out and measuring your pattern pieces, to stitching and restitching until the seam is finally straight, to getting that hem nice and even. Then, there’s the fact that there’s no better feeling than getting a compliment on one of your handmade duds and having the chance to reply, “Hey, I made this!” That’s the experience we hope to pass onto others by teaching the art of sewing at Butcher’s Sew Shop.

    Kristine Eng Photography

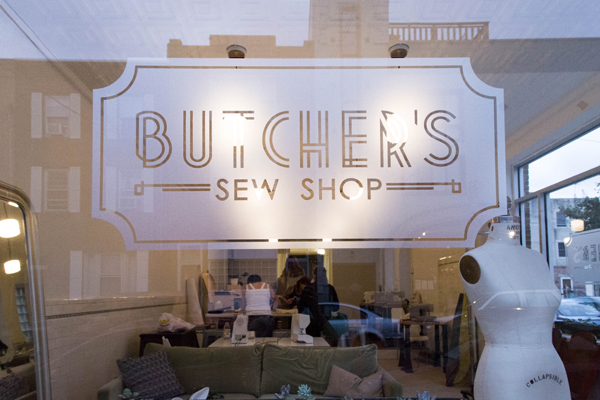
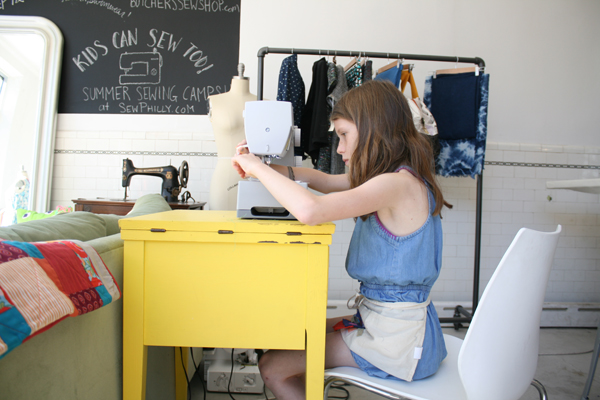
    Butcher’s Sew Shop hosts classes for adults and kids on a quiet corner (in a former butcher shop) in the Italian Market neighborhood at 800 S. 8th Street. The majority of our workshops focus on garment making using modern patterns and professional techniques, but we also love teaching things like quilting and bag making. Our goal is to foster a non-intimidating environment for learning and problem solving, and to inspire people to build a handmade everyday wardrobe that rivals the fit and finish of any store-bought clothing. Our sister program, Sew Philly, runs after-school and summer camp programs for children ages 5 through 14 in the same space.

    Butchers 3 copy Butchers 4 copy

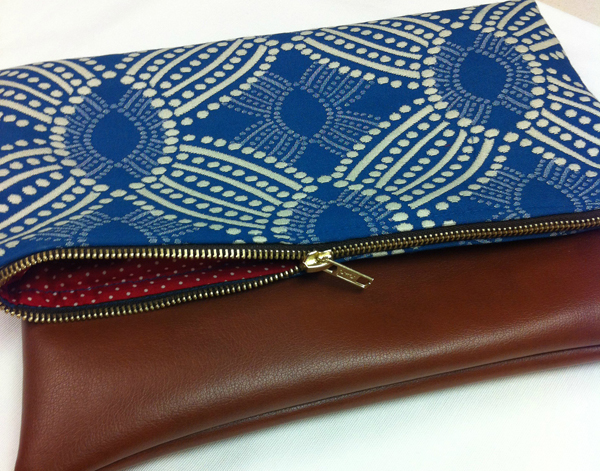
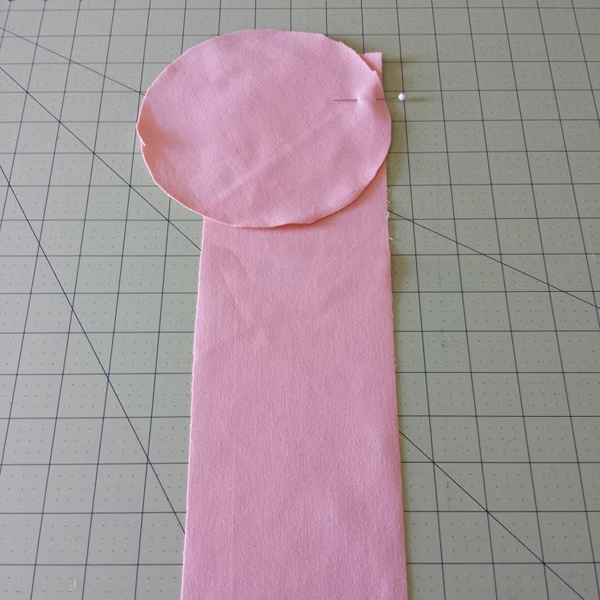
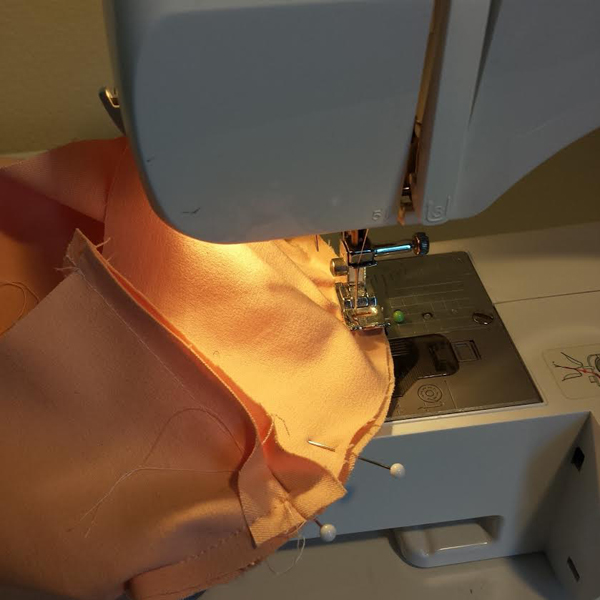
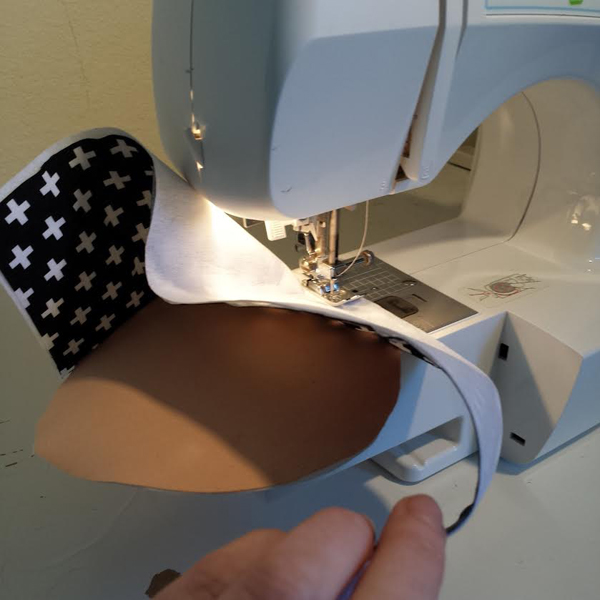
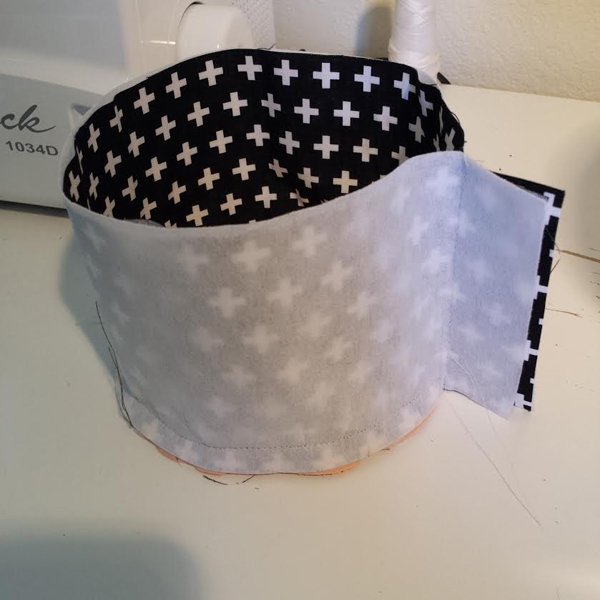
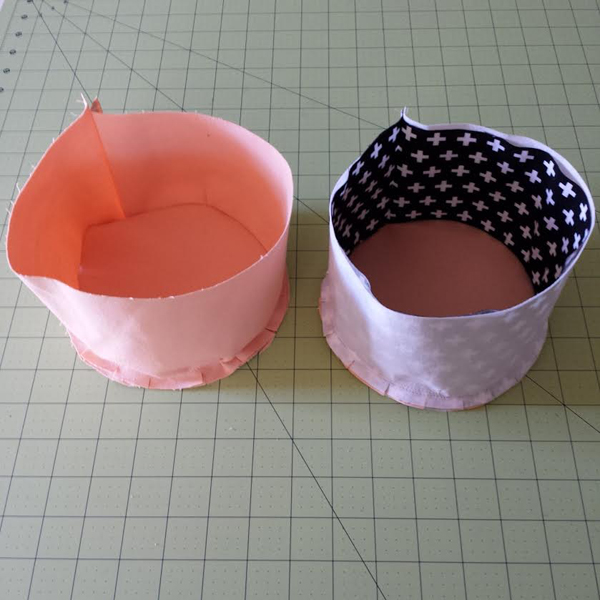
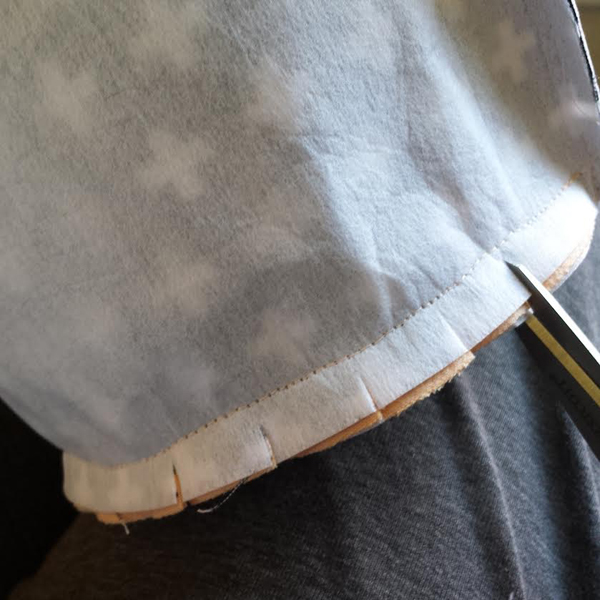
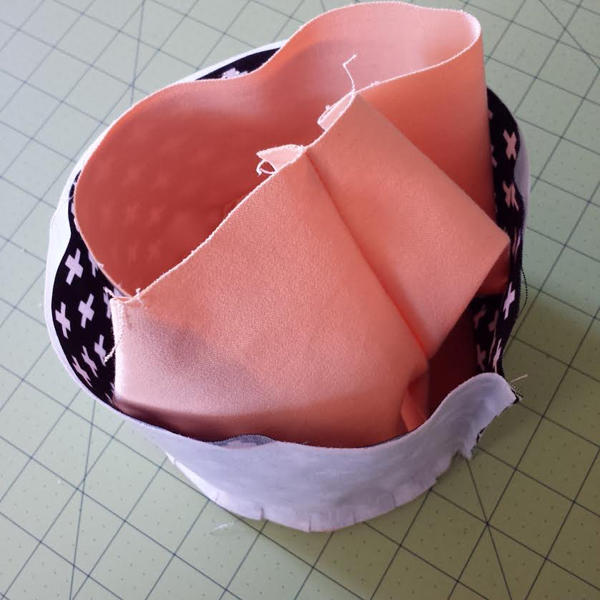
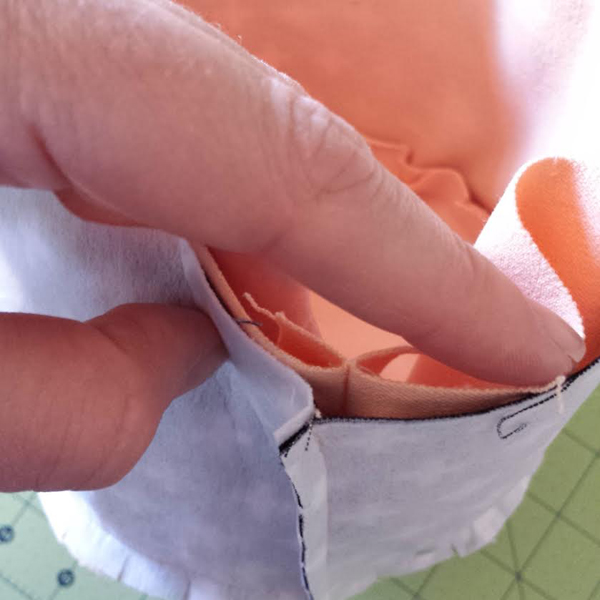
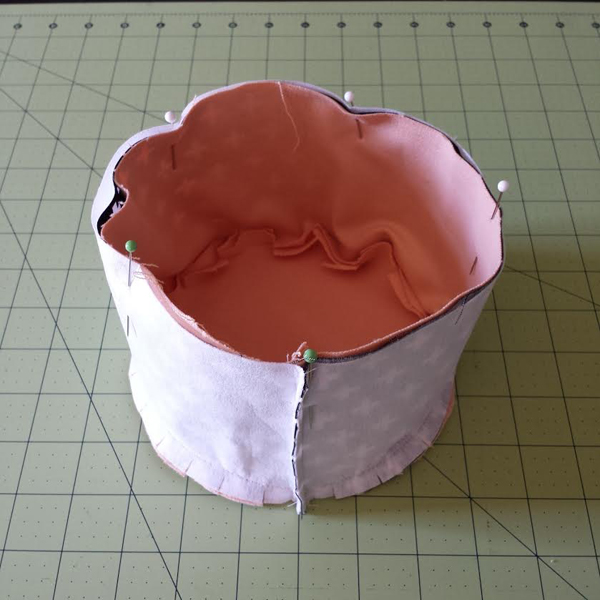
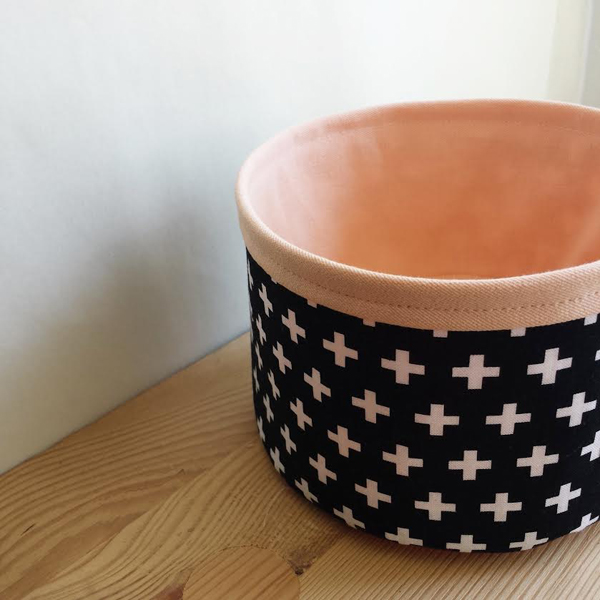
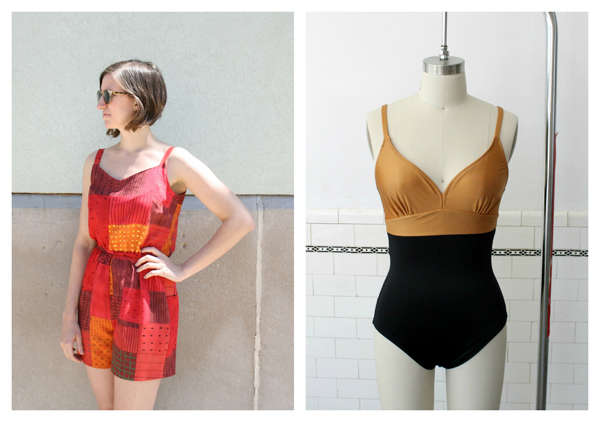
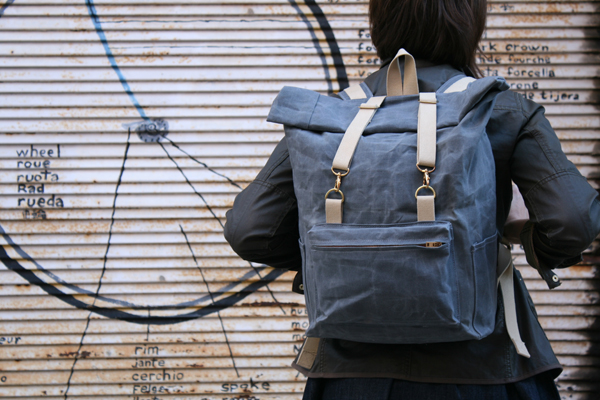
    We have workshops for women and men, from the novice to the experienced sewer. There are ongoing courses that teach foundational skills, such as the Sewing 101 class that teaches students how to thread and operate a sewing machine, how to cut fabric on-grain, and how to sew a two-toned bag with a zipper, lining, hardware and topstitching. Our upper level classes focus on dressmaking, fitting, patternmaking, casual menswear and more. We also host workshops focused on seasonal specific items–like swimwear in the summer (coming up!) and wool coats in winter.

    Butchers 5 copy Butchers 6 copy

    At the start of our beginner-level Sewing 101 class, we ask students why they want to learn to sew. For many, it is a sentimental reason; they grew up with family members who sewed or they learned long ago as a child, and they feel inspired to pick up the lost craft. Many want to learn for more practical reasons, such as altering store-bought clothing to fit their bodies. Others have stressful careers and are looking for a creative outlet. Whatever the reason, our goal is for students to leave our classes feeling productive, proud and accomplished.

    Butchers 7 copy Butchers 8 copy

    For us, learning to sew is one way that we can feel more connected to the production process of our clothing. As a culture, many of us spend most of our days consuming physical things or consuming media, and spend very little time creating anything tangible or thinking about the origin of the items we wear and use. We’re proud to be building a community of people in Philly who can appreciate and understand first-hand the craftsmanship that goes into creating handmade pieces.

    Butchers 9

    We’d love for you to join us for a class! If you’d like to learn more about Butcher’s Sew Shop and the classes we offer, visit butcherssewshop.com, follow us on Instagram at @butcherssewshop, or come stop by booth #70 at the 2016 Art Star Craft Bazaar. Our children’s sewing programs can also be found at sewphilly.com. Thanks for reading!

    Butcher’s Sew Shop
    800 S. 8th St.
    Philadelphia, PA 19147

  • Upcoming Exhibition + P.O.S.T Event!

    We are excited to be participating in Philadelphia Open Studio Tours again this year! We have some fun things that we have cooked up for you on October 3rd all day at Art Star (11-7pm)

    1. Opening of “Tastes Like Broken Dreams” a solo show by Brooklyn based painter, Mauro Baiocco.

    Postcard Image2
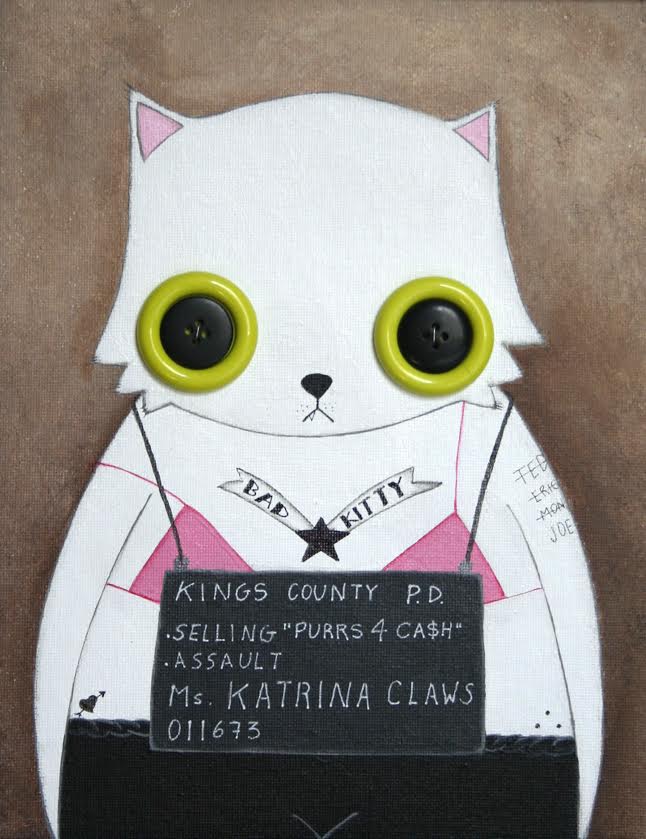
Mauro’s first solo exhibition at Art Star will feature a charming array of “Naughty but Nice” animal portraits. Yeah they may look cute and innocent on the surface but these cuddly animals have issues. The show will feature an all new collection of acrylic and ink paintings of Mauro’s cynical and bitter cast of furry friends. We will be celebrating the opening all day long during shop hours. Come ready to day drink with us, as we’ll have a boozy beverage or two to offer guests! Can’t make the opening? No worries, the show will be up in our gallery space through November 22nd.

    2. Trunk Show / Make + Take with Christie Sommers of West Oak Design

    Christie Stamp Make + TakeArt Star artist and regular blog contributor, Christie Sommers of West Oak Design will be set up with a collection of her latest designs for you to shop. She will also be providing a FREE DIY Stamp Make + Take all day long!

    Guests can make a wood block stamp perfect for hand printing fabric, or creating your own stationary. Cut your desired shape out of foam sheets and mount to wood blocks. A variety of paper + stamp pads will be on hand for testing out your creation. Christie will provide instructions and everything you need to make your own one-of-a-kind stamp that you can take home for free!

    No registration is required. Just come on by and get to craftin’! Did I mention boozy day drinks?

    3. Pop Up Studio with illustrator, Julia Lemyre
    Julia Lemyre Pop Up Studio
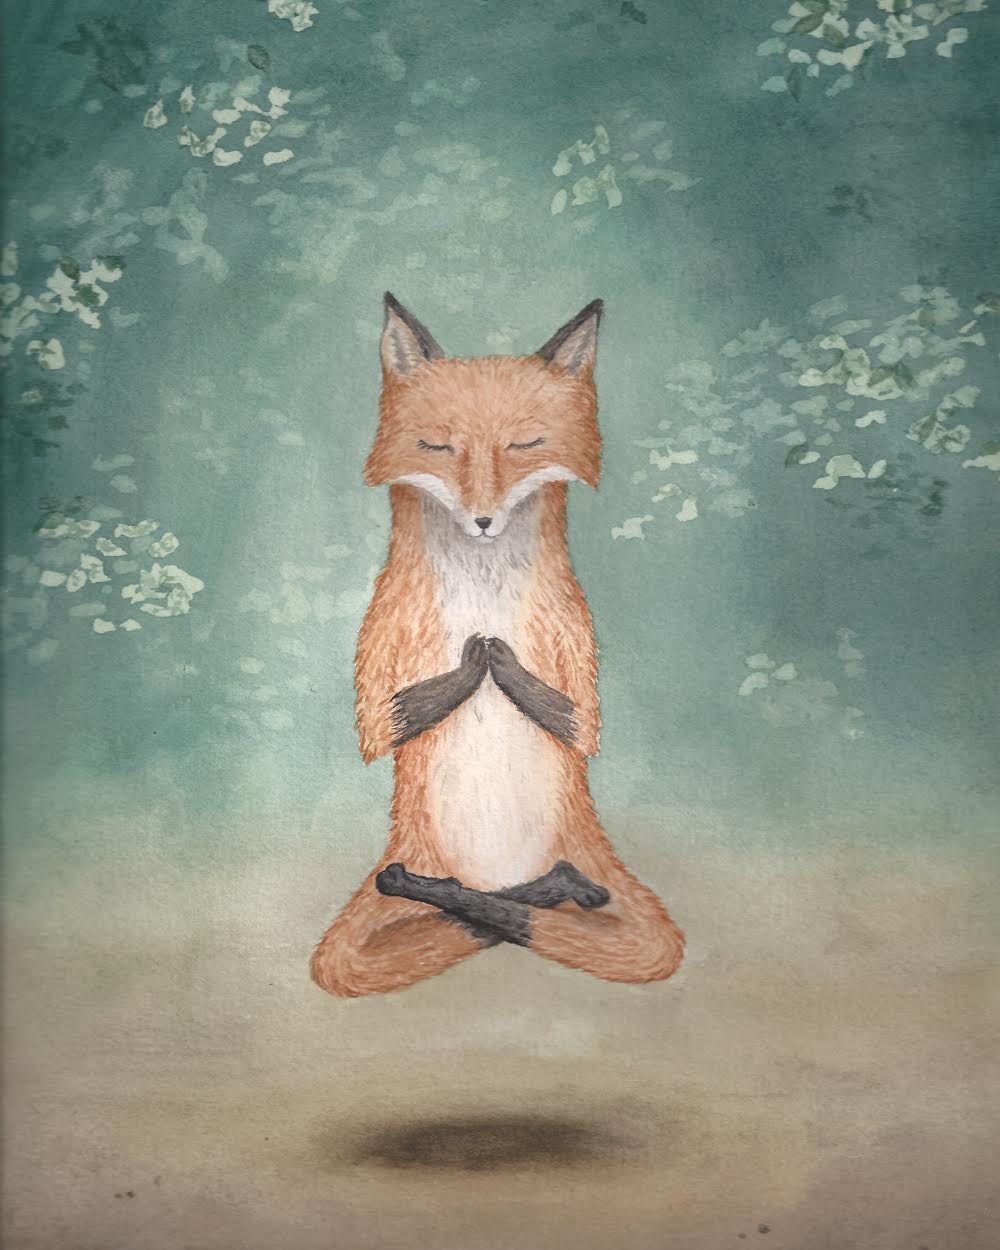
If you have stopped by our shop on a Saturday this summer, chances are you met our employee, Julia! Well, she is not only a super awesome shop helper, she is also an incredibly talented illustrator. She will be bringing along a selection of her original works and prints for you to peruse and shop.

    Like I said, all this is FREE to attend and no registration is required. Bring some friends and come hang out with us! We will be open from 11-7 and can’t wait to see you!


  • Make This: Avocado Seed Dye Tutorial

    Photos and Tutorial by Christie Sommers

    In my last tutorial, I showed you one way to carve avocado seeds to make a pendant necklace. Today I will show you how to turn those failed attempts and carving scraps into a dye suitable for dying natural fibers like wool and cotton.

    This is a simplified method that will result in a subtle, warm pink/rust color. If you are looking for deeper color saturation, or if you require colorfast results for fabric that must hold up through multiple washing, you will need to use a mordant. I’m keeping it simple and will be using my dyed fabric to make zip pouches.

    You will need:
    – avocado seeds, carving scraps from last tutorial (I used about 2 cups)
    – 4 cups of filtered water
    – 100% natural fabric or yarn (synthetic fabrics will not hold the dye without a mordant) I used a half yard of 100% cotton fabric. As with any newly purchased fabric, you should give it a run through the wash.
    – fine mesh sieve
    – a bowl or container large enough to hold dye and fabric. Stainless steel is great for this, plastic will stain.
    1

    To make your dye:
    Bring 4 cups of water to a boil, add avocado seeds and scraps. Cover lightly.
    Boil for at least 30 minutes. *note… the seeds have an astringent, cedar wood smell. You may want to crack a window or use the oven fan.
    I let my seeds sit in the water overnight in attempt to pull out as much color as possible. You can skip this step if you’re feeling impatient.

    2
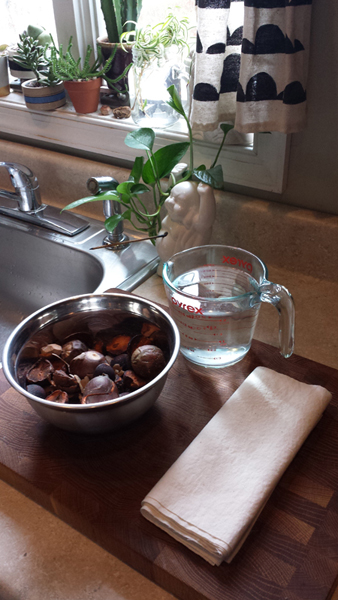
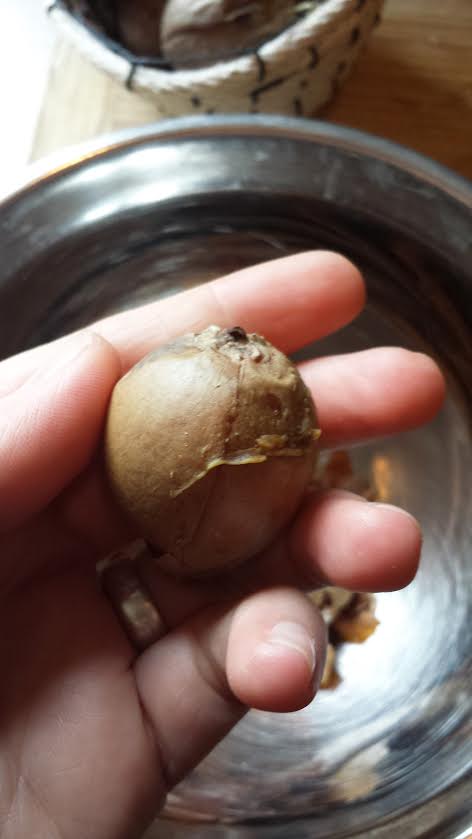
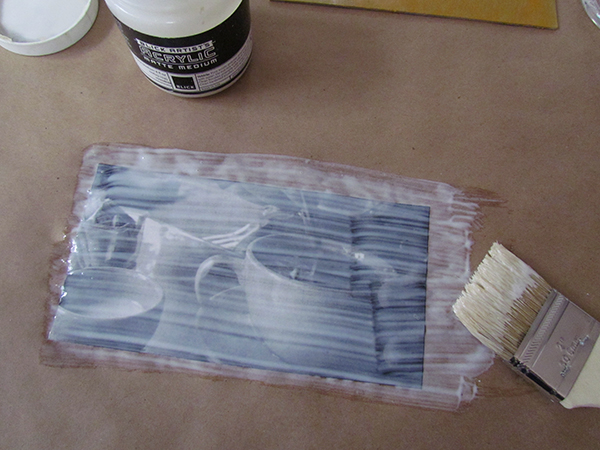
When you are ready to dye:
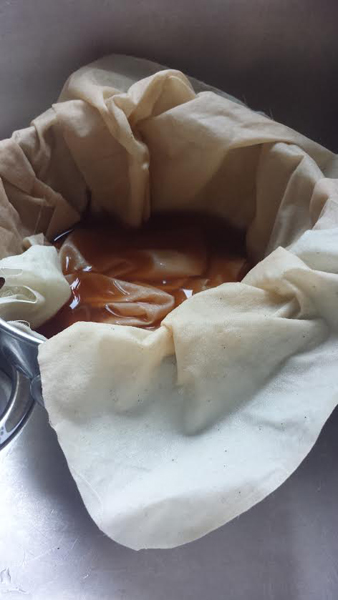
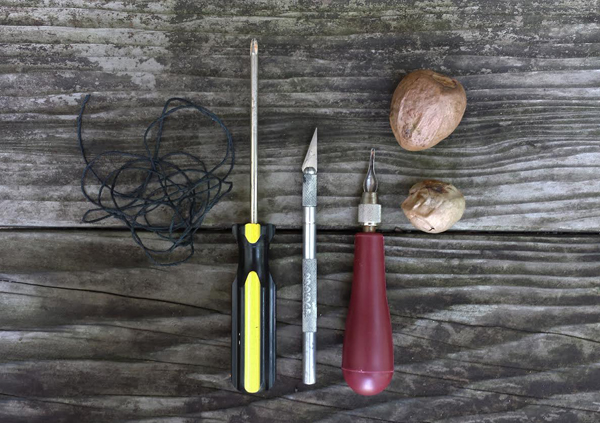
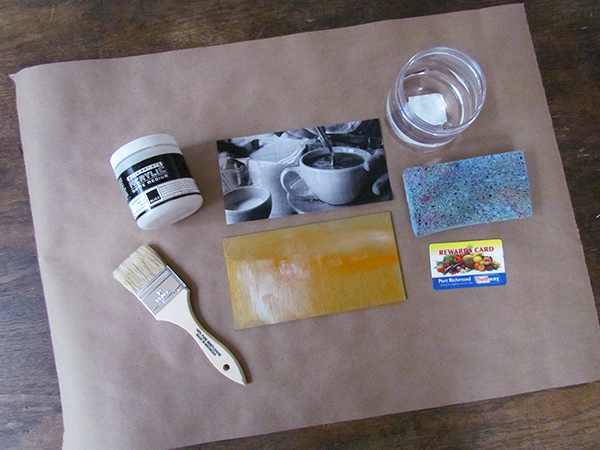
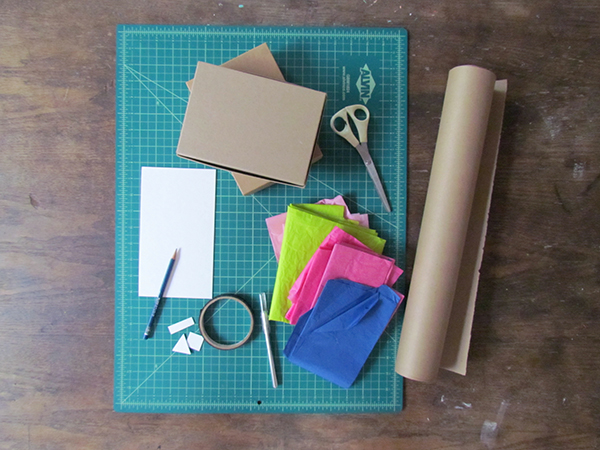
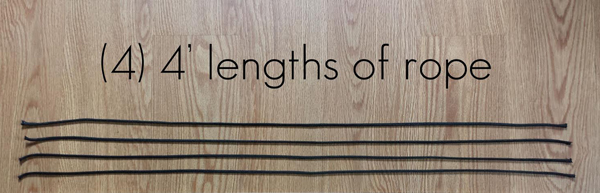
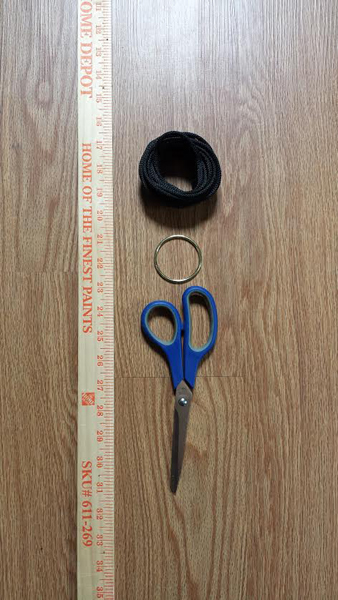
    Put your fabric into a pot and cover completely with tap water. Bring to a boil and let simmer for 5-10 minutes. This should strip away anything clinging to the natural fibers… (like soap residue or oils) and make it more susceptible to absorbing and holding dye.

    3

    Remove fabric from water and set aside

    Pour your dye through a fine mesh sieve to remove all seeds and bits. Submerge fabric into dye and let sit for at least 30 minutes. The longer it steeps, the deeper the resulting color.
    For a color gradient effect, try submerging your fabric for 10 minutes, pulling it out of the dye bath a few inches every hour for a few hours. I fully submerged a few pieces of fabric and tried a gradient effect with the others.

    45

    After dyeing:
    Taking note that your fabric will fade when it dries, remove fabric from dye bath when you have reached a desired depth of color.  Allow your fabric to air dry.

    6

    After your fabric has completely dried, rinse it in cold water. Let dry again, and your fabric is ready to use!

    Here’s a little color chart to show the results I got from rinsing in cold water once, and placing the other in a full laundry cycle.

    7

    When I removed my gradient dyed fabric from the dye bath, I was really happy with the result. There was a bit of sediment in my dye which clung to the fabric creating a marbled effect that I loved. I decided to frame that one without giving it a rinse.

    8

    You can save your dye liquid in a sealed jar in the fridge for up to one week.

    9
    Christie Sommers is the designer and maker behind West Oak Design. She handcrafts small batch and one of a kind goods for home, women, and kids in her Wyndmoor, Pa studio.www.westoakdesign.com


  • Make This: Easiest Handmade Book Ever

    Photos + Tutorial by Bonnie Kaye Whitfield

    I am obsessed with this book form. It is the fastest way to turn a simple sheet of paper into an 8-page book, all without gluing or sewing. Use this tutorial to whip up a quick notebook, zine or to quickly transform an old work of art.

    Blog_9_Pic_14

    You will need:

    paper – either blank or an old print, etc
    scissors or cutting knife
    bonefolder – optional

    Blog_9_Pic_1

    Gather your materials. I’ll demo with a blank sheet of 12 x 18” paper, but I also have an old test print to make into a book, too.

    Blog_9_Pic_2
    Blog_9_Pic_3

    Start by carefully folding your paper in half, with the shortest ends together (like a “hamburger”). If you have a bonefolder, a super handy tool for making tight creases, then use it. Otherwise, your finger/fingernail will work just fine.

    Blog_9_Pic_4 Blog_9_Pic_5

    Next, fold your paper once more in the same direction. When you open it, you should have 4 sections created on your paper.

    Blog_9_Pic_6 Blog_9_Pic_7

    Then fold your paper in the opposite direction, where the longest ends touch (like a “hotdog”). Make a tight crease. When you open your paper up you should now have 8 sections.

    Blog_9_Pic_8 Blog_9_Pic_9

    Fold you paper back in half again, on the very first crease you created (like a “hamburger”). Hold the paper carefully, and begin to cut into the folded edge on the crease – STOP when you get to the corner where the 4 creases come together. When you open your paper, it should look like you have a big slit in the middle.

    Blog_9_Pic_10 Blog_9_Pic_11

    Refold you paper long ways (like a “hotdog”) and begin to squeeze the two ends of the paper together so that the hole in your paper closes to form 2 more pages. Fold these 4 page “spokes” together to close the book. Sometimes the book has a mind of its own, and you just let the pages tell you how to close up the book.

    Blog_9_Pic_12

    And there you have it, your new 8-page, no-glue, no-sew book!

    Blog_9_Pic_15

    —————————————————————————————————————–
    Bonnie Kaye Whitfield designs and screen prints home textiles + paper goods under the name, Bonnie Kaye Studio. Products are created to inspire memories at home and around the table. A donation is made with every purchase to help feed hungry Americans.

    www.BonnieKayeStudio.com

  • Make This: Avocado Seed Pendant

    Photos and Tutorial by Christie Sommers

    pic8

    If your household goes through as many avocados as mine, you may have thought “there must be something I can do with all these pits!” (cue exasperated infomercial actor). Well there is! In fact there are a few things you can can do with them. I will walk you through two options over the course of this,and my next, tutorial for Art Star. In this tutorial, I will show you how to make a hand carved pendant, and later this month I will show you one way to turn the carving scraps and pit skins into a natural dye. So save those scraps!

    You will need:

    Pic 1

    *Hass avocado pits (at least two)

    *Xacto blade or other carving tools. No experience necessary! I have no “official” carving training aside from a brief period of self taught printmaking. Just proceed with caution, these tools are sharp! You can get creative with items in your kitchen or toolbox. Use a Phillips head screwdriver for “x” shapes, metal skewers for dots, drag a fork for perfectly spaced lines…. you get the idea.

    *a drill or Dremel for making holes

    *a length of rope or string from which to hang your pendant (I used waxed cotton cord, hemp works well too)

    You will need to allow your your seeds to dry out for at least 3 days before carving. No more than around 2 weeks or they will shrivel up and solidify, making them very difficult to carve.

    Avocado seeds are dicots. Simply put, they are in two parts. You need to find the natural split that separates the two sides. If you don’t split them prior to carving, they will split on their own later.. most likely straight through your nice design. I learned this one the hard way.

    After your seed has dried for a few days, peel the outer layer of skin away and set skin aside.

    Pic 2

    Pinch the seed between your thumb and forefinger until the natural split begins to appear.

    Pic 3

    You may need to stick a flat head screwdriver into the split to pry them apart, otherwise just get a finger in there to separate.

    Pic 4

    You now have two halves… two potential pendants.

    Pic 5

    Start by deciding where you would like to drill the hole for your string. Don’t go too close to edge if you want to avoid unwanted cracks.

    Drill a hole through the seed being careful not to press too hard, let the drill do the work. Too much pressure may cause the seed to split where you don’t want. You may have to go through a few practice seeds to get a feel for it.

    Start carving! You can lightly scratch designs into the seed with a pencil first as a guide.

    Pic 6 Pic 7

    For this tutorial I carved one pendant with a little mountain landscape, one that was inspired by mud cloth designs, and lastly a pendant with a more simplistic organic shape. I tried to make the drilled hole an intentional part of the design.

    pic 9 Pic 10 Pic 11

    String your new pendant onto your rope/string and tie in the back at your desired length.

    If you’d like to give your pendant a nice finish, try wiping with a cloth that has been lightly dipped in mineral oil.

    Now throw those seed shavings and skins into a ziplock bag and toss them in your freezer until next time when I share a way to turn those scraps into a natural dye.

    —————————————————————————————————————–
    Christie Sommers is the designer and maker behind West Oak Design. She handcrafts small batch and one of a kind goods for home, women, and kids in her Wyndmoor, Pa studio.www.westoakdesign.com

  • Make This: Quick + Easy Matte Medium Transfer

    Photos + Tutorial by Bonnie Kaye Whitfield

    Here’s a quick and simple image transfer for using matte medium and a photocopy of an image. It’s a helpful trick for adding layers of imagery to mix media works of art. On the other hand, it can also be a beautiful way to create a piece for your home or a friend that encapsulates a memory or person.

    Blog_8_Pic_1

    You will need:

    photocopy of image to transfer / copy in reverse if it matters to the image
    thick paper, canvas, or wood to use as background
    matte medium
    foam brush or wide brush
    old plastic card or brayer
    container for water
    sponge (optional)
    hair dryer (optional)

    Blog_8_Pic_3

    Gather your materials. Make a photocopy or laser print of your image that you want to transfer. You need the toner in the paper, so an ink jet print will not work. I recommend starting with a small image the first time you try this process.

    Depending on your design or what you want to make, if you want a background to your image then you’ll want to do that first. Go crazy, if you like, with painting a simple background using paint or ink washes. Let the background dry completely.

    Blog_8_Pic_5 Blog_8_Pic_4

    Cut out the image that you want to transfer, removing any excess paper. Using a foam brush, brush on matte medium on the frontside of the entire image, using a smooth and thick coat. Foam brushes are ideal since they don’t leave many streaks, but any brush can work.

    Blog_8_Pic_6

    Flip the image over onto your background. Use a brayer or old plastic card to smooth out the image and make sure that it has solid contact to the background. Any air bubbles may result in small areas of the image not being transferred. Let dry completely. Feel free to use a hairdryer to speed up the process.

    Blog_8_Pic_8

    Once the image dries (the paper will turn opaque again), grab your water container and sponge. Slowly use a damp sponge (or your finger) and work in a small circular motion to begin to remove the paper backing. This might take a while so put on a good podcast or your favorite Netflix show.

    Blog_8_Pic_7
    Try to work slowly, but if some of the transfer rubs off, it will just add to the rustic quality of the image. You’ll likely need to repeat this process a few times. As the image dries, any fibers that are not rubbed off will continue to cloud the image. Once you get the image to your satisfaction, give the image a top coat of matte medium to seal it.

    Blog_8_Pic_2

    ————————————————————————————————————-
    Bonnie Kaye Whitfield designs and screen prints home textiles + paper goods under the name, Bonnie Kaye Studio. Products are created to inspire memories at home and around the table. A donation is made with every purchase to help feed hungry Americans.

    www.BonnieKayeStudio.com

  • Make This: Cold Brew Infused Water

    Photos and Tutorial by Christie Sommers

    I don’t know about you, but when it’s this hot out I need something refreshing to drink and anything sugary or sweet is just no good. Here’s a little cold brew herbal tea recipe to enjoy all summer long, and you don’t have to heat up your kitchen to make it.

    Photo 1 Photo 2

    You will need:
    *a large pitcher or jar
    *spring or filtered water
    *fine mesh sieve or cheesecloth
    *large wooden spoon
    *clean scissors or herb snips
    *fresh herbs (suggested combos listed below). Anyone can grow fresh herbs, whether you have a garden or sunny window ledge. I highly recommend buying a potted herb plant over the prepackaged cut herbs from your grocery store for the obvious reason that you get more out of a living plant. They are very easy to care for. The more you cut and use them, the healthier and more abundant they will be. Packaged fresh herbs are fine if you’re really not a plant person.

    Start by cleaning your herbs well. Let them soak in a bowl of cold water for a bit and swish them around to remove any soil. Rinse.

    Place herbs in pitcher.

    Photo 3

    Bruise herbs with the wooden spoon to release the oils from the leaves. You basically just smash them with the spoon.

    Photo 4 Photo 5 Photo 6

    *The more herbs you use, the stronger the tea will be. Because we are cold brewing, your tea will be very subtle. If you prefer stronger tea, add a cup of boiling water now and let steep for about 5 minutes before adding your cold water to fill.

    Fill the rest of your container with spring/filtered water and place in your fridge. Let steep overnight. The longer it steeps, the more flavor your water will have.

    Photo 7

    You can filter out the herbs when you pour yourself a glass or just leave ’em in there if you don’t mind snacking on them;)

    Photo 8 Photo 9

    Your tea will keep for about a week in the fridge.
    Enjoy!

    Some herbs/combinations to try:
    Lemon Balm & Rosemary (used for this tutorial)
    Lemon Thyme
    Mint
    Chamomile & Lavender
    Hibiscus & Raspberry Leaf
    Ginger & Basil

    —————————————————————————————————————

    Christie Sommers is the designer and maker behind West Oak Design. She handcrafts small batch and one of a kind goods for home, women, and kids in her Wyndmoor, Pa studio.www.westoakdesign.com

  • MAKE THIS: 3D Geometric Wrapping Paper

    Photos + Tutorial by Bonnie Kaye Whitfield

    It takes just a few extra minutes to turn your gift into a conversation piece. Here’s a super simple tutorial to create fun 3D Geometric shapes on the top of your package for the next upcoming summer party you attend.

    Blog_7_Pic_12

    You will need:

    box to wrap
    colorful tissue paper
    brown kraft paper
    cardboard or chipboard
    scissors
    exacto knife
    self-healing mat
    tape
    pencil

    Blog_7_Pic_1

    Gather your materials. Grab whatever tissue paper and solid wrapping paper you have on hand.

    Blog_7_Pic_3 Blog_7_Pic_2

    First, wrap your packages in the tissue paper.

    Blog_7_Pic_4

    Put your packages aside and begin to draw and cut out simple geometric shapes out of your cardboard or chipboard. Keep your shapes small, under 1” in any given direction.

    Blog_7_Pic_5

    Next, cut a sheet of your solid wrapping paper, large enough to wrap your package for a second time. Place your package in the middle of the sheet and trace around the edges of the box.

    Blog_7_Pic_6

    Grab your cut out shapes and begin to trace HALF of the shape within the outline of the box. For example, if you cut out a circle, only trace half of the circle. You want to make sure that half or at least one side of your shape stays connected to the wrapping sheet. Play around with patterns and arrangement with your shapes.

    Blog_7_Pic_7 Blog_7_Pic_8

    Using an exacto knife, carefully cut along the lines that you traced.

    Blog_7_Pic_9

    Place your box inside the outline that you originally traced and now wrap your package with the wrapping paper. Flip the box over and carefully fold back all your cut shapes. (Tip: I like to use the blade of my exacto knife to help get under the cut slits. Makes for easier grabbing and folding of the paper.)

    Blog_7_Pic_11 Blog_7_Pic_10

    Now you can go wow all your friends at your next birthday/babyshower/wedding!!

    ——————————————————————-
    Bonnie Kaye Whitfield designs and screen prints home textiles + paper goods under the name, Bonnie Kaye Studio. Products are created to inspire memories at home and around the table. A donation is made with every purchase to help feed hungry Americans.

    www.BonnieKayeStudio.com

  • Make This: Mini Knotted Planter

    Tutorial and Photos by Christie Sommers

    hanging planter

    This mini planter is great for 3″ terracotta pots or even planted votive holders…no candles!!
    It makes a great little handmade gift… quick & easy!

    Photo 2You will need:
    *scissors
    *yard stick or tape measure
    *brass ring (can be purchased at AC Moore in the knitting/macrame section…OR you can just use a key ring.
    *16 feet of rope. I am using parachute cord in this tutorial but hemp, cotton rope, or even twine works well.
    *you will need something to provide resistance as you tie knots. Duct tape, a wall hook, a coat rack. You’ll see what I mean below.

    Start by cutting the rope into 4 pieces, each 4′ long
    Photo 3

    Gather the 4 strands and fold in half.
    Photo 4

    Tie the rope to the ring with a larks head knot.
    Photo 5 Photo 6 Photo 7 photo 8

    Tighten the larks head knot.
    Photo 9

    Tape down your ring. You will need a bit of resistance when you are tying your knots to simulate the weight of the plant. This will help you to line up your knots properly. You can also use a wall hook or even tie it to your shoe… if you are sitting down;)

    Separate the strands into 4 groups of 2 as shown.
    4 strands

    Working from left to right, measure down 6″ and tie your first two strands into a knot that falls 6″ from the larks head knot as shown.
    seperate
    photo 10

    photo 11

    Continue from left to right tying knots 6″ from top as shown.
    photo 12

    Separate again into 4 as shown
    photo 13

    You will now tie together one strand from 1 and one strand from 2
    continue with 2 to 3, and then 3 to 4 (tie this row of knots about 3-4″ below the last row of knots)
    Photo 16

    You will notice that there is one untied strand at the beginning and end (1 and 4)
    Tie these two together with the knot lining up with the last round to complete the circle.
    Photo 17

    Gather all strands again into one hand
    Photo 18

    Tie into one large knot
    Photo 19photo 20

    Pop a 3″ terracotta pot or any small pot/votive holder into your new knotted planter and enjoy!

    PLANTS ONLY! NO FLAMES!
    just had to say it….you never know these days;)

    ——————————————————————————————————————————————-
    Christie Sommers is the designer and maker behind West Oak Design. She handcrafts small batch and one of a kind goods for home, women, and kids in her Wyndmoor, Pa studio.www.westoakdesign.com
  • Make This: Fabric Storage Bins

    by Christie Sommers 

    16
    I have way too many “things” in little piles all over my workspace. It was time to do a little organizing so I made some storage bins and bowls in various sizes to store loose buttons, bobbins and more. They have really brightened up the place so I’d like to share them with you:)

    You will need:

    -a pencil compass
    -scrap paper
    -fabric (one outer and one liner)
    -fusible interfacing (you want something very rigid, I recommend Pellon Decor Bond Fusible)
    -an iron/ironing board
    -a sewing machine
    -scissors
    -ruler

    You will need to draft up a little pattern for this one. I made a bin that was 6.5″ in diameter and 4.5″ high. To figure out how long to cut your rectangular pieces you will need to break out the calculator… or your brain. To find the circumference of your base, multiply the diameter by 3.14. The circumference will be the length of your rectangular sides.
    In my case: 6.5″ diameter x 3.14= 20.14 ….
    Use this calculation to make your bin in any size.

    OR….

    You can just use my dimensions and make the same sized bin.

    Cut:
    (3) rectangles: 21″ long by 5″ high (1) liner, (1) outer, (1) interfacing
    (3) circles with 3.25″ radius (1) liner, (1) outer, (1) interfacing

    1 2 3 4 5

    You will iron on the interfacing to the backside of the outer fabric.
    Take the shiny adhesive side of the interfacing and line it up to the back of your outer fabric.
    Iron on holding firmly for 6 seconds to establish a good bond.
    Do the same for the circular outer fabric.

    6

    Now you will sew the side wall (rectangular piece) to the base (circular) for both the liner and the outer fabric.

    Pin as shown.

    8 7

    Straight stitch the liner wall to the liner base

    9

    Do the same for the outer wall and base making sure to place the fabric “right” sides together, right side being the printed side that you want to see on the outside when the bin is done.

    9.1

    Line up your two ends of the rectangular piece and stitch up the side wall. Trim

    10

    You should have two pieces now (liner and outer) that look like this….

    11

    Cut into the seam allowance around the base so that the basket sits evenly when assembled. Take care to not cut into your stitching.

    12

    Turn the liner inside out and fit (right sides together) into the outer piece.

    13

    Line up your seams and pin all the way around

    14 15

    Sew all the way around leaving a small section about 1.5″ unsewn. You will turn the whole bin right side out through this hole.

    When you turn it right side out, use your iron to get all of your seams looking nice and clean.
    I liked how it looked with a little of the liner as a trim at the top.

    Top stitch all the way around and be sure to carefully seal the opening with your top stitch.

    Toss in some sewing notions, or whatever bits you need to wrangle and enjoy!

    16 17

    ——————————————————————————————————————————————-
    Christie Sommers is the designer and maker behind West Oak Design. She handcrafts small batch and one of a kind goods for home, women, and kids in her Wyndmoor, Pa studio.www.westoakdesign.com
The owner of this website has made a commitment to accessibility and inclusion, please report any problems that you encounter using the contact form on this website. This site uses the WP ADA Compliance Check plugin to enhance accessibility.